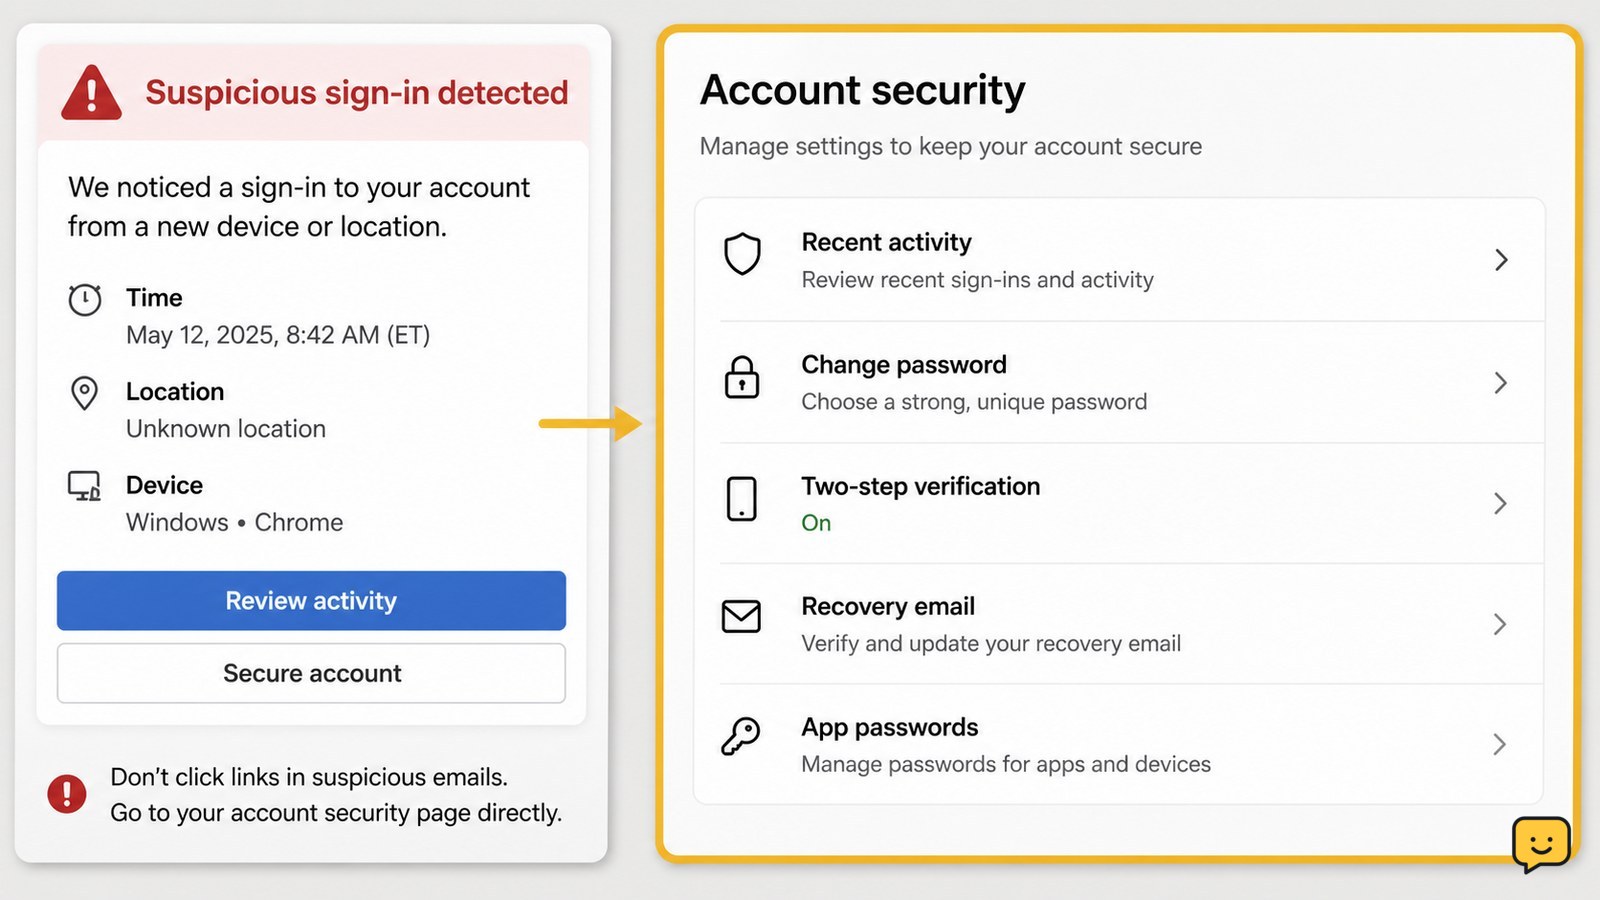
Start from the email provider’s official app or website, not from a link in the alert. Change the password to a unique one, end unfamiliar sessions, check recovery details and forwarding rules, remove unknown connected apps, and enable multi-factor authentication. If you cannot sign in, stop repeated attempts and use the provider’s official recovery process.
Confirm the alert or sign-in notice is genuine
Do not assume every suspicious-activity email is real. Open the email provider’s official app or enter its known website address manually, then check the account’s security activity or recent sign-in page. Compare the event with your own devices, locations, and sign-in times.
If messages were sent from your mailbox, use email account sending spam from your address to check for unauthorized access and secure it.
A genuine provider alert should not require you to send a password, one-time code, or payment information by reply. If the message contains a link, avoid opening it until you have verified the event through the account itself. If no matching event appears, report the message as phishing or spam and continue using the official account page.
Change the email password from the official account page
Change the password before reviewing less urgent settings. Use a new password that is long, unique to this email account, and not based on the old password. A password manager can create and store one without requiring you to reuse a familiar pattern.
- Open the provider’s account or security settings.
- Choose the password control and complete any identity check.
- Save the new password, then sign in again only through the official app or website.
Do not reuse the new email password on shopping, banking, social, or cloud-storage accounts. Email access can be used to reset those services. Change reused passwords separately, beginning with accounts that store money, identity documents, or other recovery methods.
Verify: the old password no longer works, the new password works on your trusted device, and the provider records a recent password change. If the password change is rejected, do not keep guessing; use the official recovery path.
End unfamiliar sessions and remove unknown access
Find the provider’s list of active sessions, signed-in devices, or recent device access. Sign out devices, browsers, and locations you do not recognize. Keep your current trusted session only if the provider identifies it clearly and the device is secure.
Also review connected apps, mail clients, app passwords, and other access grants. Remove anything you did not add or no longer need. Revoke access rather than trying to identify an unfamiliar service by opening its links.
Some providers show approximate locations or generic device names, so a location mismatch alone is not proof of compromise. Treat an unfamiliar device together with a password-change notice, new recovery detail, sent message, or mailbox rule as a stronger warning.
Verify: unknown sessions disappear or show a sign-out status, and unfamiliar connected apps or app passwords are no longer listed. If an unknown session returns, secure the device you are using and repeat the password change from a trusted device before continuing.
Check recovery details, forwarding, and mailbox changes
Review the recovery email address, recovery phone number, backup codes, authentication methods, and security questions if your provider offers them. Remove changes you did not make and replace outdated details with contact methods you control.
Inspect mailbox settings for forwarding addresses, filters, rules, delegates, automatic replies, signatures, and suspicious message deletions. Unauthorized forwarding can silently copy incoming mail, while a rule can hide security notices or reset messages.
Review Sent, Trash, Archive, and other folders for messages you did not write or move. If you find an unauthorized forwarding address or rule, remove it, then check whether important messages were redirected or deleted.
Verify: recovery methods belong to you, forwarding and rules match your intended setup, and recent sent messages are familiar. If a recovery method cannot be removed or the settings keep changing, stop and use the provider’s compromised-account recovery process.
Turn on multi-factor protection and store recovery options safely
Enable multi-factor authentication, also called two-step verification, in the provider’s security settings. Prefer a passkey, security key, or authenticator method when available; otherwise use the strongest option you can reliably access. Keep more than one recovery method, but do not add a phone number or email address you do not control.
Save backup codes in a secure offline location. Do not store them in the same compromised mailbox, send them to yourself by email, or share them with anyone who claims to be support. A provider will not need your one-time code by reply to an alert.
Verify: the provider shows multi-factor protection as enabled and a test sign-in requests the configured second factor. If a code does not work, confirm that it belongs to this account and use the provider’s documented recovery option instead of disabling protection.
Check the devices and accounts that can reset this mailbox
Secure the phone, computer, or browser used to access the email account. Install pending security updates, remove unknown browser extensions, review device user accounts, and run the device’s built-in security scan. Do not save the new password in a browser or app you no longer trust.
Next, change passwords for other services that reused the old email password or use this mailbox for recovery. Check those accounts for new recovery details, sessions, forwarding settings, and unfamiliar activity. Start with financial, identity, cloud-storage, and social accounts.
If the suspicious activity followed a phishing message, treat the old password as exposed even if the email account shows no unfamiliar sign-in. Entering a password on a convincing page is enough reason to replace it and protect reused logins.
Finish only when: the mailbox password is unique, unfamiliar sessions and access grants are removed, recovery settings are yours, mailbox rules are expected, multi-factor protection is active, and reused passwords have been addressed.
Frequently asked questions
What should I do if I cannot sign in after suspicious activity?
Stop repeated sign-in attempts and open the provider’s official account-recovery page manually. Use a device, browser, and location you have used before, and provide the requested identity details accurately. Do not pay anyone who promises to bypass verification. If every recovery method is unavailable, follow the provider’s verified alternative recovery process and secure other accounts that depend on this email address.
How can I tell whether someone accessed my email without permission?
Look for several signs together: an unfamiliar device or session, a password or recovery-setting change, messages in Sent or Trash that you did not handle, unknown forwarding, filters, delegates, or connected apps. A location alone may be inaccurate because providers estimate locations. If you find a security change or mailbox setting you did not make, secure the account even if the sign-in location is unclear.
Should I change passwords on other accounts after securing email?
Yes, change passwords on every service that reused the old email password or relies on this mailbox for password resets. Prioritize banking, payment, identity, cloud-storage, and social accounts. Use a different unique password for each service, then review its recovery details, active sessions, and multi-factor settings. Do not use the compromised mailbox to store or send new backup codes.
What if the suspicious email itself is a phishing message?
Do not click its links, open unexpected attachments, reply, or call numbers in the message. Verify activity from the provider’s official app or website, then report the message as phishing or spam. If you entered a password on the linked page, change that password immediately from the official account page and change it anywhere else it was reused.
Browse more Email & Social Accounts guides for help with this topic.