To change a cabin air filter, park the vehicle, switch off the ignition, confirm the correct filter for your model, and locate the housing—usually behind the glove box or under the dashboard. Remove the cover and old filter, clear loose debris, install the new filter with its airflow arrow facing the same direction, then refit the cover and test the fan.
For more help with this topic, use the Maintenance Repair guides.
Confirm your vehicle uses a replaceable cabin filter
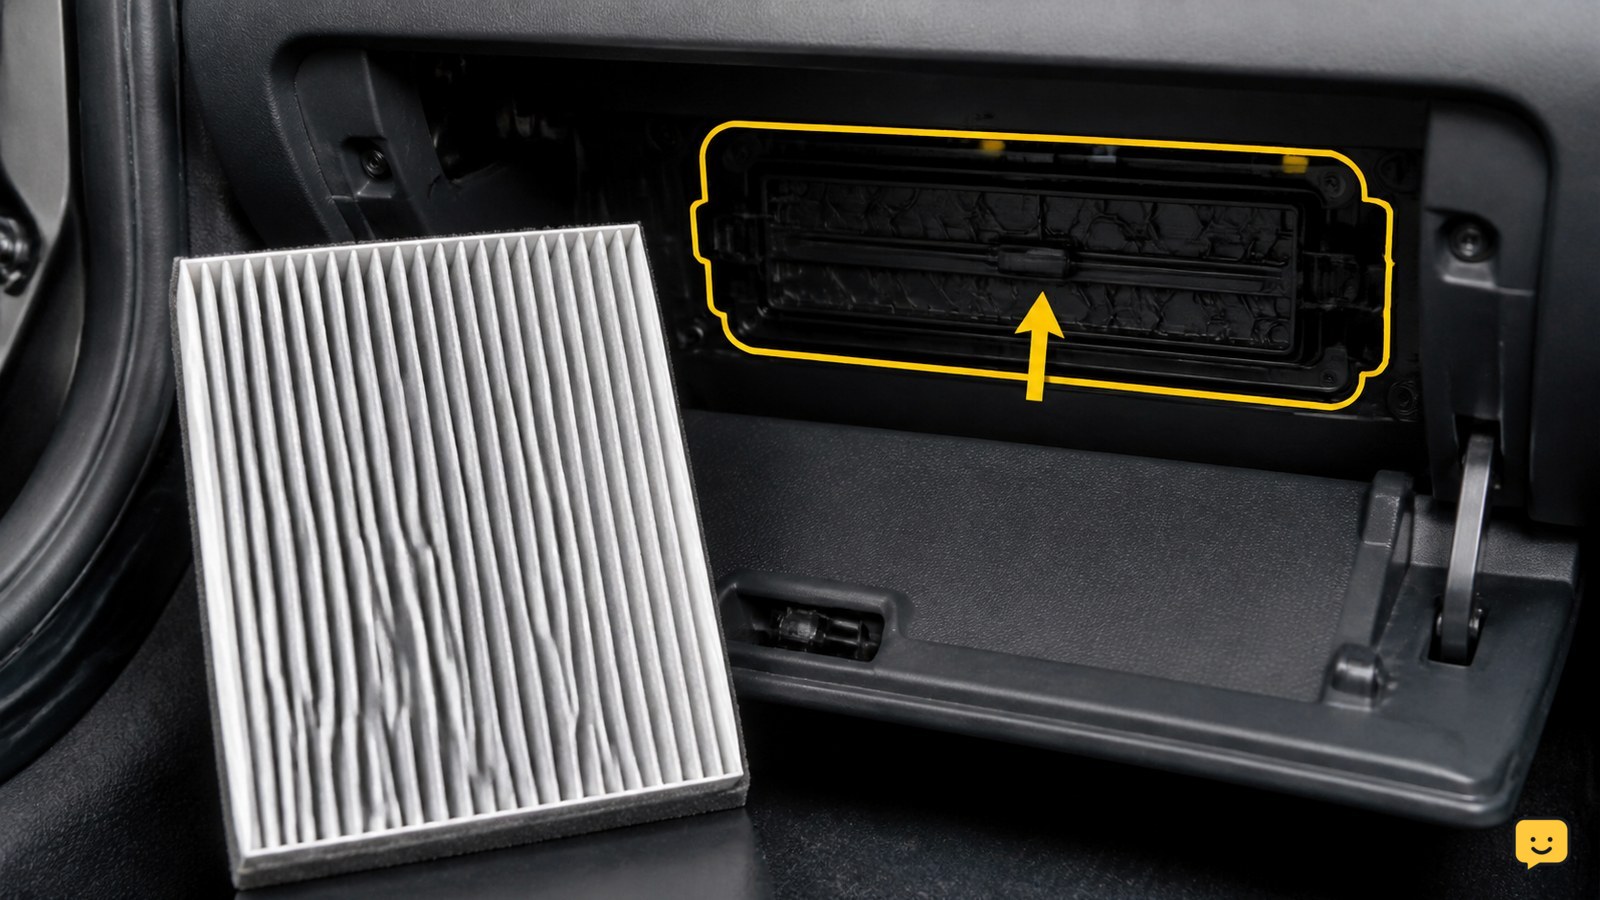
Your vehicle’s cabin filter location and access method depend on its year, model, and climate-control design. Many vehicles place the filter behind the glove box, while others use an access panel under the dashboard or a housing in the engine-compartment area. Check the owner’s manual before removing trim because some models require a particular release sequence.
Use the manual or a parts-fitment lookup to confirm the part number. A correct filter should match the old filter’s outline and slide into the housing without bending, crushing, or leaving gaps. Some vehicles use two stacked or side-by-side filter sections, so confirm whether the replacement is a single piece or a matched set.
Prepare the glove box, tools, and filter housing
Preparation prevents dust and loose fasteners from entering the passenger compartment. Switch off the vehicle, empty the glove box, and place a cloth below the work area. Keep the replacement filter sealed until the housing is open.
AutoZone’s replacement sequence begins with safety, access to the filter, removal of the old filter, installation of the new one, and replacement of the glove box. The exact fasteners vary, so use only the screwdriver or trim tool specified for your vehicle. Do not pry against painted surfaces or force a plastic clip that does not release.
Access the filter housing behind the glove box or dashboard
Open the filter access area using the vehicle-specific method shown in the manual. Behind a glove box, this may involve releasing side stops, lowering the box, or removing a small cover; under-dash designs usually use a separate panel.
Support the glove box rather than letting it hang from its hinges. If you see a damper cord, electrical connector, or wiring near the panel, identify its purpose before touching it. The filter cover should be clearly separate from unrelated wiring and airbag components.
Remove the old filter and clear loose debris
Remove the housing cover, then pull the old cabin filter straight out while keeping it level. A dirty filter may contain leaves, dust, or pollen, so move slowly to avoid dropping debris into the blower or passenger footwell.
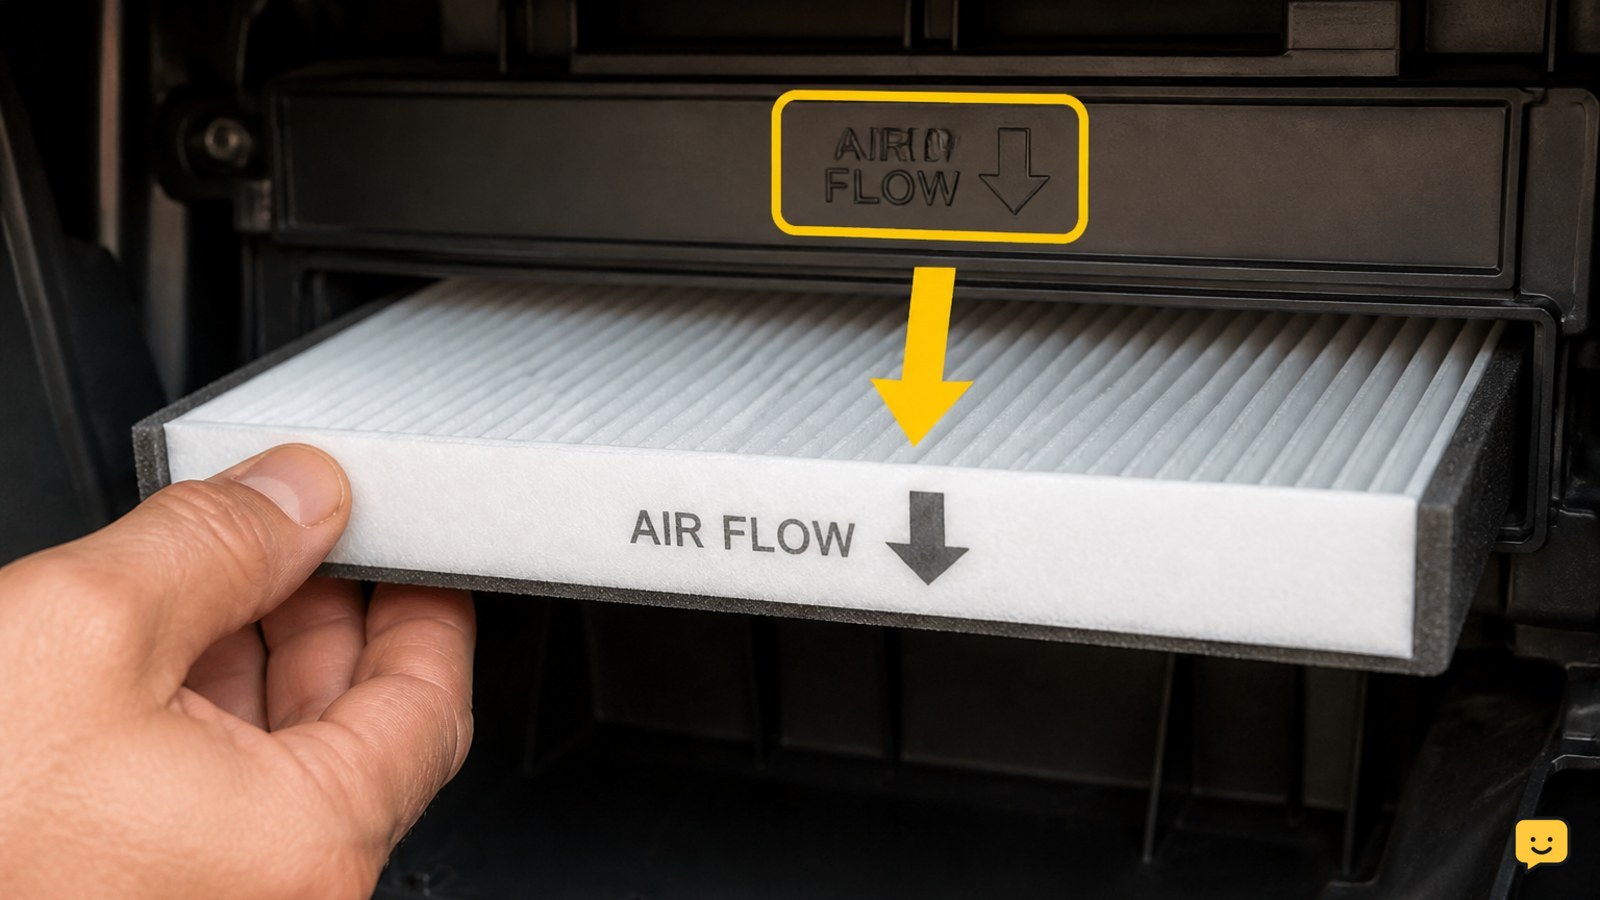
Note the old filter’s orientation before removing it. Look for an airflow arrow, an “UP” marking, or the direction of the pleats. Vacuum loose debris from the accessible housing with care, but do not push dirt deeper into the duct or damage the fan.
Install the new filter with the marked airflow direction
Install the new cabin filter in the same direction as the old one, following the arrow or “UP” marking printed on the frame. The filter should slide into its guides and sit flat, with no folded edge, bowed pleats, or visible bypass gap.
If the filter seems too large or the cover will not close, remove it and recheck the part number and orientation. Never compress the filter to make an incorrect part fit. NAPA’s published replacement sequence likewise places the new filter after the old filter is removed and calls for reinstalling the vehicle components in reverse order.
Reassemble and verify airflow, odor, and fan operation
Refit the filter cover and reinstall the glove box or access panel without pinching wiring or the filter edge. Tighten screws only until secure; overtightening can damage plastic mounts.
Turn on the blower at several speeds and confirm that air comes from the selected vents. The fan should run without new rattling or scraping sounds, and airflow should not be blocked by a loose cover. Check that the glove box opens and closes normally and that no warning light or disconnected electrical function appears.
A new filter may improve dust control and airflow, but it will not repair every climate-control fault. If the air conditioner still blows warm air, use {link} to separate a filter restriction from other possible causes.
If replacing the filter does not restore cooling, use troubleshoot warm AC airflow to check related climate-control faults.
What to do if airflow remains weak after replacement
If airflow is still weak, first switch the blower off and confirm that the filter arrow points in the specified direction and that the filter is seated flat. Recheck the housing cover for a trapped edge or an opening that could allow air to bypass the filter.
If the filter is correct and the fan sounds normal, the restriction may be farther inside the duct, at the blower, or in another climate-control component. Stop the DIY job if the housing contains water or mold, the blower makes abnormal noise, or access requires disturbing airbag wiring. Arrange inspection rather than driving with a severely restricted demister, especially if the windshield cannot clear reliably.
Frequently asked questions
How often should a cabin air filter be changed?
Use the replacement interval in your vehicle’s owner’s manual or the filter manufacturer’s fitment guidance. There is no single interval that applies to every vehicle. Inspect the filter when airflow drops, the cabin becomes dusty, or the filter is visibly loaded with debris.
Does every car have a replaceable cabin air filter?
No. Many vehicles have a replaceable filter, but the location and design vary, and some vehicles may use two filter sections. Confirm the arrangement in the owner’s manual before buying a part or removing panels.
Which way should the cabin air filter arrow point?
Follow the airflow arrow or “UP” marking printed on the replacement filter and match the direction of the old filter. If no marking is visible, stop and check the vehicle manual or filter instructions rather than guessing.
Why is the blower still weak after changing the filter?
Check that the filter is the correct size, installed flat, and facing the specified direction. Also check that the cover is seated and no debris fell into the housing. Persistent restriction, abnormal fan noise, water, or mold points beyond a simple filter replacement and needs further inspection.