First determine whether the drive is missing in Dell BIOS, F12 hardware diagnostics, or only Windows. Disconnect external devices, perform a full power reset, then run Dell diagnostics with F12. If diagnostics cannot see the drive, protect your data and arrange repair or replacement. If BIOS sees it but Windows does not, check storage settings and Disk Management without formatting.
For more help with this topic, use the Computers Internet guides.
Check where the Dell hard disk disappears
The location where the Dell hard disk disappears determines the safest next step: a drive missing before Windows points to hardware, firmware, or connection trouble, while a drive missing only in File Explorer may still be detected by Windows.
- Missing before Windows: note messages such as “Hard Drive not found,” “No boot device,” or “No hard drive detected.” Continue with the power reset and diagnostics below.
- Missing during Windows installation: the installer may need the correct storage driver or may be affected by BIOS storage-mode settings. Do not delete existing partitions to make the disk appear.
- Missing only in File Explorer: open Disk Management by right-clicking Start and choosing Disk Management. If the disk is listed with a healthy volume but no drive letter, adding a letter may restore access. Do not initialize or format a disk that contains needed data.
Disconnect devices and perform a full power reset
A Dell computer can misidentify storage after a failed startup or an attached-device conflict, so isolate the computer before changing settings.
- Shut down Windows. If it will not shut down, hold the power button until the computer turns off.
- Unplug the charger or desktop power cable and disconnect USB drives, docks, memory cards, printers, and other external devices.
- With power removed, hold the power button for about 15–20 seconds, then reconnect only the charger or power cable.
- Start the Dell computer and check whether Windows or the startup screen now detects the drive.
Success check: Windows starts normally, the previous boot error disappears, or the drive returns in Disk Management. If the same hard-disk message remains, run Dell’s hardware test rather than repeatedly restarting.
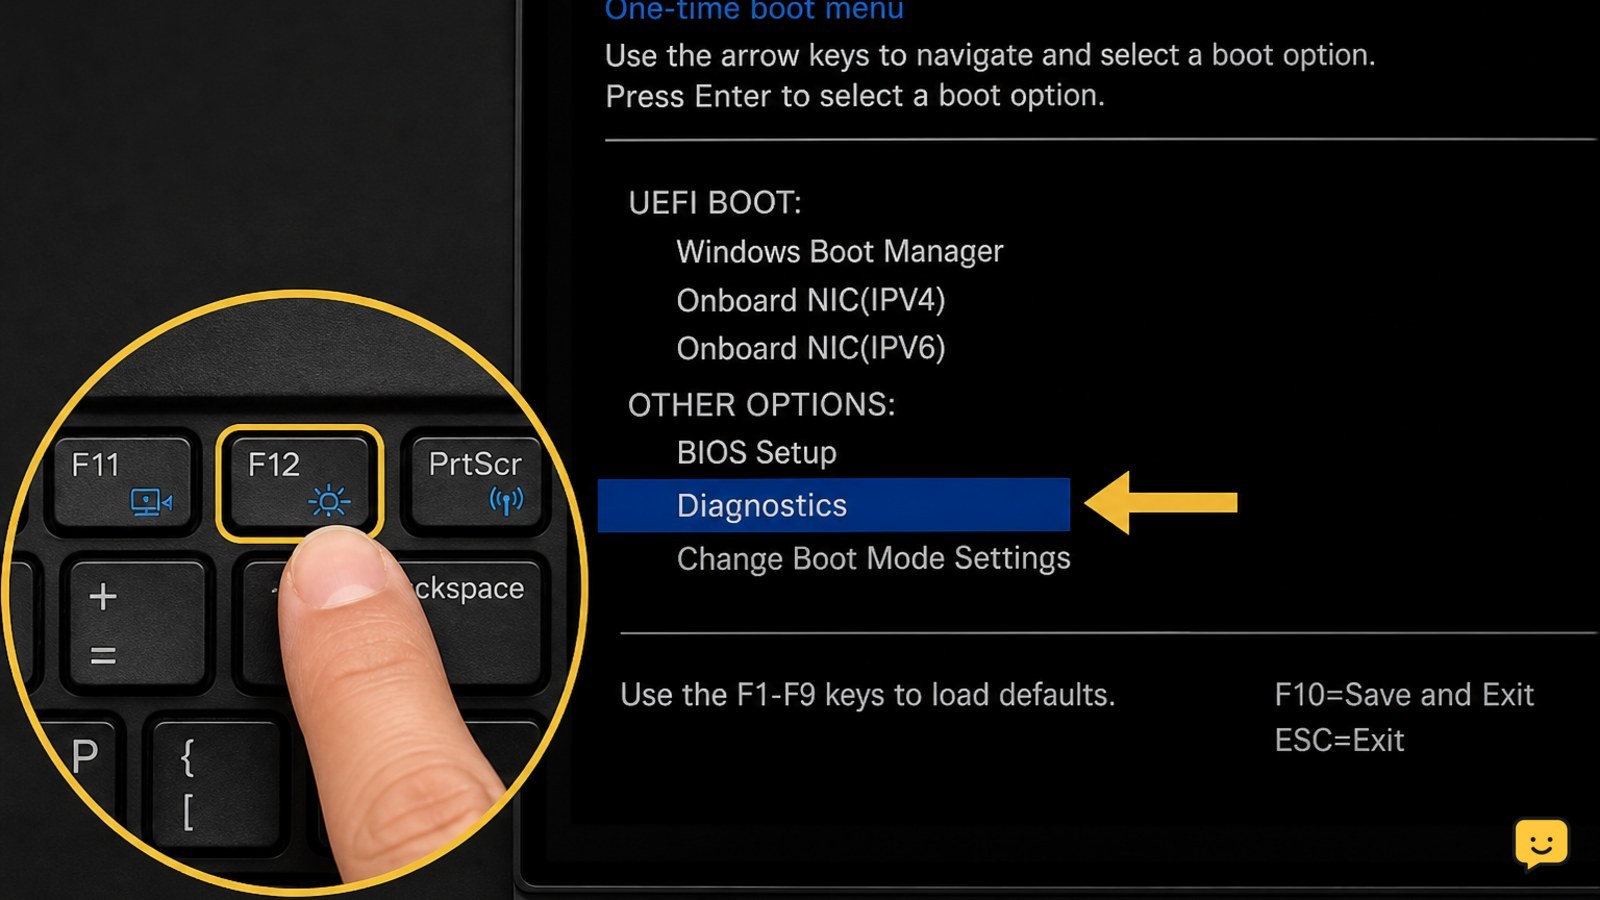
Run Dell F12 diagnostics before opening the case
Dell’s built-in diagnostics can separate a storage-detection problem from a Windows problem without modifying the drive.
- Turn the computer off.
- Turn it on and repeatedly press F12 when the Dell logo appears.
- Choose Diagnostics from the one-time boot menu and allow the storage tests to complete.
- Write down any validation, error, or reference code exactly as shown.
If the test detects the drive and passes: the hardware is at least visible to the firmware, so continue with BIOS and Windows checks.
If the test cannot see the drive or reports a storage error: treat the drive, connector, or storage controller as suspect. Back up immediately if the disk becomes visible again, then use the error code when contacting Dell or a repair service.
Verify BIOS storage detection without changing modes
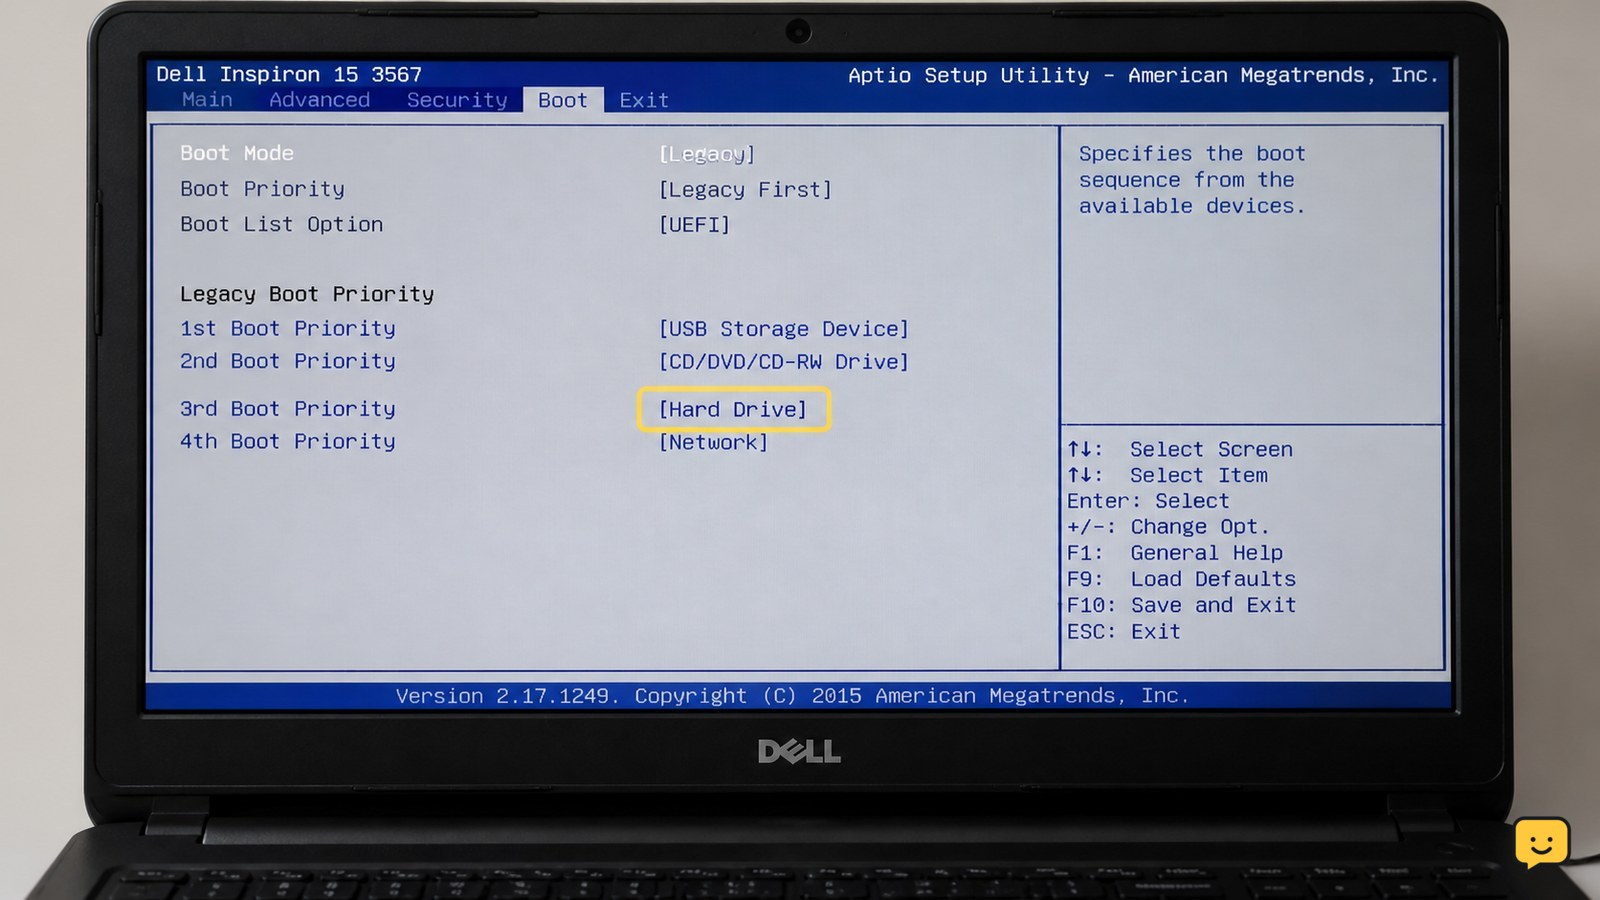
BIOS or UEFI detection is the key checkpoint: if the internal HDD or SSD is listed there, the computer can communicate with it; if it is absent, Windows cannot repair the detection problem.
- Restart the Dell computer and press F2 at the Dell logo, or use the startup screen’s displayed BIOS key.
- Look under menus such as Storage, System Information, or Drives; names vary by Dell model.
- Check whether the drive model or capacity is listed. Also review Boot Sequence to see whether the internal drive or Windows Boot Manager is available.
- Do not switch SATA Operation or storage mode between RAID, AHCI, or another option just to test detection. If a setting was recently changed, restore its previous value before exiting.
Drive listed in BIOS: save no unnecessary changes, exit, and continue in Windows. Drive absent from BIOS: shut down and proceed only with the model’s official service instructions for checking the drive connection.
Check Windows Disk Management and Device Manager
When BIOS and diagnostics see the Dell drive but Windows does not show it, Windows may be missing a drive letter, holding an offline disk, or lacking the correct storage driver.
- In Windows, right-click Start and open Disk Management.
- Look for the expected disk capacity. If a volume is present without a letter, right-click that volume, choose Change Drive Letter and Paths, and assign an unused letter.
- If the disk is marked Offline, check the disk’s context menu for Online. Do not select Initialize or Format when existing files matter.
- Open Device Manager, expand Disk drives and Storage controllers, and check for a warning symbol. Install storage or chipset drivers only from Dell Support for the exact model, or from Windows Update.
Verification: the drive appears with the correct capacity, opens in File Explorer, and remains visible after a restart. If Disk Management shows the wrong capacity, repeated errors, or the disk vanishes during use, stop writing to it.
Reseat or replace the drive only when the model supports it
Reseating can help when a removable 2.5-inch drive, M.2 SSD, or its cable has shifted, but the correct procedure depends on the Dell model.
- Find the exact Dell service manual using the model or Service Tag.
- Shut down, unplug power, and follow the manual’s battery-disconnect and electrostatic precautions.
- Inspect the drive and connector for visible damage; do not force an M.2 module or cable into place.
- Reconnect the drive exactly as shown, close the cover, and run F12 Diagnostics again.
If the drive is still absent from diagnostics or BIOS after a correct reseat, replacement or professional data recovery is the next decision. A replacement drive may restore the computer but will not recover files from a failed original disk.
Choose the next action from the test result
The Dell diagnostic result tells you whether to repair Windows, correct a removable connection, or stop and protect the data.
- Drive passes diagnostics and appears in BIOS: investigate Windows Disk Management, drivers, boot order, or Windows installation media.
- Drive appears intermittently: back up immediately and stop using it for nonessential work; intermittent detection can precede complete failure.
- Drive is absent from BIOS and diagnostics: do not keep reinstalling Windows. Check the model-specific connection only if safe, then arrange repair or replacement.
- Drive makes unusual mechanical noises or the computer reports a SMART/storage error: power it off and seek professional help if the files are important.
For a drive that is visible but missing from File Explorer, use the Windows drive visibility checks as a related reference; the Disk Management precautions also apply to internal storage.
For a drive visible to Windows but missing from File Explorer, use Windows drive visibility checks before changing partitions or formatting.
Frequently asked questions
Why does my Dell BIOS not detect the hard drive?
A missing drive in BIOS usually points to a loose connection, failed HDD or SSD, storage-controller trouble, or an incompatible firmware setting. First disconnect external devices, perform a full power reset, and run F12 Diagnostics. If the drive remains absent from both BIOS and diagnostics, Windows repairs will not solve the underlying detection problem.
What should I do if Dell diagnostics detects the drive but Windows does not?
Check Disk Management for the correct capacity, an offline disk, or a volume without a drive letter. Then inspect Device Manager for storage-controller warnings and install model-specific Dell drivers. Do not initialize or format the disk if it contains files you need.
Will changing RAID to AHCI make a Dell hard drive appear?
Not necessarily, and changing SATA Operation can prevent an existing Windows installation from starting. Record the current setting before making any change. If the drive is absent from BIOS or Dell diagnostics, changing RAID or AHCI is unlikely to fix a physical detection problem.
Can I reseat a hard drive in a Dell laptop?
Only if the exact Dell model has a user-serviceable drive and its service manual shows the procedure. Shut down, disconnect power, follow battery and static-safety instructions, and never force a connector. If the computer is sealed, under warranty, or the files are valuable, use Dell or a qualified technician instead.