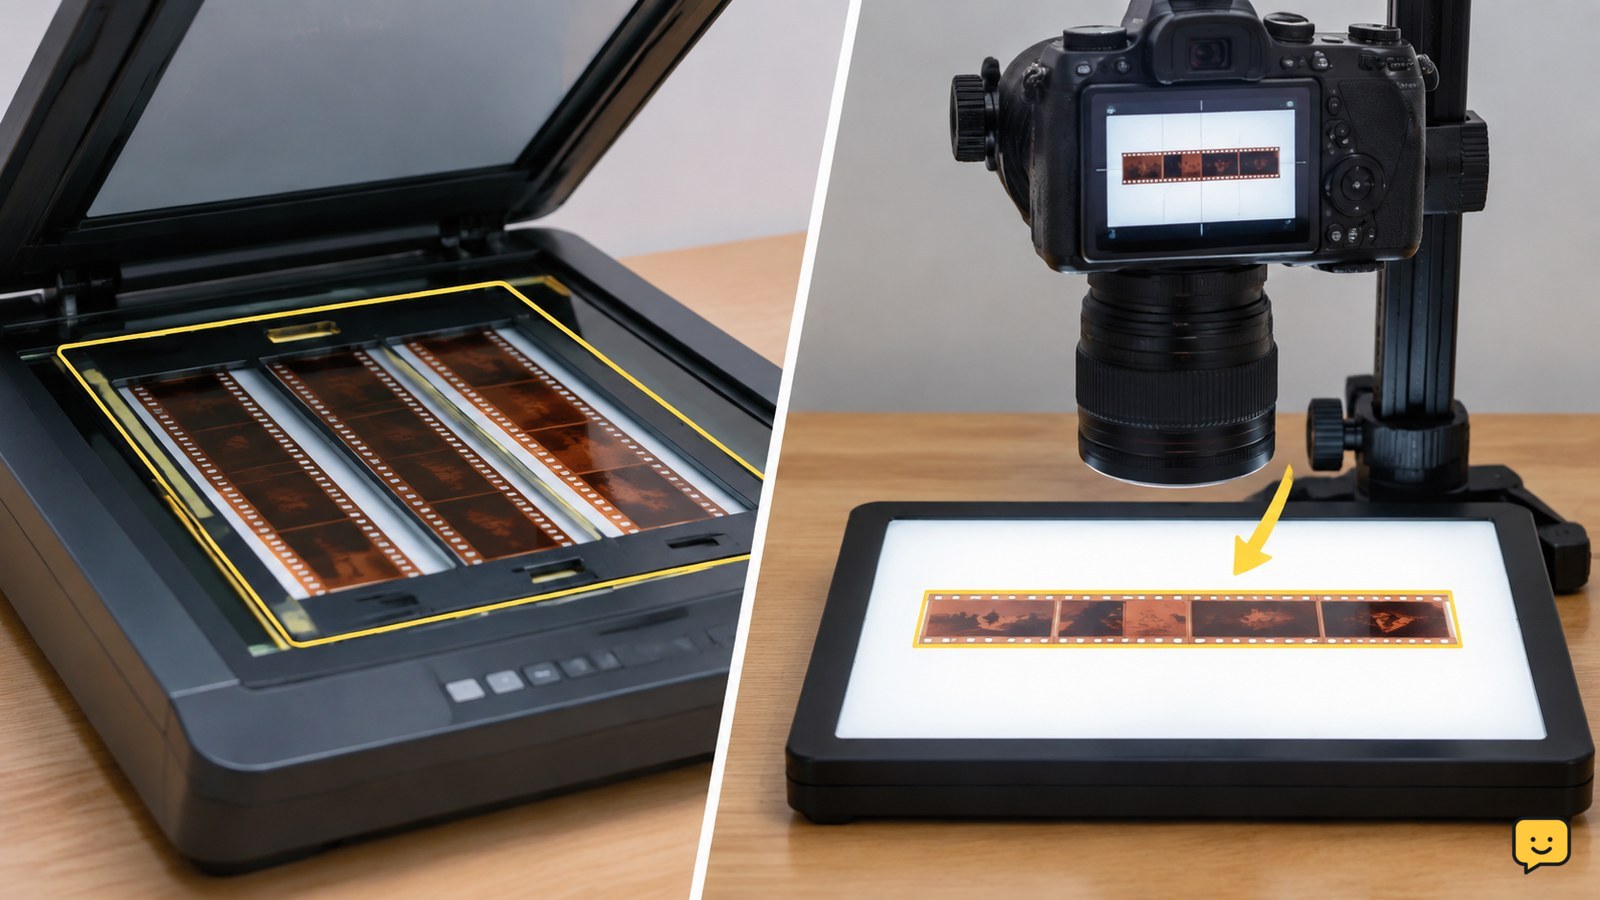
To scan photographic negatives, clean and flatten the film, place it in a scanner’s transparency holder, and use the film or negative mode at the holder’s optical resolution. If you do not have a film scanner, photograph the negative evenly backlit with a camera, then invert and correct the image in editing software. Check every frame at full size before saving.
For more help with this topic, use the Computers Internet guides.
Choose a scanner or camera method
A film scanner is the simpler choice for repeated work because its holder positions the strip and its software can apply a negative or film mode. A flatbed scanner is suitable only when it has a transparency unit or backlight; a normal document scan usually produces a dark, low-contrast result because the film must be lit from behind.
A digital camera can produce excellent files when the negative is held perfectly flat, evenly backlit, and parallel to the sensor. The camera method needs more setup and separate inversion software, but it is useful when you have many frames or no dedicated scanner. The specialist guide from Shoot It With Film covers both scanner and software considerations, while the cited camera-scanning demonstrations emphasize controlled camera settings and lighting.
Prepare and position the film
Photographic film negatives scan best when the strip is clean, dry, and held flat in the correct orientation. Handle the edges, use a blower for loose dust, and inspect both sides under ordinary light before loading it.
- Cut the film into lengths that fit the holder, if it is not already cut. Do not force a strip into a holder that is too short or narrow.
- Place the emulsion side and frame direction according to the scanner or holder markings. The correct orientation varies by model, so use its manual rather than guessing.
- Close the holder without pressing hard on the film. For camera scanning, mount the negative between the camera and a diffuse, even light source and keep the film parallel to the lens.
Make a test capture of one frame. At 100% viewing, the frame should be sharp, evenly illuminated, and free of obvious hairs or large dust spots. If it is soft, adjust film flatness, camera alignment, or focus before continuing.
Scan a test frame at optical resolution
Use the scanner’s film, negative, or transparency setting and select optical resolution rather than an interpolated enlargement. The exact menu names differ by scanner software, so look for the setting that identifies the loaded material as film instead of paper.
- Preview the strip and set the crop around one frame, leaving no unnecessary border.
- Choose a resolution that preserves the frame’s detail without creating unnecessarily large files. A moderate-to-high optical setting is appropriate for printing or later editing; the scanner manual is the authority for its actual optical limit.
- Disable automatic dust removal for archival originals if it noticeably removes fine detail. Compare one frame with and without correction before scanning the roll.
- Save the test as a high-quality TIFF or another non-lossy format when you plan to edit it. Use JPEG copies for easy sharing after the master file is checked.
With a camera, keep the exposure low enough to preserve highlight detail in the backlight and use a fixed focus or manual focus when available. The camera-scanning source workflow specifically treats camera settings as part of the digitization process, so do not rely on an automatic mode without checking the histogram and focus.
Invert and correct the negative image
A scanned color or black-and-white negative must be inverted before it looks like a normal photograph. Scanner software may perform this automatically; a camera capture generally requires an editing application with a negative or invert control.
- Invert the tones so dark areas of the negative become light areas in the positive image.
- For color film, correct the orange mask with the software’s film profile, color-balance controls, or a trusted negative-conversion workflow. Black-and-white film does not need orange-mask correction.
- Adjust exposure and contrast only after inversion. Crop the frame, rotate it, and remove small dust marks without erasing meaningful detail.
The expected result is a correctly oriented positive image with natural-looking tones, visible shadow detail, and no clipped highlights across large areas. If the image has a strong color cast, first check that the film type and conversion method are correct; excessive contrast adjustments rarely fix an incorrect negative profile.
Verify files before scanning the whole roll
Verify one finished file at full size before repeating the settings for every frame. A usable scan has sharp subject detail, complete frame edges where desired, even brightness, and a filename that identifies the roll and frame.
If dust appears in the same location on many frames, clean the film or scanner glass and rescan the affected frames. If every frame is soft, check film flatness, camera alignment, scanner focus area, and the selected holder. If only one frame is damaged or badly curled, do not force it through the holder; set it aside for a specialist lab.
Keep an untouched master and make edited copies separately. Open several saved files after the scan finishes to confirm they are not blank, corrupted, wrongly inverted, or accidentally reduced to a small sharing size.
Frequently asked questions
Can I scan negatives with a regular flatbed scanner?
Only if the flatbed scanner has a transparency unit or backlight designed for film. A document-only flatbed generally cannot illuminate negatives correctly from behind, so its scans may appear very dark and lack detail. Check the scanner manual for film-holder or transparency support before buying accessories.
Is a film scanner better than photographing negatives?
A film scanner is usually easier for consistent, repeatable batches because it holds the strip and provides film-specific software. Photographing negatives can be faster or more flexible when the camera, macro setup, and backlight are already available. The better result depends on sharp focus, flat film, even illumination, and careful color inversion.
Why do scanned negatives have an orange color cast?
Color negative film commonly includes an orange mask, so a simple inversion can leave the image strongly orange or produce inaccurate colors. Use a color-negative conversion or film profile, then fine-tune white balance and exposure. Do not apply the same correction intended for black-and-white film.
What should I do if the scanned image is blurry?
First check whether the film is flat and whether dust or fingerprints are on the scanner glass or film. For camera scanning, make the film and camera sensor parallel, refocus on the film plane, and use a stable mount. If only one frame remains soft, the original may be out of focus or damaged; do not keep increasing sharpening to disguise missing detail.