If your laptop is plugged in but not charging, first test the outlet and reconnect the charger at both ends. Inspect the unplugged cable, adapter, plug, and charging port for damage or debris. Then check for a charge limit, restart the laptop, and refresh its battery driver. Stop if you notice swelling, excessive heat, sparks, or a burning smell.
Confirm what the laptop is reporting
Start by identifying whether the laptop detects external power. This separates a completely missing power connection from a battery that is intentionally or unsuccessfully refusing a charge.
- Connect the charger directly to the laptop and a wall outlet.
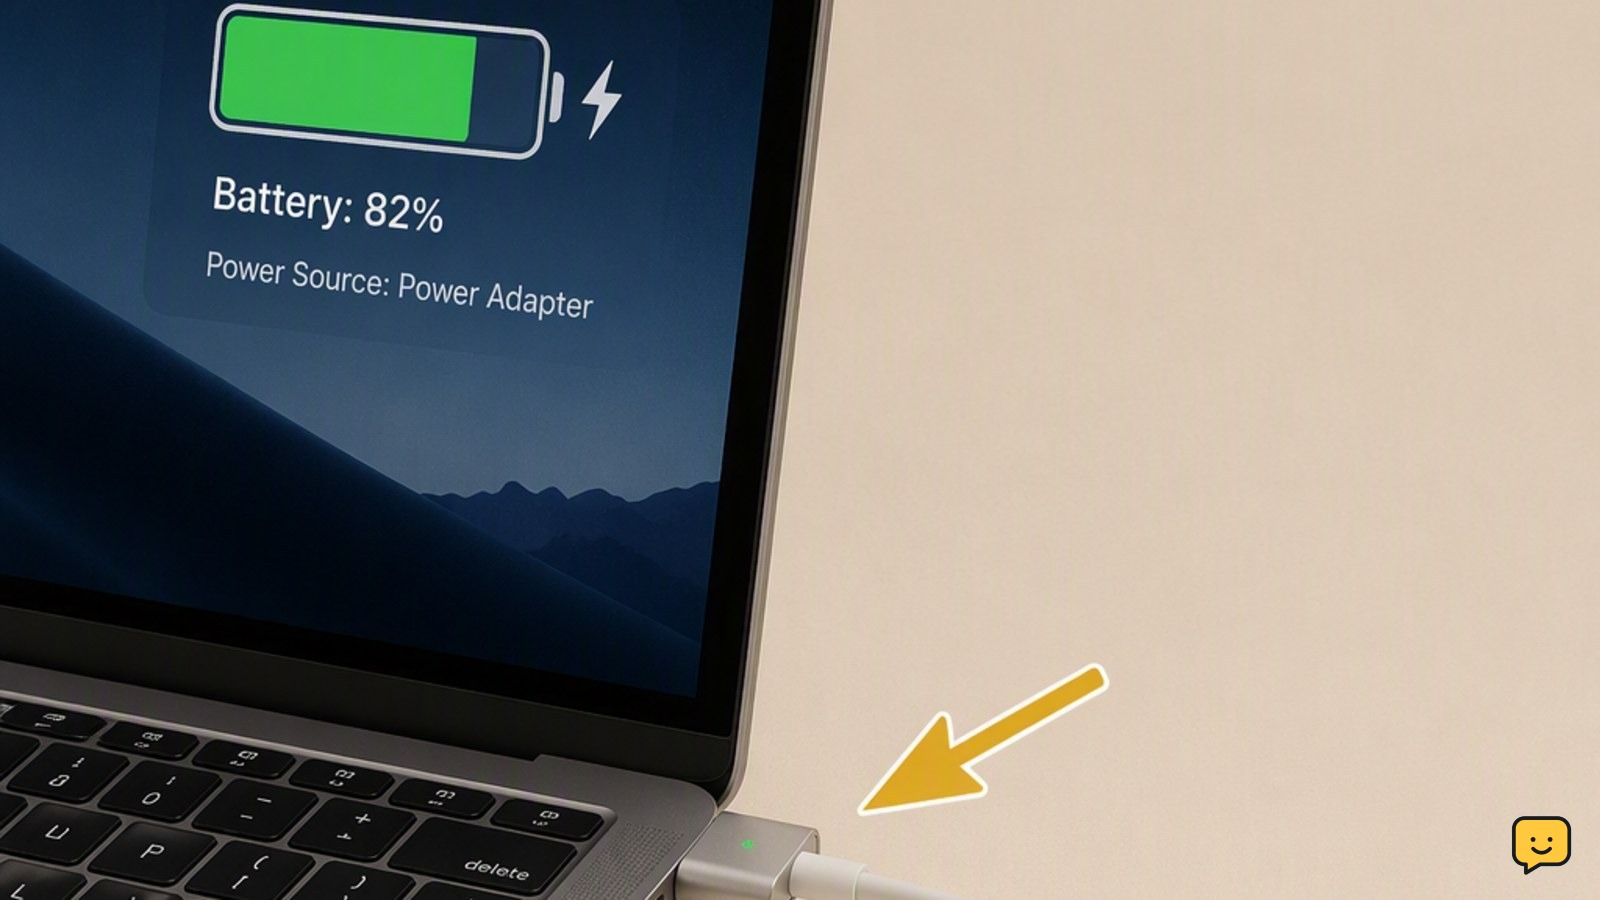
- Check the battery icon. Look for wording such as Plugged in, Not charging, Charging on hold, or Power source: power adapter.
- Note the battery percentage and leave the laptop connected for 10 minutes while it is idle.
- Check whether the percentage rises, remains fixed, or continues falling.
Verification: If the percentage rises, charging has resumed. A fixed percentage near a repeatable threshold may indicate a charge limit. If the percentage falls even though external power is detected, continue with the power-path checks.
Test the outlet and reconnect the charger
A loose connection or failed outlet can let the laptop briefly detect an adapter without receiving stable charging power.
- Shut down the laptop.
- Unplug the charger from the laptop, wall outlet, and removable adapter cable, if it has one.
- Wait 30 seconds, then reconnect each joint firmly.
- Plug the charger directly into a known-working wall outlet. Temporarily bypass power strips, travel adapters, docks, and extension cords.
- Turn on the laptop and watch the battery indicator for several minutes.
Verification: If charging begins, reconnect other equipment one item at a time. Replace or stop using the strip, dock, extension, or outlet adapter that causes charging to fail again.
If it still does not charge: Leave the charger connected directly to the wall and continue to the adapter inspection.
Inspect the charger, plug, and charging port
Unplug the charger before inspecting it. Damage near the connector, cable strain relief, or adapter body can interrupt power even when the laptop recognizes the connection.
- Check the full cable for cuts, crushed areas, exposed wire, sharp kinks, or sections pulling away from the plug.
- Inspect the connector for bent pins, looseness, discoloration, or melted plastic.
- Use a flashlight to examine the laptop’s charging port. Look for lint or debris that prevents the plug from seating fully.
- If debris is visible, shut down and unplug the laptop. Use short bursts of electronics-safe compressed air while keeping the can upright.
- Reconnect the charger without forcing it. The plug should sit securely without needing pressure or a particular angle.
Verification: A stable charging indicator that does not change when the cable rests naturally points to a restored connection.
Failure path: If charging cuts in and out when the plug moves, stop testing. A damaged connector or loose internal port needs replacement or professional service.
Make sure the charger and port are suitable
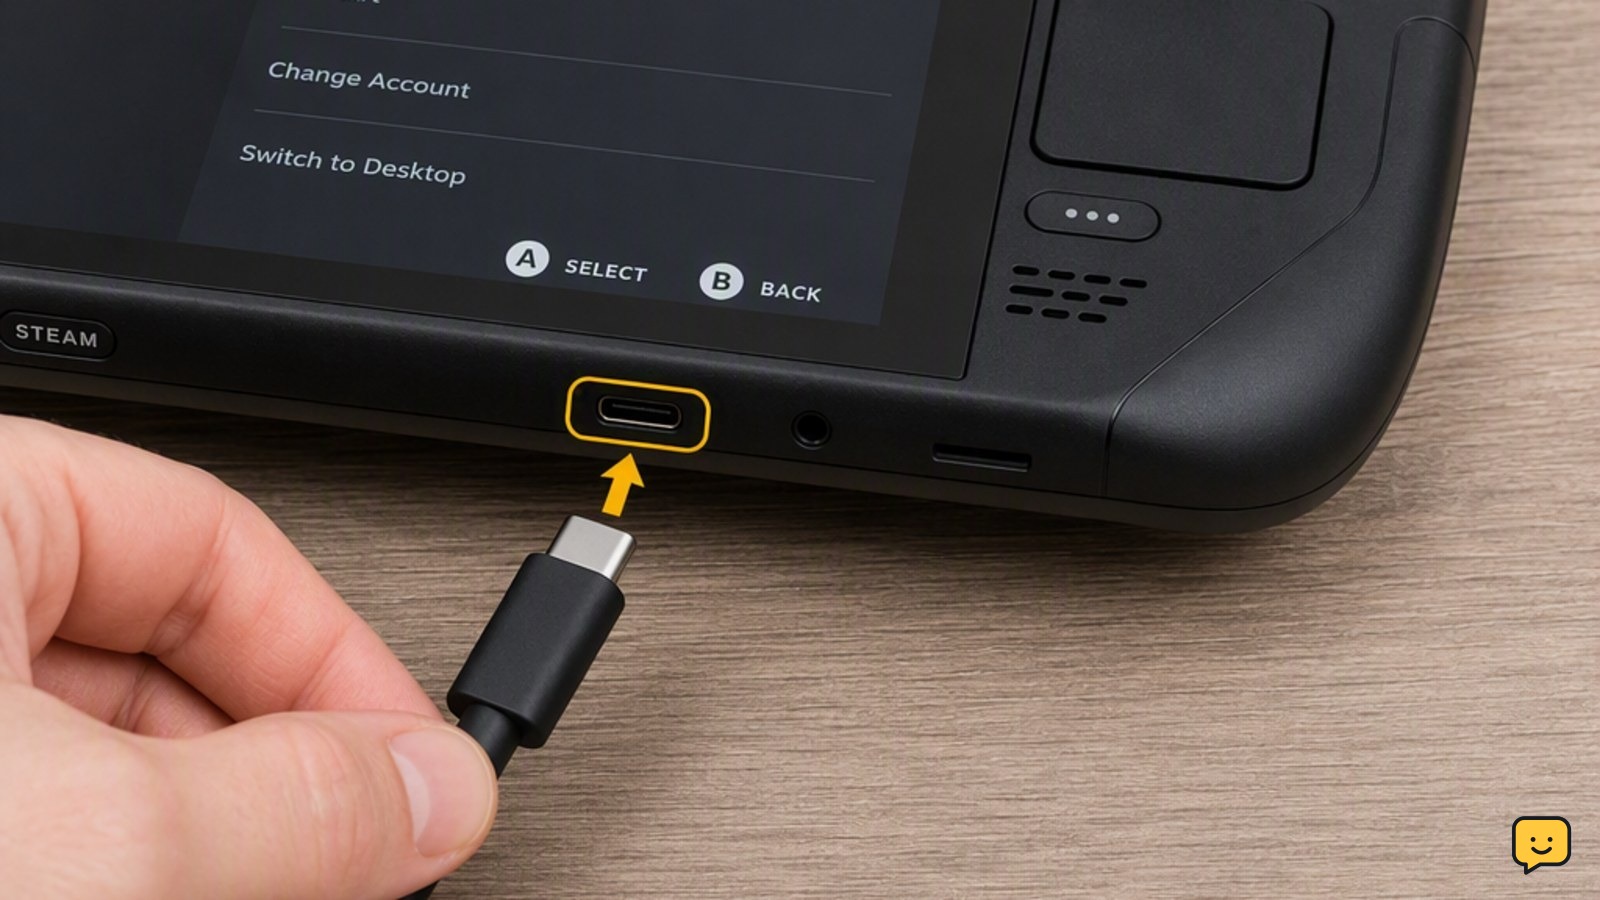
A connector that fits is not necessarily able to supply the power the laptop requires. This is especially common with USB-C chargers, phone adapters, docks, and multiport chargers.
- Compare the charger’s output information with the laptop manufacturer’s stated requirements.
- Use the laptop’s designated charging port. Some USB-C ports support data or displays but not charging.
- If the charger has multiple USB-C ports, disconnect other devices and test the laptop by itself.
- If available, test with a known-good manufacturer-approved laptop charger that meets the required rating.
Verification: If the known-good charger works, replace the original charger or cable. If neither charger works in the correct port, continue with temperature and software checks.
Do not repeatedly test unverified adapters or connectors that require force. An unsuitable adapter can produce warnings, slow charging, or no battery charging at all.
Let the laptop return to a safe temperature
Charging may pause when the laptop or battery is unusually hot. Heavy applications, blocked ventilation, direct sunlight, or charging on a soft surface can contribute.
- Shut down the laptop and unplug it.
- Move it to a hard, dry surface at normal room temperature.
- Make sure the vents are not covered.
- Wait 20 to 30 minutes, then connect the charger and turn the laptop on.
Verification: If charging resumes after cooling, avoid charging on beds, blankets, or other surfaces that block airflow.
Stop condition: A laptop that becomes painfully hot, emits an odor, or shows case deformation should remain unplugged until inspected professionally.
Check for a battery charge limit
Battery-preservation features can deliberately stop charging below 100%. They may be called a charge threshold, conservation mode, optimized charging, smart charging, or battery care.
- Notice whether charging repeatedly stops at the same percentage, commonly around a configured partial-charge level.
- Open the laptop manufacturer’s support or battery utility and look for battery-health or charging settings.
- On a Mac, open System Settings > Battery and review the battery-health and optimized-charging options.
- Temporarily disable the limit only if you need a full charge, then reconnect the adapter.
Verification: If the percentage rises above its previous stopping point, the battery and charger were probably working normally under a configured limit.
If no limit is enabled, or the laptop is stuck at a very low percentage, restore your preferred battery-care setting and continue.
Refresh the Windows battery driver
If Windows detects the adapter but shows an incorrect or unchanging battery state, restart first. If that does not help, reload the battery-management driver.
- Save your work and restart Windows. Recheck charging before changing anything else.
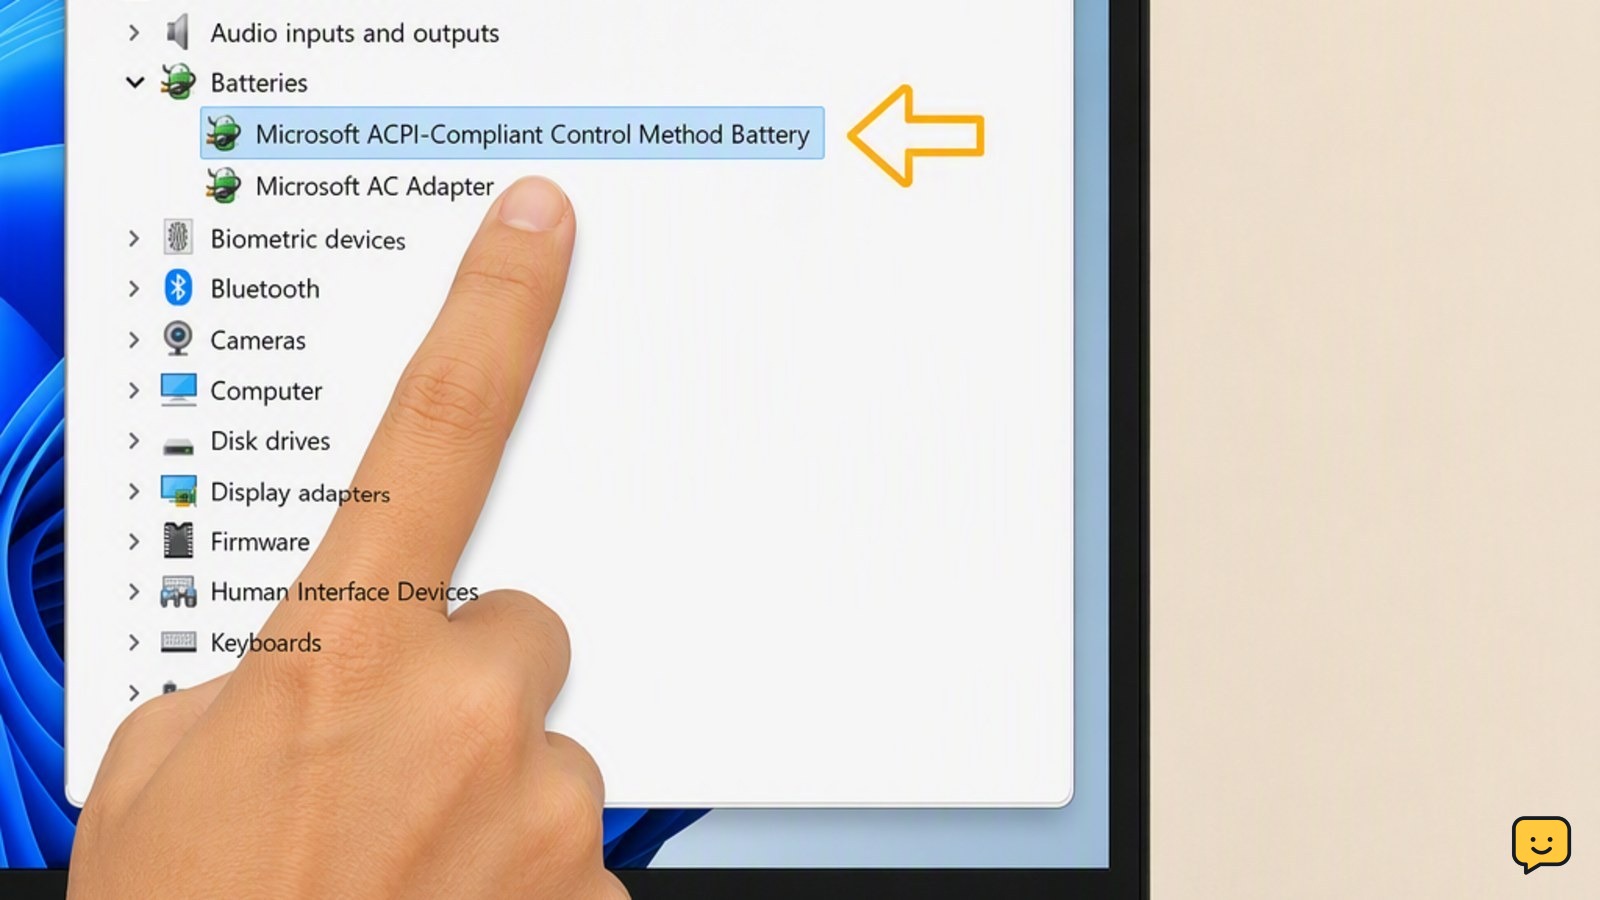
- If the problem remains, right-click Start and open Device Manager.
- Expand Batteries.
- Right-click Microsoft ACPI-Compliant Control Method Battery and select Uninstall device.
- Confirm the removal, then restart the laptop. Windows should detect and reinstall the battery entry automatically.
Verification: Return to Device Manager and confirm that the battery entry has reappeared. Watch the battery percentage for at least 10 minutes.
Failure path: If the entry does not return, Device Manager shows an error, or the battery is not detected at all, install pending system and manufacturer updates. If detection still fails, use the manufacturer’s battery diagnostic or arrange service.
Decide whether the battery needs service
A battery is more likely to be worn or faulty when the laptop runs correctly from the charger but shuts down soon after being unplugged, cannot rise above a very low percentage, or fails a built-in battery diagnostic.
- Run the battery test in the laptop manufacturer’s support application or startup diagnostics, if available.
- Record any failure code, battery-health status, or replacement recommendation.
- If the laptop has a tool-free removable battery, shut down and unplug the laptop before following the manufacturer’s documented reseating procedure. Skip this if screws or case removal are required.
- Contact the manufacturer or a qualified repair provider if the diagnostic reports failure or the problem persists with a verified compatible charger.
Likely outcomes: One charger failing points to the charger or cable. Multiple compatible chargers failing in one port points to the port or internal charging system. Normal adapter operation with poor runtime or a failed battery test points to battery replacement.
Frequently asked questions
Why does my laptop say plugged in but not charging at 80%?
A charge-limit or battery-preservation feature is the most likely cause when charging consistently stops at the same percentage. Check the manufacturer’s battery utility for conservation mode, smart charging, optimized charging, or a custom threshold. Temporarily disable the feature to verify that the battery can charge beyond 80%.
Can I use my laptop while it is plugged in but not charging?
Yes, if the charger is stable and there are no signs of physical damage, swelling, overheating, sparks, or burning. However, save important work because the laptop may shut down if the adapter cannot provide enough power. Stop using it immediately if the battery percentage falls quickly or the connector becomes hot.
How do I know whether the charger or battery is faulty?
Test with a known-good, manufacturer-approved charger that meets the laptop’s requirements. If the second charger works, the original adapter or cable is faulty. If neither works but the laptop runs from external power, check charge limits and battery health. A failed battery diagnostic or extremely short unplugged runtime points to the battery.
Why does my battery percentage fall while the laptop is plugged in?
The charger may not be delivering enough power for the laptop’s current workload. Disconnect accessories, close demanding applications, use the correct charging port, and test the approved charger directly from a wall outlet. If the percentage keeps falling while the laptop is idle, the charger, port, battery, or internal charging system may need service.
Will reinstalling the battery driver delete my files?
No, uninstalling the Microsoft ACPI-Compliant Control Method Battery entry does not delete personal files. Restarting Windows normally reinstalls the battery-management driver. Save your work first, and do not remove unrelated Device Manager entries. If the battery entry does not return after restarting, use the manufacturer’s support tools or request service.
Browse more Computers & Internet guides for help with this topic.