To use a router table, unplug the router while installing the bit, secure the router and level the table insert, then set the bit height and fence for the cut. Wear eye and hearing protection, use dust collection, and feed the workpiece from right to left against the bit’s rotation. Make light passes and stop if the stock binds or becomes unstable.
Secure the router, insert and cutter before setup
A router table is ready for adjustment only when the router is firmly mounted, the insert is level and the cutter is correctly secured. Unplug the router first. Fit the bit into the collet with the manufacturer-specified engagement, tighten the collet with the supplied wrench, and confirm that no part of the bit can contact the insert or fence.
Check the bit by turning it by hand while the router remains unplugged. It should rotate smoothly without wobbling, scraping or shifting. The table insert should sit flush with the tabletop; Woodcraft identifies leveling the insert as an early setup check because a raised or tilted insert can interfere with stock movement.
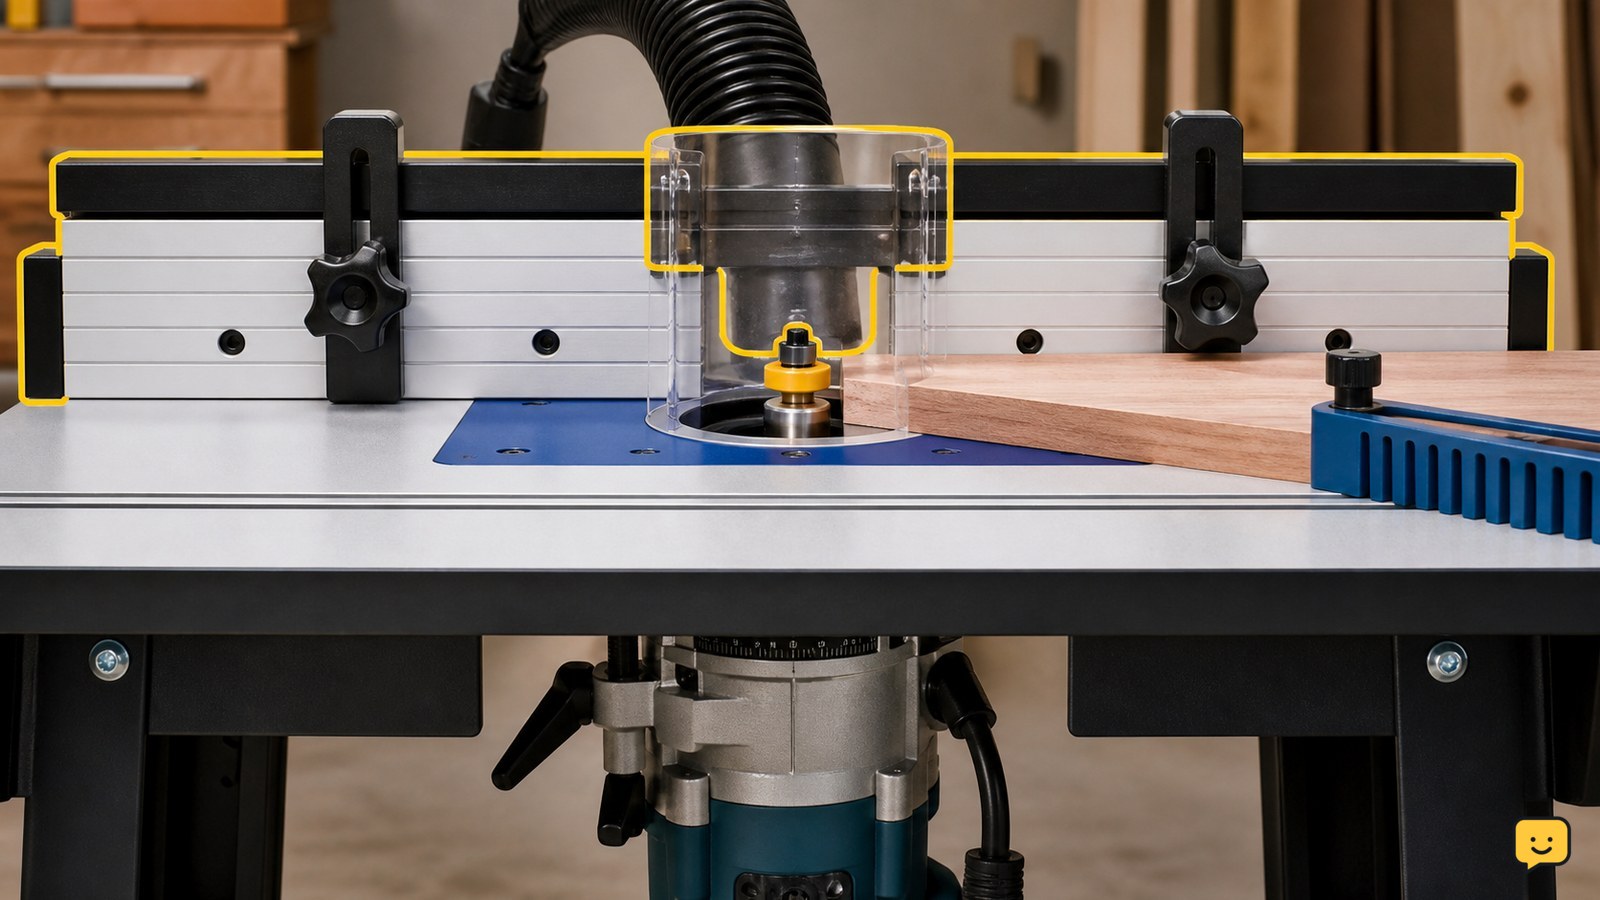
Install the guard and dust collection if supplied. Confirm that the fence faces are aligned and that the opening is appropriate for the bit. If the bit is too large for the insert opening, the guard is missing, or the router mount flexes, stop and correct the setup before connecting power.
Set the bit height and fence for the cut
Set the bit height and fence with the router unplugged, using a ruler, setup block or the method specified by the table manufacturer. Woodcraft describes bit-height adjustment and fence setting as separate setup decisions; make each one against the actual stock rather than estimating from the cutter’s label.
For an edge profile, position the fence so the bearing or cutting edge meets the intended part of the workpiece. For a rabbeting or jointing operation, use a straight, continuous fence and make sure the stock will stay supported on both sides of the cutter. Tighten every adjustment, then check that the fence cannot move when pushed by hand.
Use a scrap piece of the same thickness and material for the first test. The test cut should produce the intended profile at the planned depth, with the workpiece remaining flat against the table and fence. If the cut is too deep, incomplete or uneven, unplug the router before changing height or fence position.
Feed the workpiece against the bit rotation
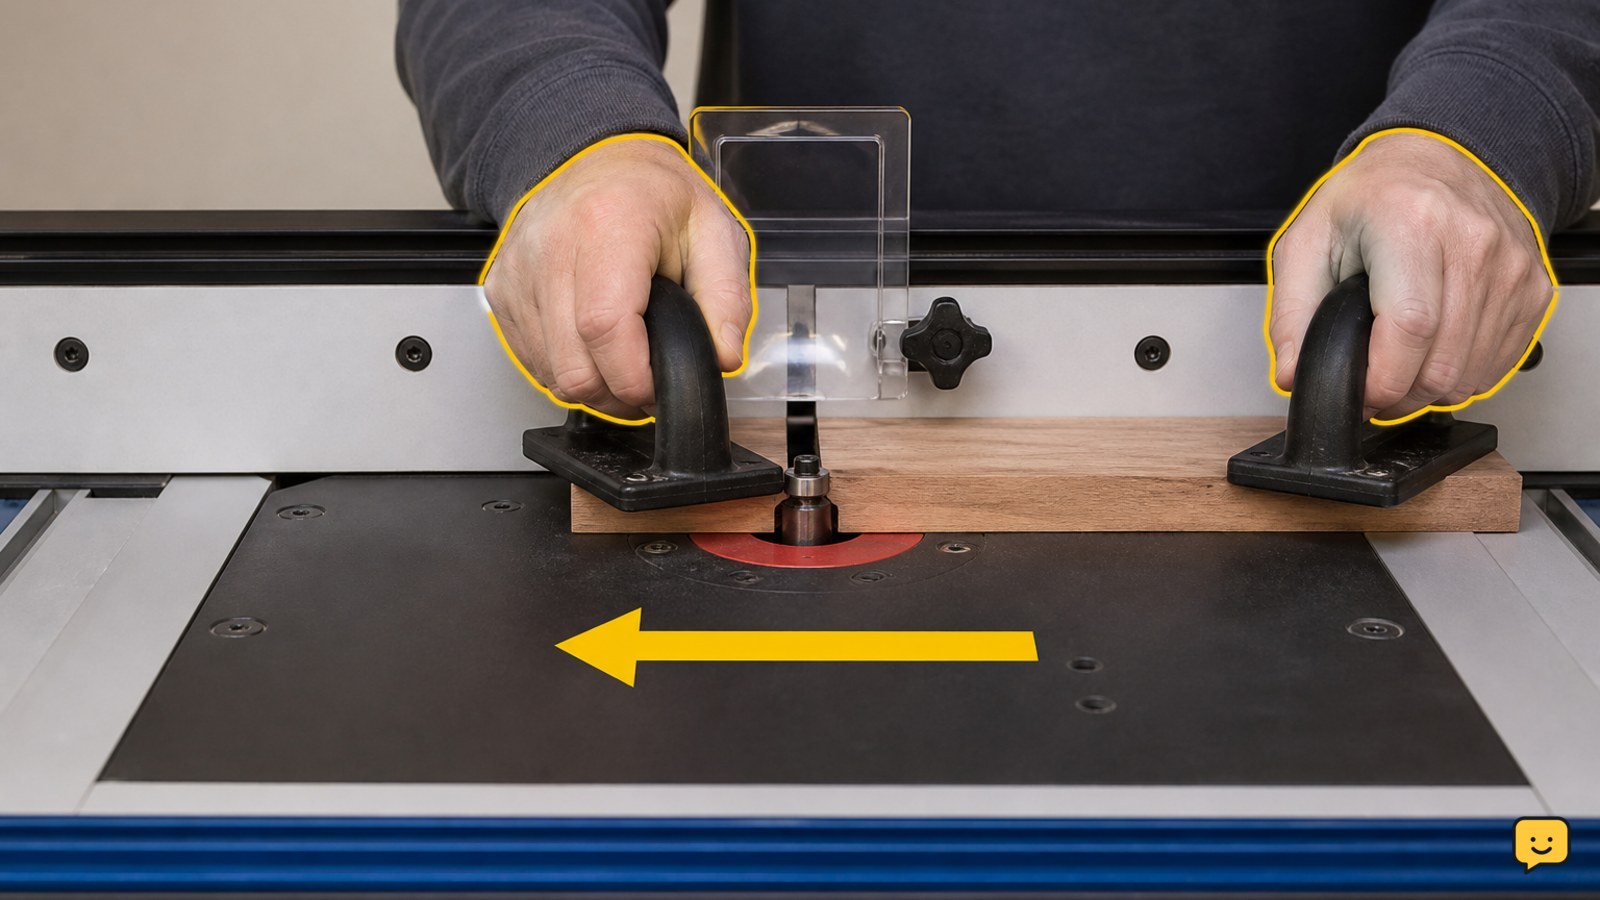
With a normal fence-guided cut, feed the workpiece from right to left when standing in front of the router table. This direction keeps the stock moving against the cutter’s rotation, allowing the bit to push the workpiece toward the fence rather than pulling it away.
Keep the workpiece flat on the table and pressed consistently against the fence. Use both hands to control the stock, but keep them to the sides of the cutter path; use push blocks or push pads when the remaining material becomes narrow. Maintain a steady feed instead of forcing the stock or pausing over one section.
Do not reverse the feed direction for a routine fence-guided pass. A climb cut can pull the stock rapidly into the bit and is not a suitable beginner technique. If the workpiece starts moving faster than your control allows, release the feed pressure, switch the router off and wait for the cutter to stop before investigating.
Make shallow passes and support the stock
Take multiple shallow passes when removing substantial material or forming a deep profile. WOOD magazine’s router-table demonstration covers trim work, edge jointing and making identical parts; those operations depend on controlled stock movement and repeatable settings rather than one aggressive cut.
After each pass, switch off the router and wait for the bit to stop before measuring or clearing waste. Inspect the edge for burn marks, tear-out, chatter or an incomplete profile. A clean, consistent edge and an unchanged fence setting indicate that the pass was controlled.
Support long, wide or narrow stock before it reaches the cutter and after it leaves the fence. Use an outfeed table, auxiliary support or a second person only when the arrangement keeps hands away from the bit and does not obstruct the feed path. Never reach across the spinning cutter to catch falling stock.
Use a starter pin only for suitable freehand work
A starter pin is an alternative to the fence for appropriate freehand routing, not a replacement for a fence on ordinary edge work. The WOOD magazine demonstration and the supplied beginner woodworking reference both identify the starter pin as a control aid when the fence is not being used.
Use this method only with a bit, guard and table designed for the operation. Keep the workpiece controlled against the pin before bringing it into the cutter, and follow the table and router instructions for the correct contact sequence. A template or bearing-guided cutter may be a safer alternative when the workpiece shape is irregular.
If the stock cannot be held flat, the cutter has no suitable bearing or guide, or the workpiece is too small to control with push blocks, do not make the freehand cut on the router table. Choose a different tool or have the operation completed by an experienced woodworker.
Diagnose burn marks, chatter or an uneven profile
Router-table defects usually point to a feed, support, setup or cutter problem. Turn the router off, unplug it and let the bit stop before making any diagnosis.
| What you see | Likely check | Safe next action |
|---|---|---|
| Burn marks | Feed may be too slow, or the bit may be dull or clogged. | Clean or replace the bit and make a controlled test pass with light material removal. |
| Chatter or vibration | Bit, collet, insert, mount or stock support may be loose. | Check each connection and support point; stop using the setup if the bit still wobbles. |
| Uneven depth | Stock may be lifting, or the fence or insert may not be level. | Correct the support and level checks, then retest on scrap. |
| Workpiece pulls away | Feed direction or fence pressure may be wrong. | Stop immediately. Re-establish right-to-left fence-guided feeding or use a suitable guide. |
If a corrected setup still produces unpredictable movement, do not continue cutting. A damaged cutter, incompatible router-table combination or structural fault needs manufacturer guidance or qualified repair.
Frequently asked questions
Can you use a handheld router in a router table?
You can use a handheld router only when the router, mounting plate and table are designed to work together. Check the router and table instructions for compatibility, mounting requirements, cutter limits and above-table adjustment features. If the router cannot be clamped securely or the controls become inaccessible beneath the table, do not use that combination.
Which direction should wood move through a router table?
For a standard fence-guided cut, move the wood from right to left when viewed from the front of the table. This feeds the stock against the bit’s rotation and helps keep it against the fence. A different direction can create a dangerous climb cut, which may pull the workpiece suddenly.
Why does my router table leave burn marks?
Burn marks can result from feeding too slowly, removing too much material in one pass, or using a dull or dirty bit. Unplug the router, inspect and clean or replace the cutter, then make a lighter test pass on scrap with steady feed pressure. Stop if the bit overheats, smokes or vibrates.
Do I need a fence for every router-table cut?
No. A fence is the usual guide for straight edge work, while a starter pin and suitable bearing-guided setup can support some freehand or curved work. Use only the guide method approved for the cutter and table. If the workpiece is too small or irregular to control safely, choose another method.
For more help with this topic, use the Home Maintenance guides.