If Windows 11 does not detect your external monitor, first secure both ends of the video cable and select the matching input on the monitor. Then open Settings > System > Display and select Detect. If it still does not appear, test another cable or port, choose Extend with Win+P, restart the graphics driver, and update display drivers.
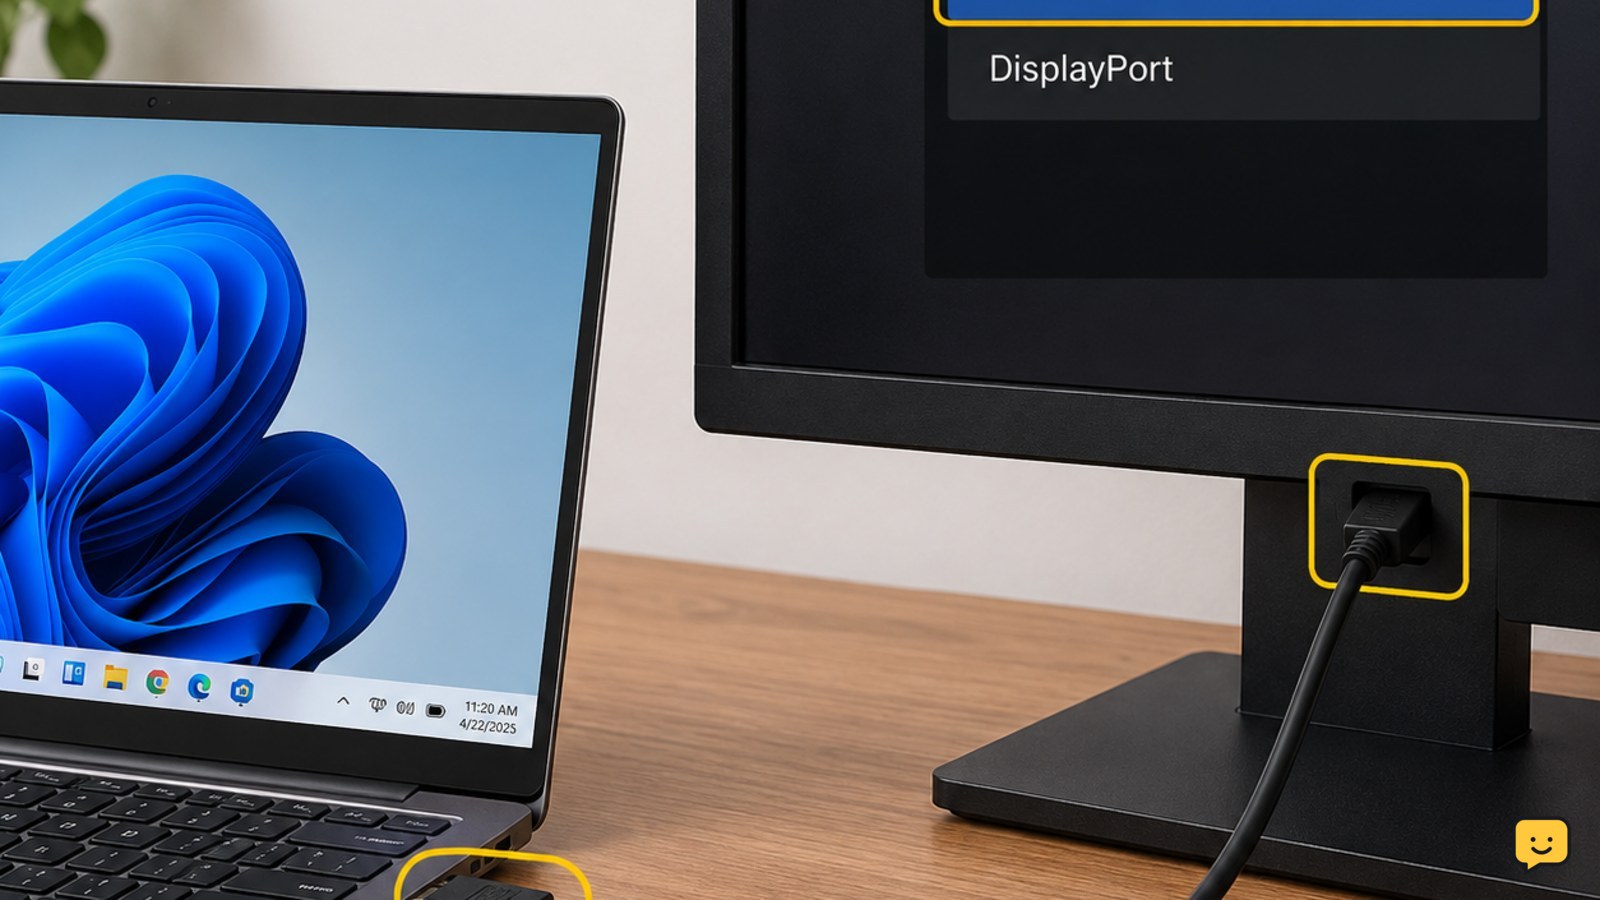
Check the monitor power, cable, and input source
Start with the physical connection because Windows cannot detect a monitor that is not receiving a usable video signal. Confirm that the monitor is powered on and that its power indicator is lit. If there is no indicator, test the outlet and power cable before changing Windows settings.
For the related task, How to Fix Windows 11 Laptop Second Monitor covers the next checks separately.
- Unplug the video cable from the PC and the monitor.
- Reconnect both ends firmly. A loose HDMI, DisplayPort, USB-C, or adapter connection can prevent detection.
- Use the monitor’s buttons to open its input or source menu.
- Select the input that matches the connected port, such as HDMI 1, HDMI 2, DisplayPort, or USB-C.
Verify: the monitor should show a picture, a signal message, or at least change its no-signal behavior after the correct source is selected. If it remains on the wrong source, Windows may appear unable to detect it even though the cable is connected.
If nothing changes: try another compatible cable, another input on the monitor, or another video output on the PC. Disconnect docks, hubs, and other accessories temporarily so they do not hide the faulty connection. Do not continue if a connector is damaged or unusually warm.
Use Display Settings to detect the second screen
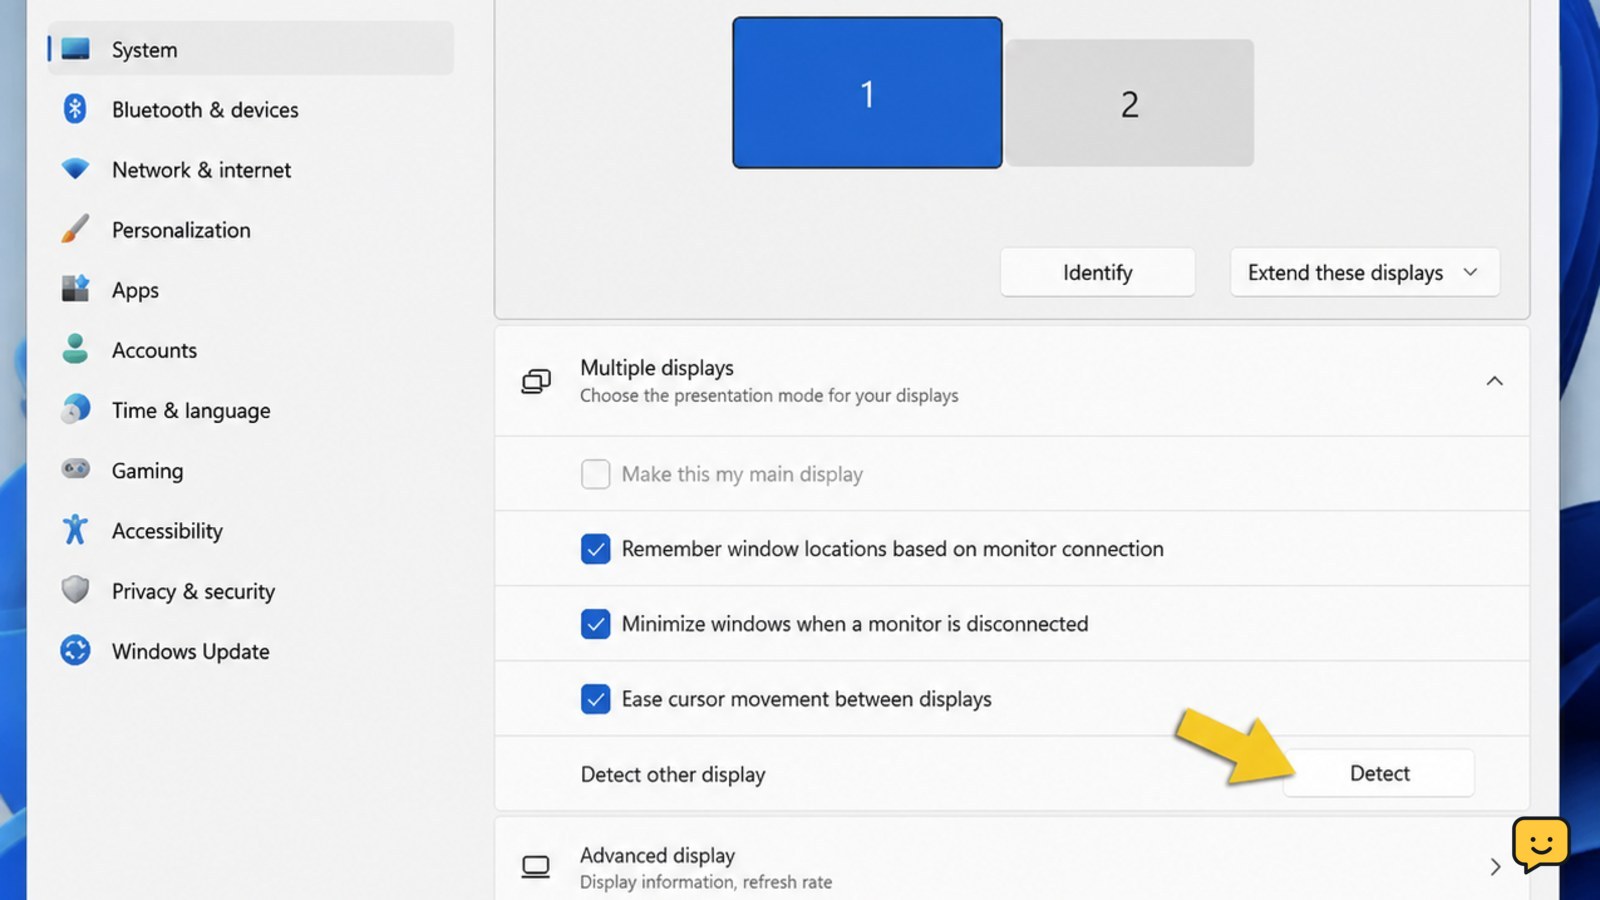
After checking the connection, ask Windows 11 to scan for the display manually. Right-click an empty area of the desktop and select Display settings. You can also open Settings > System > Display.
- Scroll to the Multiple displays section.
- Select Detect.
- Wait briefly for Windows to scan the connected outputs.
Success looks like: a second numbered display appears in the layout, or Windows reports that another display was found. Select Identify if you need to match the numbered box with the physical monitor.
If the second display appears but is disabled or arranged incorrectly, select its numbered box and choose the desired display option under Multiple displays. Use Extend these displays when you want a separate desktop on both screens. Select Keep changes if Windows asks you to confirm.
If Detect finds nothing: continue with the input and projection checks below. Repeatedly selecting Detect will not repair a failed cable, unsupported adapter, or faulty port.
Choose Extend with the Windows projection menu
Windows may be using a projection mode that sends the desktop only to the built-in screen or only to the external monitor. Press Windows key + P to open the projection menu, then select Extend.
Use Duplicate only when both screens should show the same image. Second screen only turns off the PC’s built-in display, so it is not the right choice if you are trying to make both screens active.
Verify: the external monitor should show a separate portion of the desktop after you choose Extend. Move the pointer toward each edge of the desktop to confirm that Windows is treating the screens as one extended workspace.
If the projection menu changes nothing: return to Settings > System > Display. If no second display is listed there, projection mode is not the main fault; go back to cable, adapter, port, and driver testing.
Refresh the graphics connection and update display drivers
A temporary graphics connection failure can leave Windows with an incomplete display list. Press Windows key + Ctrl + Shift + B to refresh the graphics driver. The screen may briefly go dark or flicker, and you may hear a short alert sound.
Check the result in Settings > System > Display. Select Detect again only after the screen has returned to normal.
Next, install available Windows updates by opening Settings > Windows Update and selecting Check for updates. Restart the PC if Windows requests it. Display-driver updates may also be available through the PC or graphics hardware manufacturer’s support page.
You can inspect the installed graphics device by right-clicking the Start button and opening Device Manager > Display adapters. If an adapter shows a warning symbol, note the exact device name before changing anything. Use only a driver intended for your PC model and Windows 11; do not install a random driver package from an unverified site.
If the screen remains absent: shut down the PC, disconnect unnecessary accessories, connect the monitor directly if possible, and start the PC again. If the monitor is detected after removing a dock or adapter, that accessory or its driver is the likely point of failure.
Separate a Windows setting fault from a hardware fault
Use one change at a time so the failed component is identifiable. Test the external monitor with another computer, game console, or compatible source if available. Then test the PC with a different known-working monitor or television.
- Monitor works with another source: check the PC’s cable, output port, adapter, dock, graphics driver, or display hardware.
- Another monitor works from the same PC port: the original monitor, its selected input, or its cable is more likely at fault.
- Neither monitor works from one PC output: try a different output and remove adapters or docks from the connection.
- USB-C is involved: the port, cable, or adapter must support video output; a USB-C connector alone does not establish that capability.
Stop troubleshooting in Windows when the monitor fails with a known-good cable and compatible source, or when a specific PC port fails with multiple working displays. Those results point to hardware compatibility or failure and usually require manufacturer support or repair.
Frequently asked questions
Why does Windows 11 say no other display was detected?
The usual causes are a loose or damaged video cable, the monitor being set to the wrong input, a faulty adapter or dock, an unsupported USB-C video connection, or a graphics-driver problem. Test the monitor and cable separately, connect the monitor directly to the PC, then use Settings > System > Display > Detect.
How do I make Windows 11 use two monitors?
Connect and power on both displays, open Settings > System > Display, and select Detect if the second screen is missing. When both numbered displays appear, open the multiple-display option and choose Extend these displays. Use Identify to match each numbered display with its physical monitor.
Can a bad HDMI or DisplayPort cable stop monitor detection?
Yes. A cable can fit securely while failing to carry a usable video signal. Disconnect and reconnect both ends, select the correct monitor input, and test a known-good compatible cable. If the replacement works, stop using the original cable.
What should I do if the monitor works but Windows still cannot detect it?
Connect the monitor directly to the PC, bypassing a dock or hub, and try another video output if available. Press Windows key + Ctrl + Shift + B to refresh the graphics connection, restart the PC, and check Windows Update. If multiple working displays fail on one output, seek hardware support.
Browse more Computers & Internet guides for help with this topic.