To check brake pads, look through the wheel spokes for the friction material beside the brake rotor. If the pad is difficult to see, safely raise the vehicle, support it on jack stands, and remove the wheel. Inspect both the inner and outer pads for thin or uneven material, cracking, contamination, or metal contact. Stop driving if braking is noisy, weak, pulling, or unsafe.
Check the brake pad through the wheel first
Most disc brake pads can be checked without removing the wheel because the pad is visible through the wheel spokes beside the brake rotor. Toyota of Clermont describes this as the first inspection point, while Allstate also recommends checking the wheels and listening for brake symptoms.
- Turn the steering wheel slightly to improve the view of a front brake assembly.
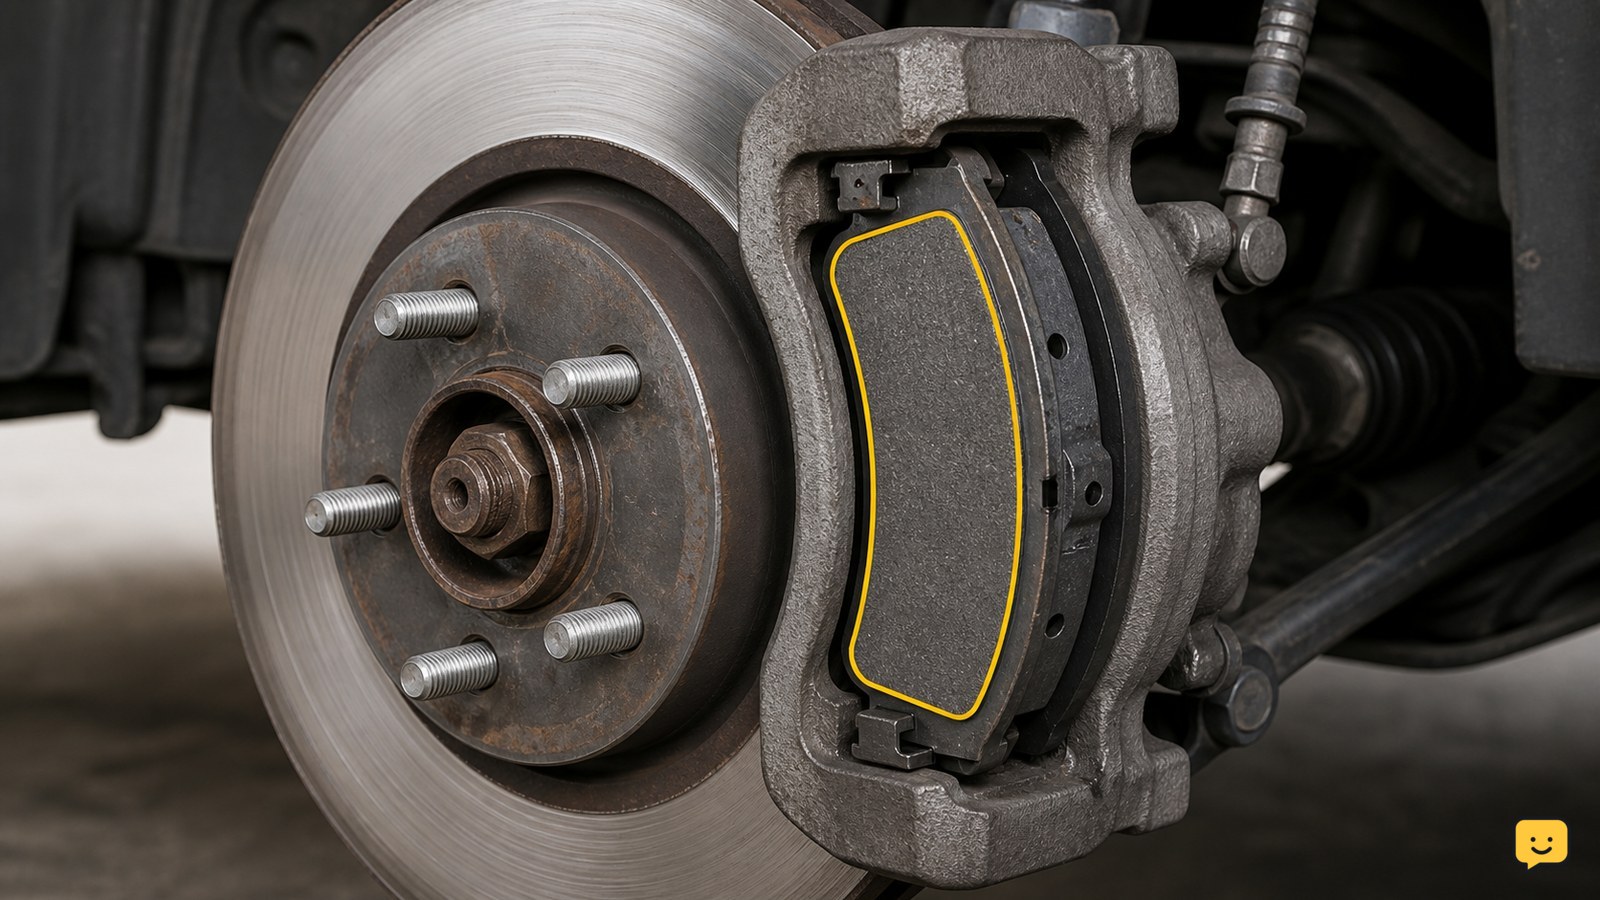
- Use a flashlight to identify the flat brake pad pressed against the rotor. The pad’s friction material sits between the rotor and the metal backing plate.
- Look for a reasonably substantial, continuous layer of friction material. A pad that appears very thin, cracked, loose, contaminated with fluid or grease, or nearly down to its backing plate needs further inspection.
Check both front wheels rather than judging one side alone. A wheel-spoke view is only a screening check: the inner pad may wear differently and can be partly hidden by the caliper.
Remove the wheel for a clearer wear check
Removing the wheel gives a more reliable view of the brake pads, caliper, and rotor when the spokes block the pad. Wagner Brake’s inspection guidance specifically recommends removing the tire for a good view of the brake pad.
- Chock the wheels that remain on the ground and loosen the wheel nuts slightly before lifting, if your vehicle and wheel design require it.
- Raise the vehicle only at the approved lifting point and lower it onto correctly rated jack stands.
- Remove the wheel and place it flat under the vehicle as an additional precaution, without treating it as a substitute for jack stands.
- Look at the pad from its edge. Identify the friction material separately from the thicker metal backing plate; do not count the backing plate as usable pad material.
- Inspect the rotor face for deep grooves, blue or purple heat discoloration, cracks, or a damaged edge.
If the caliper or pad is covered in heavy rust, wet with fluid, or impossible to identify, reinstall the wheel and arrange a brake inspection rather than dismantling parts you cannot safely service.
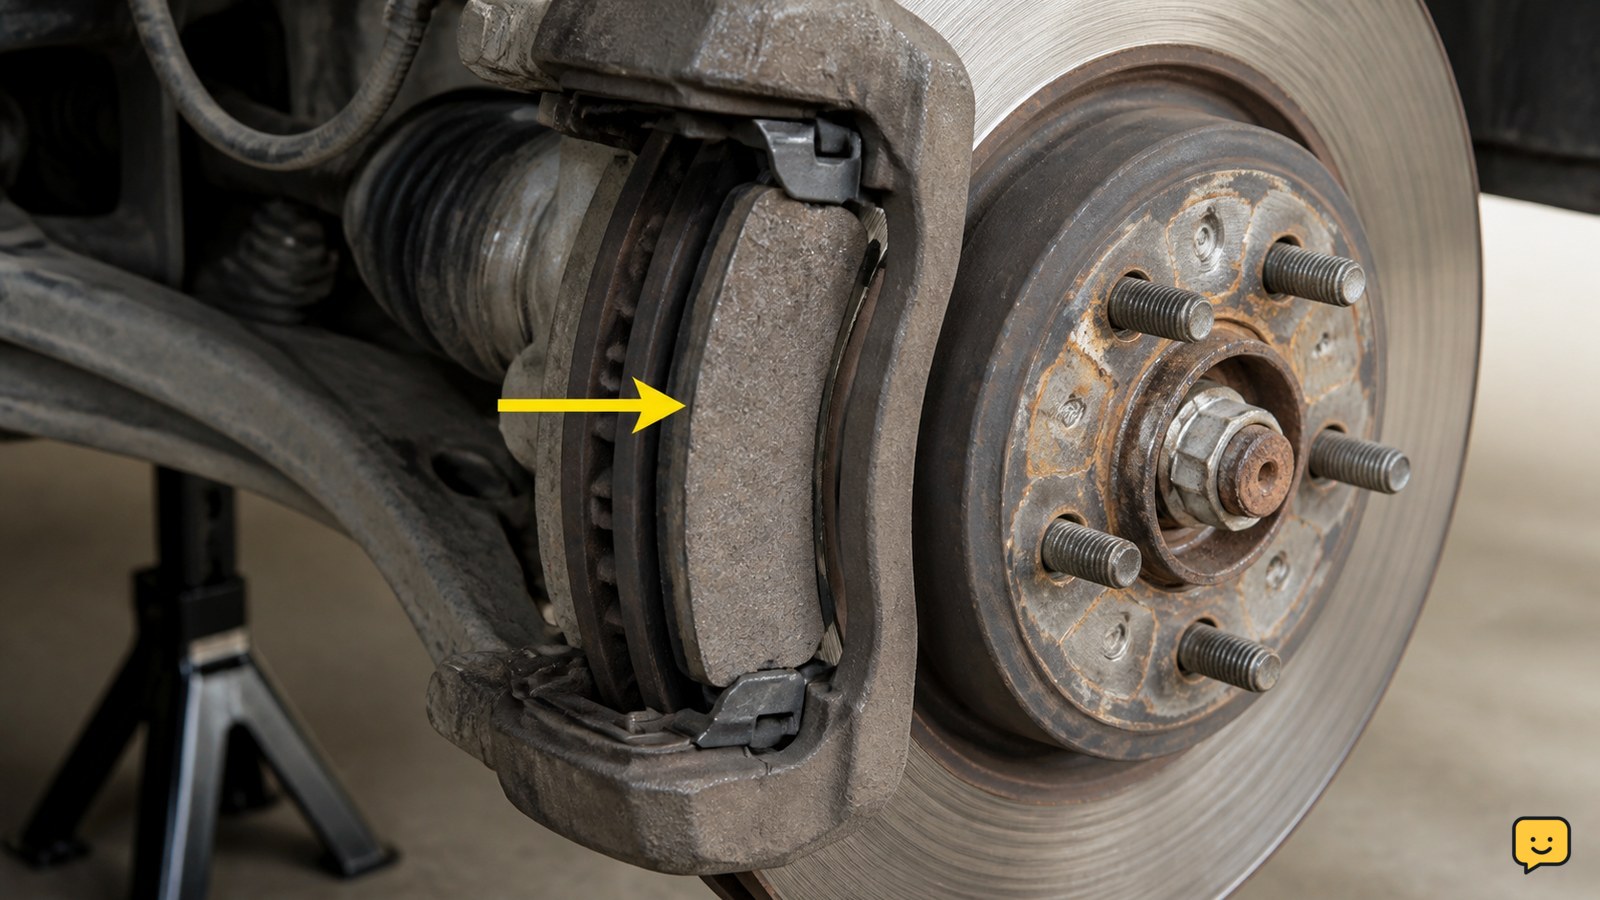
Compare inner and outer pad wear
Inner and outer brake pads should not be judged independently because uneven wear can indicate a caliper, guide-pin, or hardware problem. Compare the visible friction material on both pads at the same wheel, then compare the left and right sides of the axle.
| What you see | What it means | Next action |
|---|---|---|
| Both pads look similarly worn | Wear appears more even, but the remaining material still needs a vehicle-specific assessment. | Record the condition and recheck during routine maintenance. |
| Inner pad is much thinner | The hidden pad may be wearing faster than the outer pad. | Have the caliper movement, guide pins, and hardware checked. |
| One wheel is much more worn | Wear may be uneven across the axle. | Do not replace only the visibly worn pad; request an inspection of the complete brake assembly. |
| Friction material is cracked, loose, soaked, or crumbling | The pad may not contact the rotor correctly. | Stop driving until the brake system is assessed. |
There is no universal replacement interval or visual thickness that applies to every vehicle. Use the owner’s manual or manufacturer service information for the model-specific minimum and replacement guidance.
Verify wear with brake symptoms
Brake pad condition should be checked together with how the vehicle brakes. A high-pitched wear indicator sound can be a warning that the pad is nearing replacement, but grinding, scraping, or reduced braking is not a normal inspection result.
- With the vehicle stationary, press the brake pedal firmly. It should feel firm and should not continue sinking while steady pressure is applied.
- During a cautious, low-speed test in a safe area, note whether the vehicle stops smoothly and tracks straight.
- Listen for persistent squealing, grinding, scraping, or repeated clicking, and note any vibration or pulsing.
- Check the dashboard for a brake-system or ABS warning light. A warning light can indicate a problem beyond pad thickness.
This test does not prove that the pads are serviceable. If the pedal feels soft, braking is weak, the vehicle pulls, or grinding is present, skip further road testing and have the vehicle transported or inspected at once.
Know when a visual check is not enough
A visual brake-pad check cannot confirm hidden inner-pad wear, hydraulic faults, seized caliper parts, rotor thickness, or correct operation of the ABS system. It also does not establish how many miles the pads have left.
If the pad looks acceptable but the car still makes noise, pulls, vibrates, or stops poorly, request a complete brake inspection. Ask the technician to compare pad thickness across the axle, inspect the rotor and caliper hardware, and check for fluid leaks or seized components.
After a wheel-off inspection, refit the wheel using the vehicle’s specified tightening procedure and torque specification. Before normal driving, confirm that all tools are clear, press the brake pedal several times until it feels firm, and make a slow controlled stop in a safe area. If the pedal does not become firm, stop and do not drive.
Frequently asked questions
Can I check brake pads without removing the wheel?
Yes, you can often see the outer pad through the wheel spokes with a flashlight. Turn the front wheels slightly if that improves the view. This is only a preliminary check because the inner pad may be hidden and may wear differently. Remove the wheel safely or arrange a professional inspection when the pad edge cannot be seen clearly.
What does a worn brake pad look like?
A worn pad has a narrow layer of friction material between the rotor and the metal backing plate. Concerning signs include material that is nearly level with the backing plate, cracks, crumbling edges, loose material, or fluid and grease contamination. Because designs vary, use the vehicle’s service information for the exact replacement limit rather than relying on appearance alone.
Why is one brake pad thinner than the other?
One pad can wear faster when the caliper, guide pins, piston, or pad hardware does not move correctly. The inner pad is also commonly harder to see, so uneven wear may go unnoticed. Do not replace only the thin-looking pad; have the complete brake assembly checked to find and correct the cause.
Can I drive with squealing brake pads?
Sometimes a brief squeal is caused by moisture or brake dust, but persistent squealing should be inspected. Grinding, scraping, weak braking, pulling, vibration, or a soft pedal means you should not continue driving. Arrange a brake inspection, and use towing instead of driving if stopping performance or pedal feel is unsafe.
For more help with this topic, use the Maintenance Repair guides.