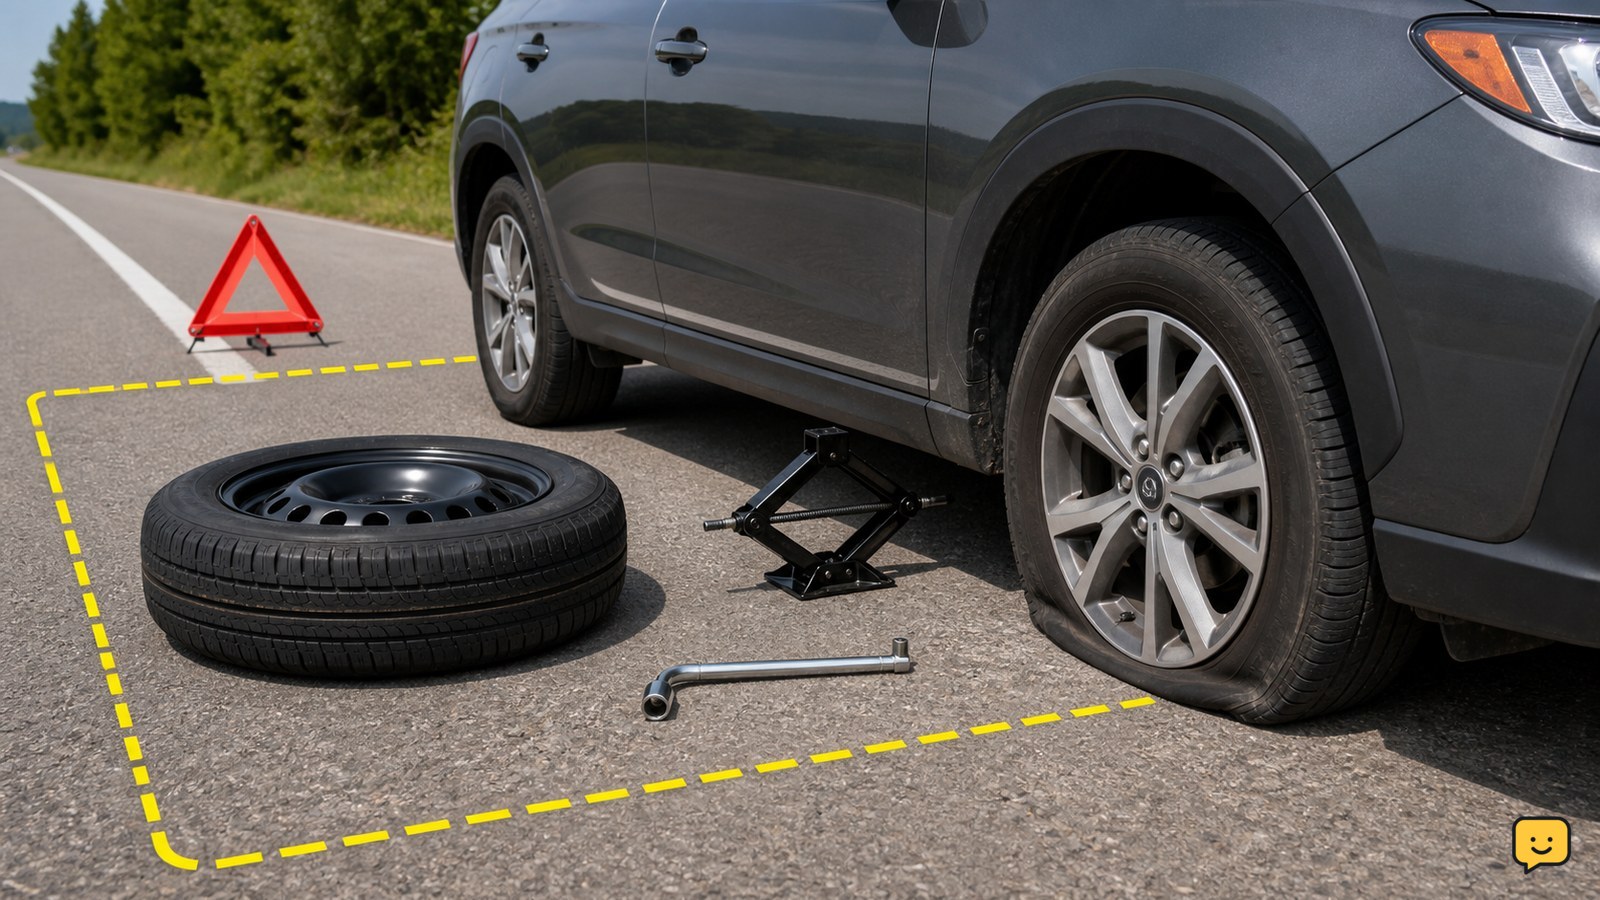
To change a flat tire, park safely on firm, level ground, switch on the hazard lights, apply the parking brake and place wheel chocks if available. Loosen the lug nuts before lifting the car, raise it only at the manufacturer’s jack point, install the spare, lower the car and tighten the nuts in a star pattern.
Check whether the roadside tire change is safe
Changing a flat tire is appropriate only when the vehicle can be secured on firm, level ground away from moving traffic. Switch on the hazard lights, place the transmission in Park or in first gear or reverse for a manual car, apply the parking brake and turn off the engine.
Use wheel chocks on the wheel opposite the flat if you have them. Keep people out of the traffic side of the vehicle. If the flat occurred on a narrow highway shoulder, near a bend, in poor visibility or on unstable ground, remain in a safe location and call roadside assistance instead.
Success check: the car is stationary, the lifting side is clear and you can work without standing in a live traffic lane.
Find the spare tire, jack and approved lifting point
The vehicle owner’s manual identifies the correct jack point and the equipment supplied for that vehicle. Remove the spare tire, jack, lug wrench and any locking-lug-nut adapter before beginning; these may be stored under the cargo floor, behind an interior panel or in a separate compartment.
Check the spare’s sidewall for its inflation requirement and any temporary-spare speed or distance restriction. A compact spare is an emergency replacement, not a normal tire. If the spare is flat, cracked, badly corroded or missing, do not lift the car.
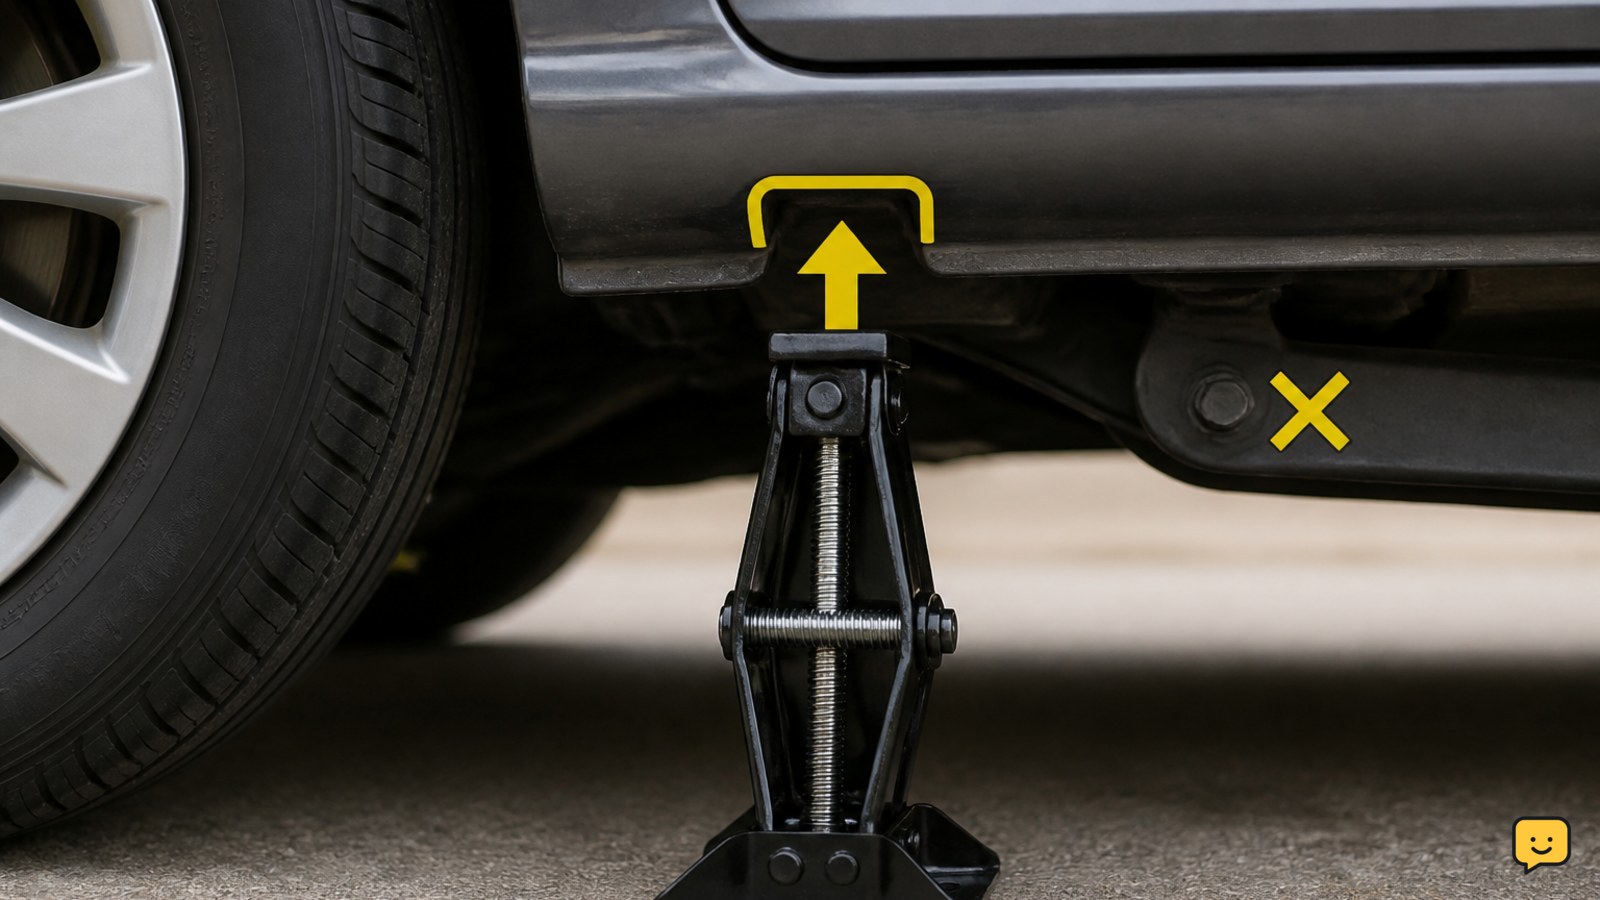
Locate the jack point behind or ahead of the affected wheel as shown in the manual. Do not substitute a suspension arm, plastic trim, exhaust component or another unapproved contact point.
Loosen the lug nuts before lifting the car
Loosen each lug nut while the flat tire still supports the vehicle. Fit the lug wrench fully onto the nut and turn counterclockwise. Break the initial resistance with controlled pressure; do not jump on the wrench or use an improvised extension.
Remove decorative wheel covers or center caps only if they block access to the nuts. Loosen the nuts about one turn, but leave them threaded on the wheel. If one nut refuses to move, check that the wrench is fully seated and try steady pressure once more.
Failure path: if the nut remains stuck, the socket slips, or the wheel stud begins turning or looks damaged, stop before lifting the vehicle and arrange professional assistance.
Raise the vehicle and remove the flat wheel
Position the jack at the approved lifting point and raise the vehicle slowly until the flat tire is just clear of the ground. The jack should remain upright, stable and centered under the specified point. Never place any part of your body under a vehicle supported only by a jack.
Finish removing the loosened lug nuts and keep them together. Pull the flat wheel straight toward you. If it sticks to the hub, rock it gently from side to side while staying clear of the vehicle’s underside; do not strike the vehicle or crawl underneath it.
If the vehicle tilts, the jack leans, the ground gives way or the wheel will not come free safely, stop, lower the car if possible without reaching beneath it and call for help.
Fit the spare and tighten the nuts in a star pattern
Place the spare wheel over the hub and align its holes with the studs or its center opening with the hub. The wheel must sit flat against the hub. Thread every lug nut by hand until snug so the threads are not cross-threaded.
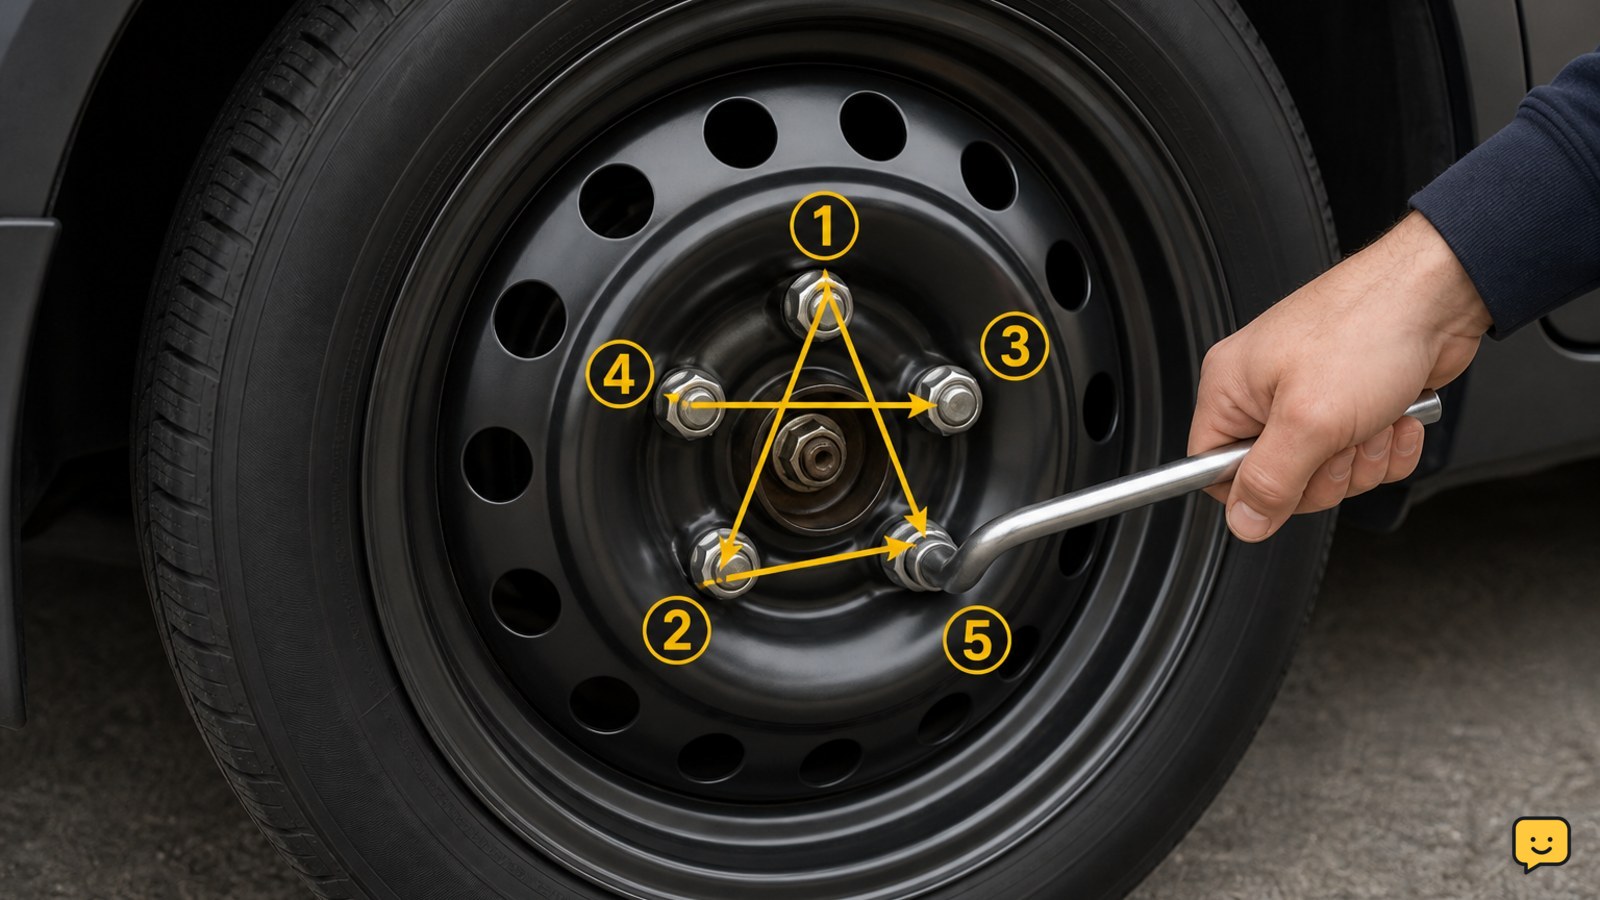
Use the lug wrench to tighten the nuts lightly in a crisscross or star pattern rather than moving around the circle. This helps center the wheel. Do not fully tighten the nuts while the tire is off the ground, and do not use an impact tool unless the vehicle’s instructions specifically allow it.
Success check: all nuts are installed, the spare is flush against the hub and no nut is visibly crooked.
Lower the car and complete the final wheel check
Lower the vehicle slowly until the spare touches the ground and can no longer rotate, then remove the jack. Tighten the lug nuts firmly in the same star pattern. The owner’s manual or service information provides the correct torque; use a torque wrench when available rather than guessing.
Reinstall the wheel cover only if it fits the spare. Put the flat tire, jack and tools in their secured storage locations. Check that the spare is not rubbing the body or brake parts and that the lug nuts remain fully seated.
Drive carefully to a tire shop or other suitable repair location, following the temporary-spare limits. Have the flat inspected: a puncture in the repairable tread area may have different options from sidewall, shoulder or wheel damage. Recheck the spare’s pressure and replace it with the correct full-size tire as soon as practical.
Frequently asked questions
Can I change a tire on the side of a highway?
Usually, no. A highway shoulder may leave you too close to fast-moving traffic, especially at night, on a curve or in poor weather. Turn on the hazard lights, move away from traffic if the vehicle can be moved safely, and call roadside assistance. Do not attempt the repair if you cannot establish a stable work area.
What should I do if the lug nuts will not come off?
Make sure the lug wrench is fully seated and apply steady, controlled pressure while the tire remains on the ground. Do not jump on the wrench, use a pipe extension or round off the nut. If it still will not loosen, stop and request roadside or professional help before raising the vehicle.
How far can I drive on a temporary spare tire?
Drive only within the speed and distance limits printed on the temporary spare or listed in the owner’s manual. Temporary spares can change braking, cornering and traction. Avoid unnecessary driving and have the original tire repaired or replaced promptly.
Can I use tire sealant instead of installing the spare?
Only if the tire manufacturer and vehicle manual approve it for that tire and the damage matches the product’s limits. Sealant generally is not an answer for a sidewall tear, a separated tire, a damaged wheel or a large puncture. When the damage is uncertain, use roadside assistance rather than relying on sealant.
For more help with this topic, use the Maintenance Repair guides.