Start by opening the laptop’s physical camera shutter or pressing its camera key, then restart Windows. Check Settings > Privacy & security > Camera and enable camera access for the required apps. Test the Camera app next. If the webcam remains missing or black, run the Get Help camera troubleshooter and inspect, roll back, or reinstall the camera in Device Manager.
1. Check the camera shutter, switch, or keyboard key
Many laptops can disconnect or cover the webcam without changing a Windows setting. Check this before granting permissions or reinstalling anything.
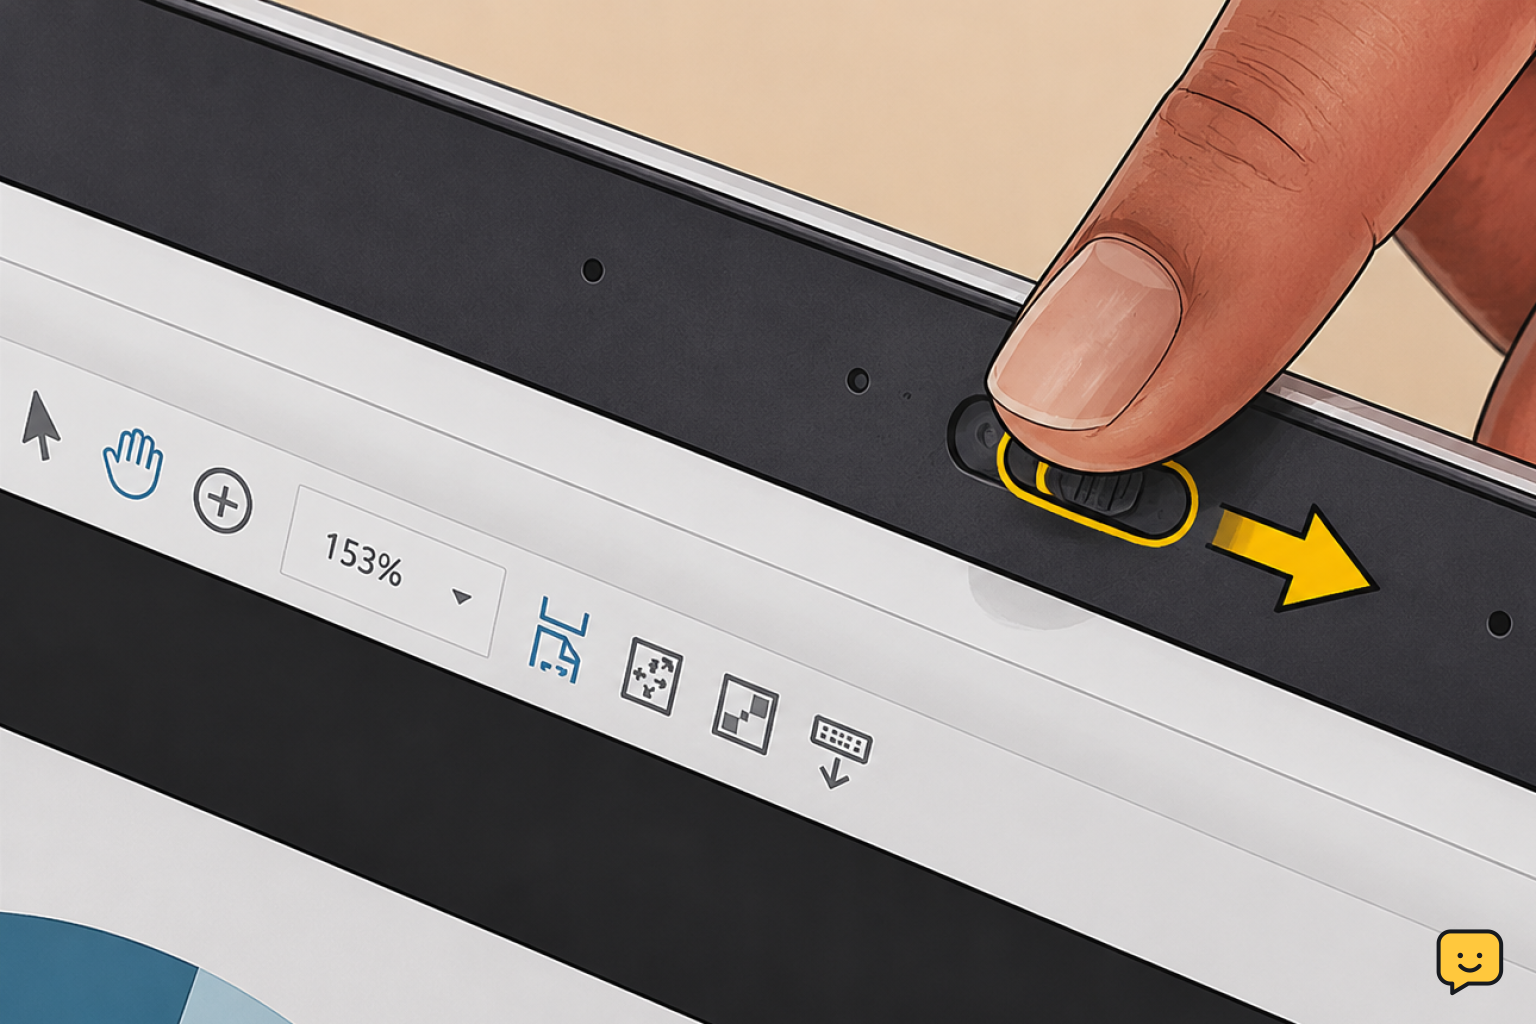
- Inspect the top edge of the display for a sliding privacy shutter. Move it until the lens is completely uncovered.
- Look along the laptop’s sides for a camera privacy switch.
- Check the function-key row for a camera icon. Press that key once; on some models, you must hold Fn while pressing it.
- Remove tape, a webcam cover, or any accessory blocking the lens.
- Restart the laptop, then open Start > Camera.
Verify: If the Camera app displays a live picture, the hardware is operating. Continue to the app-specific checks if the problem occurs only in a meeting or messaging app.
If it still fails: Leave the shutter open and continue to Windows privacy settings.
2. Allow camera access in Windows 11
Windows can block the webcam for every user, for individual Microsoft Store apps, or for conventional desktop programs.
- Open Settings.
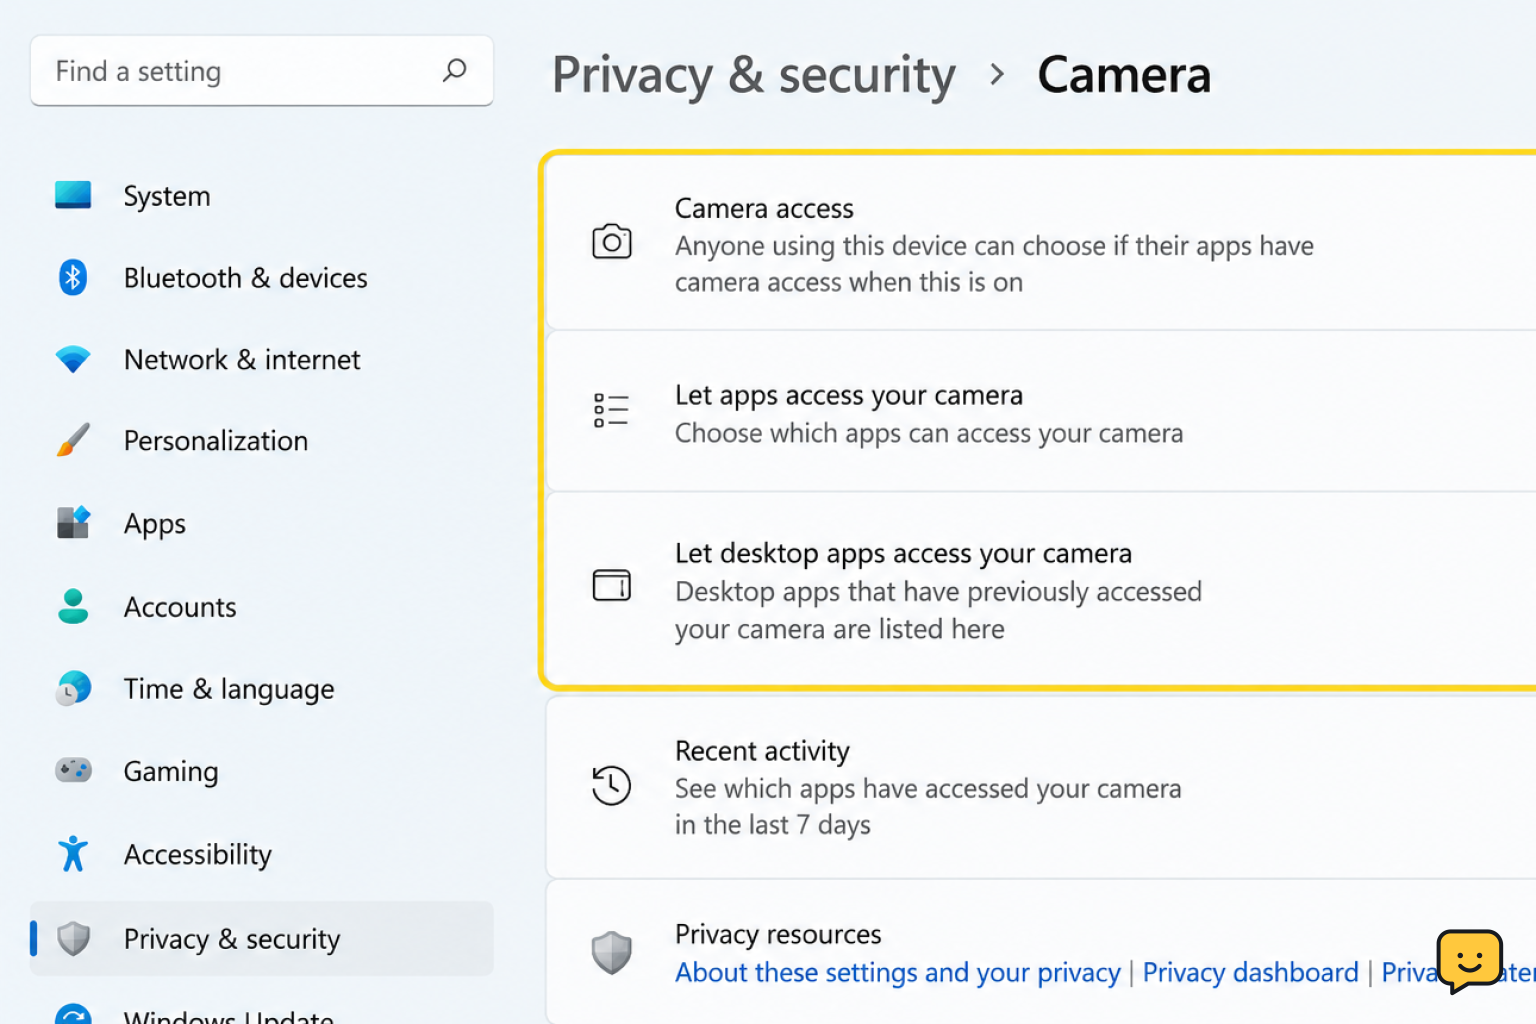
- Select Privacy & security > Camera.
- Turn on Camera access.
- Turn on Let apps access your camera.
- Enable the affected app if it appears in the app list.
- For programs installed outside the Microsoft Store, turn on Let desktop apps access your camera.
Close and reopen the affected program after changing these controls. Desktop programs are generally covered by the shared desktop-app switch rather than individual switches.
Verify: Reopen the Camera app first, followed by the program that originally failed.
If a setting is unavailable: An administrator, security policy, or device-management profile may control it. Do not attempt to bypass that restriction.
3. Test the webcam in the Camera app
The Windows Camera app separates a system-wide camera problem from a fault inside one program.
- Close video-call, browser, recording, and streaming programs.
- Open Start, type Camera, and launch the Camera app.
- If the laptop has more than one camera, use the switch-camera control to select the built-in webcam.
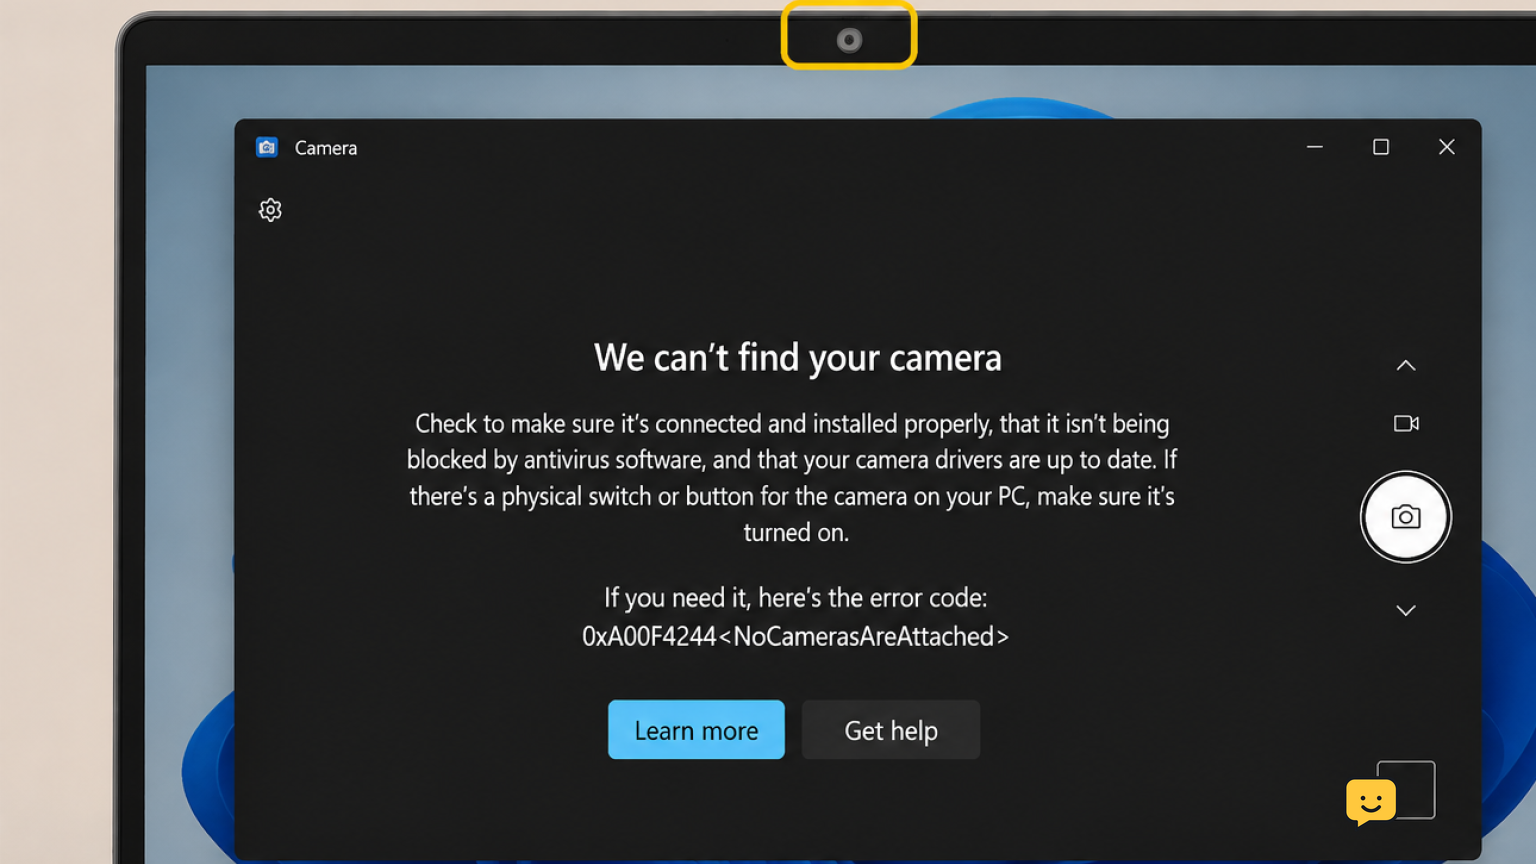
- Check whether you see a live picture, a black image, or a message saying that no camera is available.
If Camera works, the driver and hardware are probably functional. Focus on the affected app’s permission and camera selection. If Camera is black, recheck the shutter and close programs that may already be using the webcam. If Camera cannot find any device, continue to diagnostics and Device Manager.
4. Check the camera selected inside the affected app
An app can select a virtual camera, disconnected USB webcam, or another built-in sensor instead of the main webcam.
- Open the app’s Settings.
- Find its Video, Camera, or Devices menu.
- Select the entry that matches the laptop’s integrated or HD camera.
- Close any other app that could be using the webcam.
- Quit the affected app completely and reopen it.
For a browser-based call, also select the padlock or site controls beside the address and allow camera access for that site.
Verify: Use the app’s video preview or test-call feature. If the Camera app works but this preview does not, reinstalling the Windows camera driver is not the first choice; update or repair the affected app instead.
5. Run the Windows camera troubleshooter
Microsoft recommends starting Windows 11 camera diagnostics through the Get Help app.
- Open Start and search for Get Help.
- Open the app and search for camera troubleshooter.
- Follow the diagnostic steps and apply only the fixes that match the detected issue.
- Restart the laptop if requested.
- Open Settings > Windows Update, select Check for updates, and install applicable Windows updates.
Verify: Test the Camera app after the restart before opening other video programs.
If the troubleshooter cannot detect a camera: Continue to Device Manager to determine whether Windows can see the hardware.
6. Enable or rescan the camera in Device Manager
Device Manager shows whether Windows detects the built-in webcam and whether the device has been disabled.
- Right-click Start and select Device Manager.
- Expand Cameras. If that category is absent, also check Imaging devices and Sound, video and game controllers.
- If the camera has been disabled, right-click it and select Enable device.
- If no camera appears, open the Action menu and select Scan for hardware changes.
- Restart the laptop and check Device Manager again.
Verify: An enabled camera should appear without a warning symbol and should be available to the Camera app.
If the device remains missing: Do not install drivers from an unrelated laptop model. Use the exact model’s manufacturer support page or proceed to the hardware-isolation checks.
For a similar Windows device-detection checklist, see how to fix a missing second monitor.
7. Roll back, update, or reinstall the camera driver
Use this order so that you can reverse a recent driver change before removing the device.
- In Device Manager, right-click the camera and select Properties.
- Open the Driver tab. If the problem began immediately after an update and Roll Back Driver is available, select it and restart.
- If rollback is unavailable or does not help, right-click the camera, select Update driver, and let Windows search automatically.
- If the camera is still unavailable, right-click it and select Uninstall device. Do not select an option to remove driver software unless the laptop manufacturer specifically instructs you to do so.
- Restart Windows so it can detect the camera again.
Verify after each change: Open the Camera app. Stop as soon as the live preview returns.
If Windows does not restore the device, download only the camera or chipset package listed for the exact laptop model and Windows version on the manufacturer’s official support site.
8. Isolate a firmware or hardware problem
A camera that never appears in Device Manager may be disabled outside Windows, disconnected internally, or faulty.
- Shut down the laptop fully, wait several seconds, and turn it on again.
- Search the manufacturer’s support site for the exact model and a documented BIOS or UEFI camera setting.
- If the documentation confirms such a setting, verify that the integrated camera is enabled. Do not alter unrelated security, boot, storage, or processor settings.
- Return to Windows, scan for hardware changes, and test the Camera app.
If the camera appears in Device Manager but fails only in one app, the problem remains software-specific. If it appears but produces a black image everywhere with the shutter open, reinstall the official driver before seeking service.
Stop condition: If the integrated camera is enabled in documented firmware settings but remains absent from Device Manager, arrange service with the laptop manufacturer or a qualified repair provider. That result points away from a normal Windows permission problem.
Frequently asked questions
Why is my Windows 11 laptop camera showing a black screen?
A black screen usually means the lens is covered, the wrong camera is selected, another program is using the webcam, or the driver is not responding. Open the physical shutter, close other video apps, restart the laptop, and test with the Windows Camera app. If every app remains black, inspect the camera in Device Manager.
Why is my camera missing from Device Manager?
The camera may be physically disabled, hidden under another device category, disabled in firmware, missing its driver, or no longer detected by the hardware. Check Cameras, Imaging devices, and Sound, video and game controllers, then scan for hardware changes. If it remains absent after a restart and documented firmware check, contact the laptop manufacturer.
Why does the Camera app work but my meeting app does not?
The meeting app probably lacks permission or has selected the wrong video device. Enable camera access under Settings > Privacy & security > Camera, including desktop-app access when applicable. Then open the meeting app’s video settings and select the laptop’s integrated camera instead of a virtual or disconnected webcam.
Should I uninstall the camera driver in Windows 11?
Yes, but only after checking the shutter, permissions, app selection, troubleshooter, and driver rollback. Uninstall the camera through Device Manager and restart so Windows can detect it again. If it does not return, use the official driver package for the exact laptop model rather than a third-party driver download.
Can a Windows update stop a laptop camera from working?
Yes, a driver or system change can coincide with a camera failure. If the problem started immediately after an update, open the camera’s Device Manager properties and use Roll Back Driver when that option is available. Restart and test before reinstalling anything. Also check the laptop manufacturer’s support page for a model-specific driver.
Browse more Computers & Internet guides for help with this topic.