Choose a backpack in this order: decide where and how long you will use it, estimate the gear you must carry, select an appropriate capacity, measure your torso, then try the loaded pack. The right pack keeps most weight supported by the hips, leaves your shoulders comfortable, stays stable while walking and has no pressure points.
For more help with this topic, use the Camping Outdoors guides.
Match the backpack to the trip and load
The best backpack capacity depends on trip length, equipment and conditions, not on the bag’s external size alone. A small daypack suits short outings with minimal equipment; a larger hiking or trekking pack is needed when you add shelter, sleep gear, food, extra clothing or safety equipment.
Start by listing the largest load you expect to carry. Include water, food, clothing, navigation equipment, first aid and weather protection. Then compare the packed volume with the manufacturer’s stated capacity. As a rough planning guide, the Pedal Project places minimalist daypacks at up to 10 liters and overnight or extended day-hike packs around 10-30 liters; treat those ranges as starting points rather than a substitute for your actual gear list.
Choose the smallest capacity that holds the required equipment without forcing you to strap essential items to the outside. If you regularly carry bulky winter clothing, a tent or cooking equipment, allow extra volume. If the pack is only for commuting, travel or casual recreation, prioritize access, laptop protection or organization instead of a hiking frame.
If the load does not fit, first remove duplicate or optional items and repack by volume. If essential equipment still has no secure place, move up one capacity category rather than overloading the smaller pack.
Choose the frame and support for the weight
Backpack frame choice should follow the weight and stability your activity requires. A frameless or lightly structured pack can work for a small load, while a pack with a rigid or internal frame gives more support when the load becomes heavier or awkward. REI’s backpack guide identifies trip length, capacity, fit and frame type as the main selection factors.
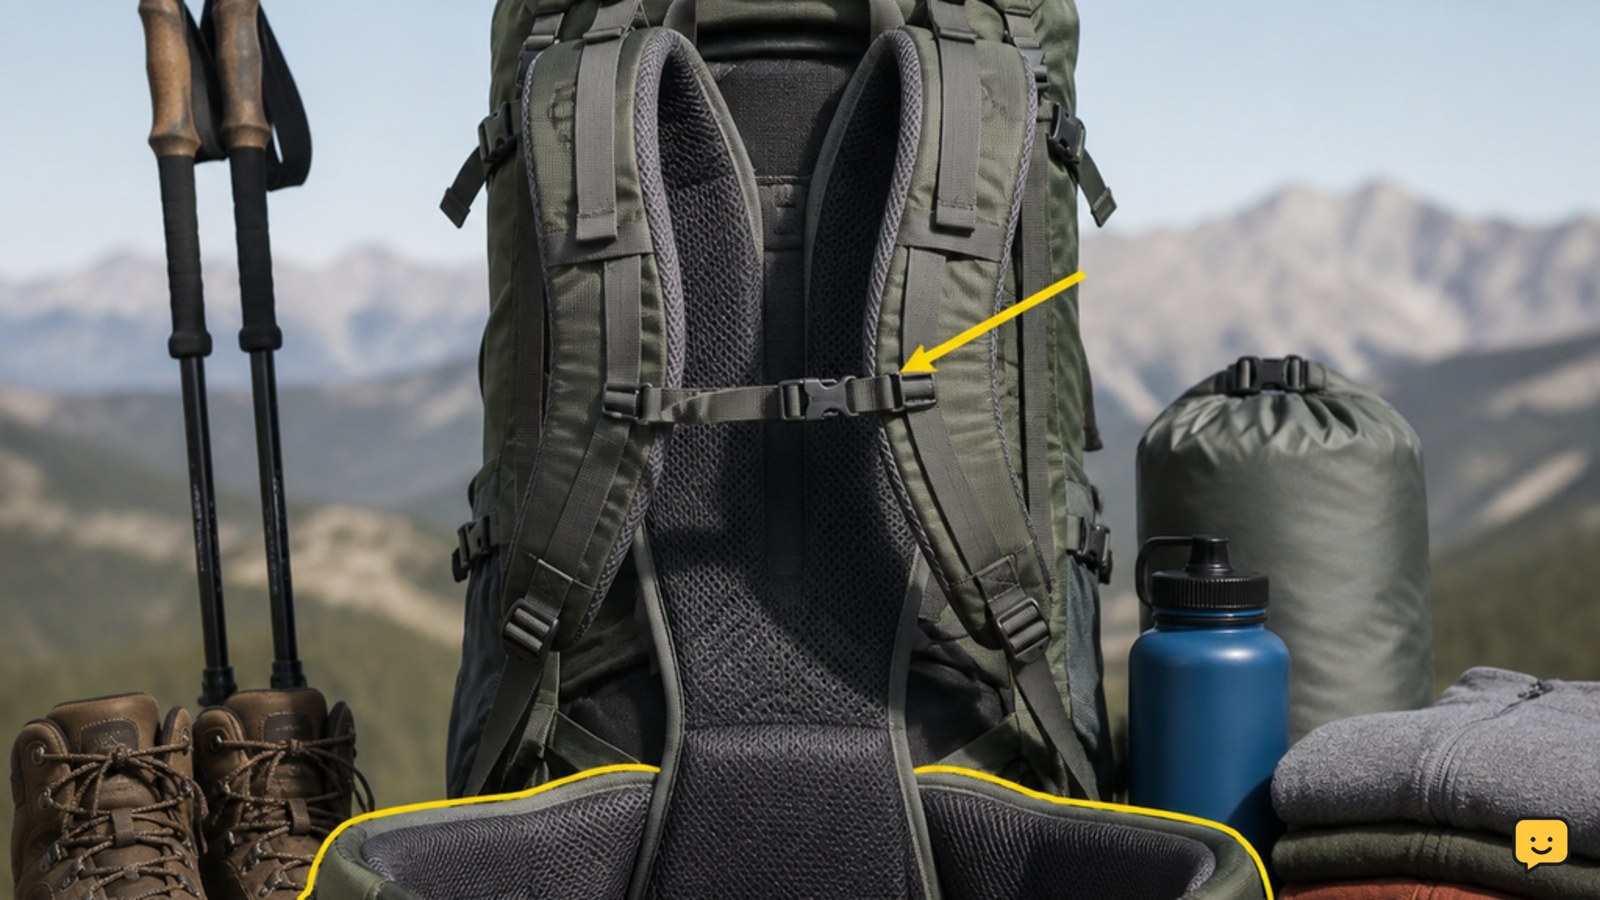
Look for a padded hip belt on packs intended to carry substantial outdoor loads. The belt should sit over the hip bones rather than around the waist, because that position lets the pelvis support much of the load. Shoulder straps should hold the pack close without carrying all the weight.
Use a simple comparison when two packs have similar capacity: choose the one that keeps the load close to your back, offers useful compression straps and lets you adjust the torso and hip-belt fit. Extra pockets, zippers and attachment loops are useful only if they match how you pack; unnecessary features add complexity and can create snag points.
For a remote outing, pack organization must leave safety equipment accessible. This wilderness safety checklist can help you account for shelter, water, signaling and other essentials before choosing a smaller capacity.
Use this wilderness safety checklist to account for shelter, water, signaling and other essentials before choosing a smaller capacity.
Measure torso length before selecting the size
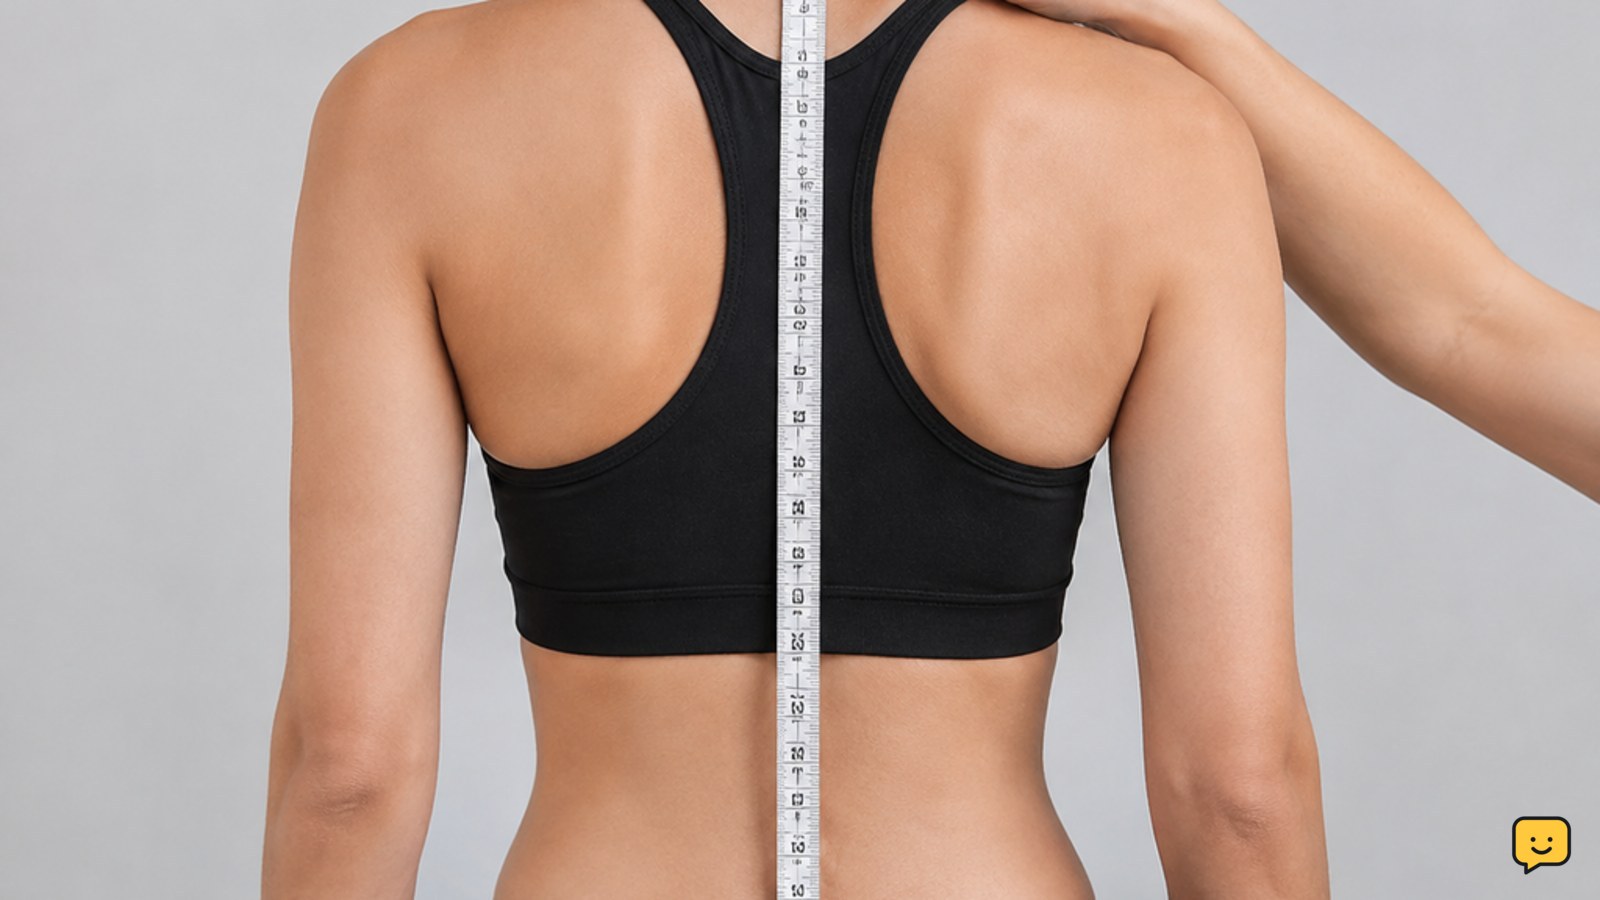
Backpack size is based primarily on torso length, not height. Washington Trails Association describes the measurement as the distance from the prominent vertebra at the base of the neck to the lower point near the top of the hip bones.
- Tilt your head forward and locate the prominent vertebra where your neck meets your shoulders.
- Place your hands on your hips with your thumbs pointing toward your back. The line between your thumbs marks the top of the hip bones.
- Measure between those two points along your spine, or ask another person to measure it accurately.
- Compare the result with the backpack manufacturer’s torso-size range. If your measurement falls between sizes, use the adjustment range and the loaded fitting test to decide.
A retailer’s fitting tool or measurement service is useful when the result is uncertain. Do not select a pack solely because it is labeled small, medium or large; those labels vary between manufacturers and models.
If the pack’s adjustment range does not include your torso length, stop comparing that model and choose a size or design with a compatible range.
Adjust the loaded backpack in the correct order
A backpack fits correctly when the hip belt is secure over the hip bones, the shoulder straps are close without digging in, and the load remains stable as you walk. Load the pack with the weight you expect to carry before judging comfort; an empty pack can hide poor fit.
- Loosen the shoulder straps, load lifters and sternum strap.
- Put on the pack and position the hip belt so it wraps over the hip bones. Tighten it firmly but not so tightly that it restricts breathing or causes pressure.
- Pull the shoulder straps down and back until the pack sits close to your back. They should not leave large gaps, but they should not press sharply into your shoulders.
- Adjust the load lifters, if fitted, so the top of the pack moves toward your upper back without pulling the shoulder straps upward.
- Buckle and adjust the sternum strap so the shoulder straps stay in place. It should not press against your throat or chest.
- Walk, bend, climb a step and turn your upper body. Recheck every strap after the load settles.
Success looks like a stable pack, a level hip belt, free arm movement and no rubbing or numbness. If your shoulders carry nearly all the weight, loosen the shoulder straps, reposition the hip belt and repeat the sequence. If the belt still slips or the frame contacts your body painfully, try another torso size or model.
Check access, weather protection and durability
Backpack features should solve a specific packing problem. A top-loading pack can suit simple hiking loads, while front, side or panel access may be more convenient when you need to reach equipment without unpacking everything. Test every pocket with the objects you actually carry.
For wet conditions, distinguish water-resistant fabric, covered zippers and a separate rain cover from a fully waterproof construction. A pack cover can protect the exterior, but items that must stay dry should also be placed in waterproof liners or bags. For related shelter preparation, see this guide to checking tent waterproofing.
Inspect stitching around the shoulder straps, hip belt, grab handle and compression points. Pull each buckle closed, open every zipper and check that adjustment webbing feeds smoothly. Confirm that the pack stands or rests securely when loaded and that loose straps can be restrained.
If a zipper catches, a buckle will not close or a seam shows damage before purchase, choose another example or model. Do not rely on a damaged load-bearing component for a backcountry trip.
For related shelter preparation, see this guide to checking tent waterproofing.
Verify the final choice with a realistic walk
The final backpack choice is verified by a loaded walk, not by appearance or a brief empty fitting. Fill the pack with your normal equipment or an equivalent weight, adjust it using the fitting sequence, and walk for at least several minutes on stairs or uneven ground if possible.
Check four outcomes: the belt stays over the hip bones, the pack does not sway when you turn, the shoulder straps remain comfortable, and nothing inside creates a hard pressure point. Also confirm that you can reach water, navigation equipment and weather protection without removing the pack.
Try a different size or suspension design if the pack feels comfortable only when very lightly loaded. If it fits well but lacks room for essential equipment, increase capacity. If it has enough room but moves excessively, improve the internal packing balance and tighten compression straps; if movement remains, select a better-fitting frame.
Keep the receipt and model information until the pack passes a complete home fitting. Do not take an unverified pack on a long, remote or severe-weather outing.
Frequently asked questions
What backpack size is best for a day hike?
A day-hike pack is usually the smallest pack that safely holds your water, food, clothing, first-aid supplies, navigation tools and weather protection. The required volume depends on conditions and equipment. The Pedal Project gives up to 10 liters as a minimalist daypack range and 10-30 liters for overnight trips or extended day hikes, but your packed gear should make the final decision.
Should a backpack be tight or loose?
A backpack should be secure rather than tightly compressed against your body. The hip belt must stay over the hip bones, the shoulder straps should have close contact without digging in, and the sternum strap should stabilize the straps without restricting breathing. Walk with the intended load; loosen or reposition the pack if you feel numbness, sharp pressure or rubbing.
How do I know if a backpack torso length is correct?
The torso length is correct when the hip belt reaches the hip bones while the shoulder straps and load lifters sit naturally against your body. Measure from the prominent vertebra at the base of the neck to the top of the hip bones, then compare that measurement with the manufacturer’s range. Brand size labels alone are not reliable.
Is a backpack rain cover enough to keep gear dry?
A rain cover helps protect the pack exterior but should not be treated as a guarantee that all contents will stay dry. Use waterproof liners or bags for clothing, electronics, maps and other critical items, especially in prolonged rain. Check the pack’s stated construction and zipper design before relying on it in wet conditions.