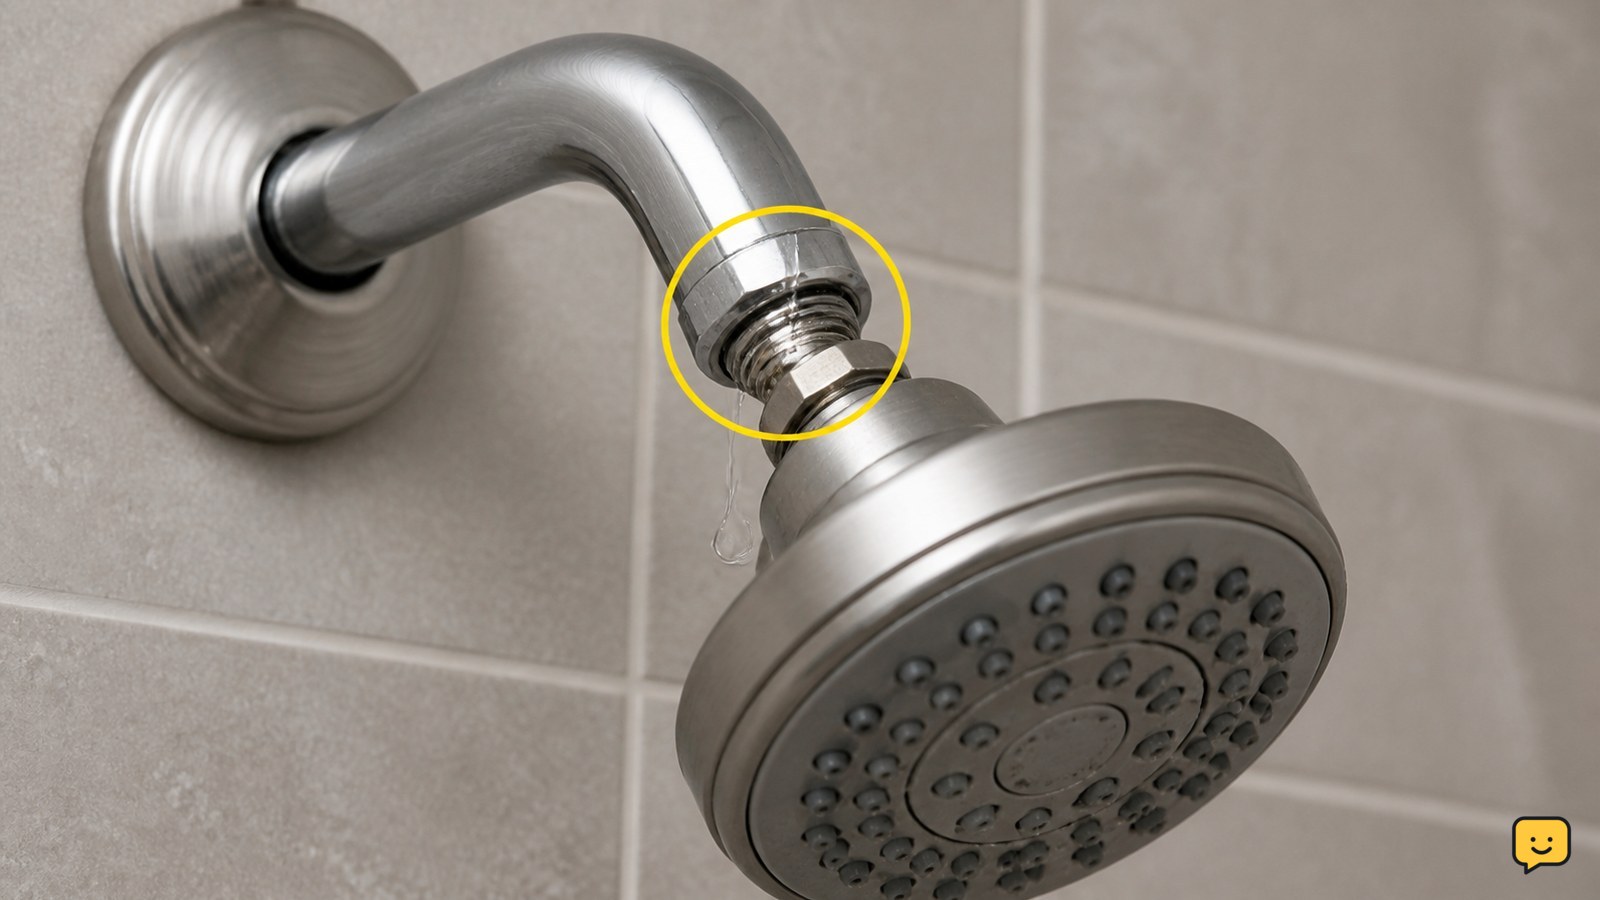
To fix a leaking shower head, first identify where water escapes. A leak at the shower-arm connection usually needs tightening, a new washer or O-ring, or thread seal tape. Spray from blocked nozzles may need mineral cleaning. If the head drips after the valve is fully off, the shower valve cartridge may need replacement. Shut off water before disassembly.
For more help with this topic, use the Plumbing Fixtures guides.
Check where the shower head leaks
A leaking shower head is easiest to repair when you match the leak location to the likely cause. Dry the shower head and shower arm, then turn the water on briefly. Watch the first place that becomes wet.
| Observable symptom | Likely cause | First action |
|---|---|---|
| Water escapes where the head meets the arm | Loose connection, worn washer, O-ring, or damaged threads | Remove and inspect the seal |
| Water sprays sideways from the face | Mineral buildup blocking or redirecting nozzles | Clean the spray plate |
| A steady drip continues after shutoff | Water may be passing through the shower valve | Inspect the cartridge or valve service parts |
Do not start by tightening every part. The correct fix depends on the wet location, and excessive force can damage the shower arm or finish.
Tighten and reseal the shower-head connection
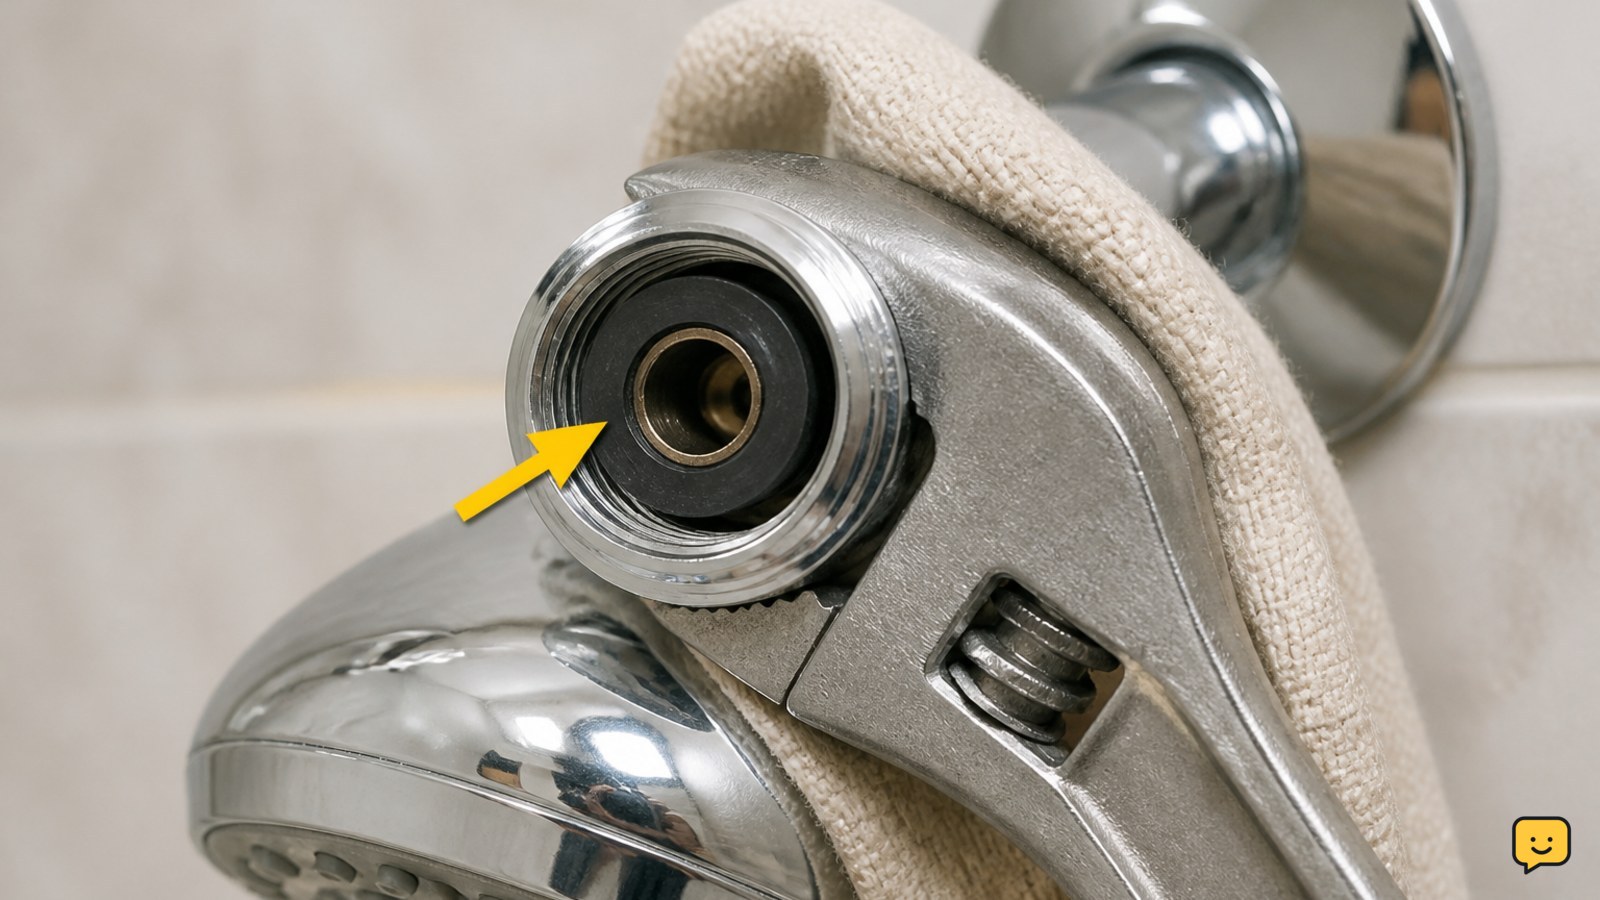
A leak at the threaded shower-head connection usually responds to a clean washer, correct alignment, and modest tightening. Turn the water off, then unscrew the shower head by hand; use a cloth-covered wrench only if it will not loosen.
- Remove the old rubber washer or O-ring from inside the shower-head inlet.
- Clean grit and old tape from the shower arm threads without scratching them.
- Fit a matching replacement washer or O-ring. The seal sits inside the head; it should not be twisted or pinched.
- If the joint seals against the shower-arm threads, wrap fresh plumber’s thread seal tape around the male threads in the direction of tightening. Keep tape away from the open end so pieces cannot enter the head.
- Thread the shower head on by hand until snug, then make only a small additional turn with a protected wrench.
Turn the water on and inspect the joint for a full minute. A dry connection during flow confirms the seal is working. If it leaks immediately, remove it and check that the washer is present, centered, and the threads started straight. High Sierra Showerheads identifies tightening the connection and cleaning or replacing the washer or O-ring as common connection-leak fixes.
Clean mineral buildup from the spray face
Mineral buildup can redirect water through the shower-head nozzles and make a clean connection appear to leak. Remove the head only if cleaning the spray face in place does not work.
- Wipe the nozzles with a damp cloth or gently brush them with an old toothbrush.
- For visible limescale, soak the removable shower head or spray face in white vinegar for one to two hours, following the fixture manufacturer’s material guidance.
- Rinse thoroughly and run water through the head briefly before reinstalling it.
- Check that the inlet washer has not shifted during cleaning, then reconnect the head.
The expected result is an even spray with no side jets from the face. Mira Showers recommends a one- to two-hour white-vinegar soak for limescale deposits. Do not use vinegar on a finish or material that the manufacturer says is incompatible, and do not poke metal tools into soft rubber nozzles.
Test for a shower valve cartridge leak
A shower head that keeps dripping after the handle is fully off may be receiving water through a worn shower valve cartridge rather than leaking at the head itself. Wait several minutes after shutoff to distinguish trapped water from a continuing supply.
- Close the shower handle completely and dry the shower head.
- Catch the remaining drops in a cup or place a dry tissue under the head.
- Check again after several minutes. A few final drops can be residual water; a continuing drip suggests the valve is not closing fully.
- Turn off the water supply before removing the handle, trim, or cartridge retainer.
- Use the faucet brand and model to match the replacement cartridge, and follow its service instructions. Keep parts in removal order.
After reassembly, open the shutoff slowly and test both the valve area and shower head. The repair has succeeded when the head stays dry after the remaining water drains and the handle controls flow normally. A repair video supplied for this topic also points to cartridge replacement for a persistent drip, but cartridge designs vary by manufacturer.
What to do if the leak remains
If the shower head still leaks after a new seal and cleaning, inspect the threads and the shower arm before trying more tape. Cross-threading, cracks, corrosion, or a damaged wall fitting can prevent any washer from sealing.
- Shut the water off again and remove the head.
- Look for flattened rubber, split O-rings, damaged threads, or a hairline crack in the head inlet.
- Replace the shower head if its inlet or body is cracked.
- Stop if the shower arm moves in the wall or moisture appears behind the escutcheon; forcing it can worsen a concealed leak.
If the connection is dry but water continues from the head after the valve is off, the valve cartridge or valve body remains the likely fault. If the cartridge is inaccessible, seized, or the shutoff cannot isolate the fixture, use a plumber rather than opening the wall or applying excessive force.
Frequently asked questions
Why does my shower head drip after I turn it off?
A few drops immediately after shutoff are usually water draining from the shower head and arm. If dripping continues for several minutes, water may be passing through a worn shower valve cartridge. Confirm the head connection is dry, then shut off the supply before inspecting or replacing the cartridge.
Should I use plumber’s tape on a leaking shower head?
Use plumber’s thread seal tape only on a threaded joint designed to seal on its threads. A shower head that seals with an internal rubber washer may not need tape. Remove old tape, keep the new tape away from the pipe opening, and avoid overtightening.
Can vinegar fix a leaking shower head?
Vinegar can help when mineral buildup redirects water through the spray nozzles, but it will not repair a worn washer, cracked fitting, or leaking valve cartridge. Soak a compatible removable head or spray face for one to two hours, rinse it, and test the spray again.
When should I call a plumber for a shower-head leak?
Call a plumber if the shower arm moves inside the wall, water leaks behind the trim, the shutoff will not close, fittings are severely corroded, or a cartridge cannot be removed safely. These conditions can turn a small fixture repair into a concealed water leak.