To sew a button, thread a needle, knot the thread, anchor it on the garment’s inside, then pass the needle through each buttonhole several times. Keep a small thread gap beneath a flat button so the fabric can close around it. Finish by wrapping the thread beneath the button, tying several secure knots, and trimming the tail.
Choose the correct button and thread
A garment button must match the original button’s type, size, hole pattern, and weight before you sew it on.
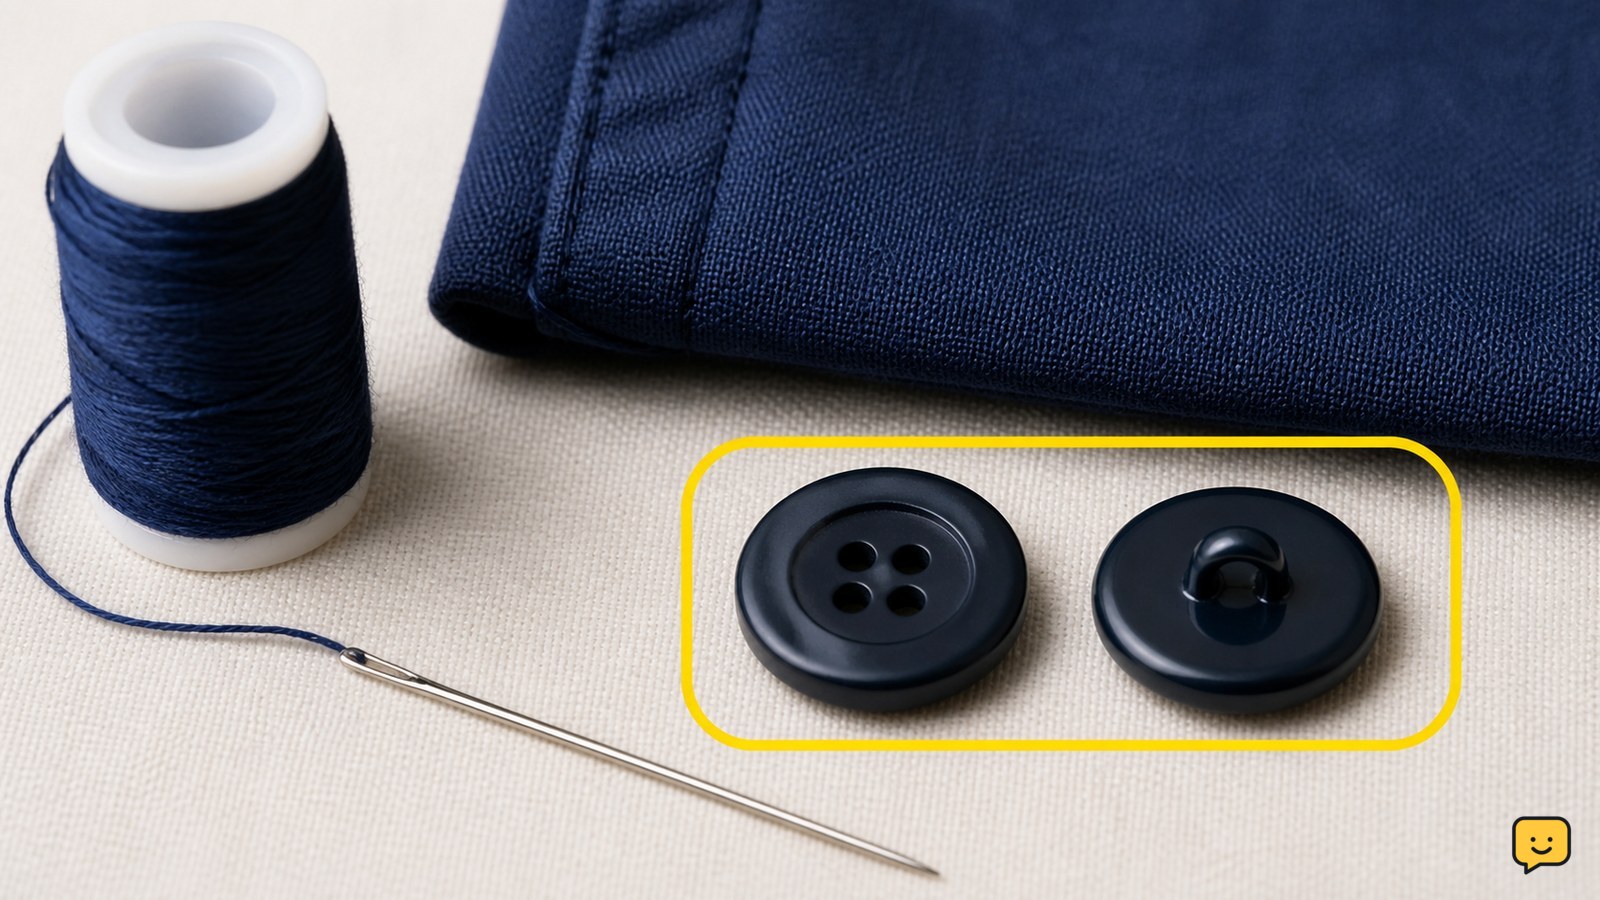
Most shirt and coat buttons are flat buttons with two or four holes. A shank button has a raised loop on the back instead of holes through the face. Match the replacement as closely as possible so it sits correctly and passes through the existing buttonhole.
Choose polyester all-purpose thread for most washable clothing. Use thread that matches the garment or button, and avoid using a very fine thread on a heavy coat button. A sharp hand-sewing needle should pass through the fabric without forcing.
Mark the original button position
The correct button position is the point where the existing buttonhole closes flat without pulling the garment out of shape.
- Close the garment and align the edges, seams, and any neighboring buttons.
- Mark the center of the buttonhole on the fabric with a fabric pencil, removable chalk, or a small temporary stitch.
- Open the garment and place the replacement button over the mark.
Check the placement from the outside before stitching. If the button sits too high or low, the front edges will not align even if the sewing is strong.
Sew a flat button with two or four holes
A flat button is secure when the thread crosses its holes evenly and leaves a small flexible gap between the button and fabric.
- Cut about 18 to 24 inches of thread, pass it through the needle, and pull the ends together. Tie a firm knot at the doubled end.
- Insert the needle from the garment’s inside at the marked position. Make two or three small stitches close together to anchor the thread.
- Place the button over the anchor and pass the needle up through one hole, then down through the opposite hole. Repeat this motion six to eight times for light clothing.
- For a four-hole button, sew across one pair of holes first, then the other pair. Use parallel lines or an X pattern that matches nearby buttons.
- Keep the button slightly raised from the fabric. A toothpick or the tip of a needle laid beneath the button can preserve this small gap while you sew.
After the final pass, bring the needle to the garment’s inside without pulling the button tightly against the fabric. The button should stay in place while still allowing the fabric to fold around it.
Wrap and tie off the button securely
A thread shank beneath a flat button protects the stitches from rubbing and gives the button room to move through its buttonhole.
- Remove the temporary spacer, if you used one.
- Bring the needle up beside the button, but not through a hole, and wrap the thread around the stitches beneath the button four to six times.
- Take the needle to the garment’s inside and make two small stitches through the fabric near the original anchor.
- Loop the thread around the needle to form a knot, pull it snug, and repeat once or twice.
- Trim the thread close to the final knot without cutting the fabric or nearby stitches.
The finished button should not wobble excessively, and the thread wraps should form a compact stem rather than a loose tangle.
Sew a shank button without crushing the fabric
A shank button is sewn through its rear loop, so it does not need the thread gap used for a flat button.
- Anchor the knotted thread on the garment’s inside at the marked position.
- Pass the needle through the fabric and then through the button’s rear shank.
- Repeat the pass through the shank six to eight times, keeping the stitches aligned under the button.
- Return the needle to the inside, make two securing stitches, and tie two or three knots.
- Trim the thread close to the knot.
Do not pull a shank button tightly against delicate fabric. If the button tilts or the shank presses into the garment, loosen the stitches and resew with less tension.
Verify the repair before wearing the garment
A successfully sewn button remains aligned, passes through the buttonhole, and does not distort the surrounding fabric.
- Close and open the buttonhole two or three times slowly.
- Check that the garment edges meet their original alignment and that the button does not pull the fabric into radiating wrinkles.
- Gently tug the button in several directions. The stitches should hold without widening the fabric holes.
- Inspect the garment’s inside for loose thread ends, sharp needle fragments, or a knot that could scratch the wearer.
If the button feels loose, add more passes through the holes and reinforce the inside anchor. If the fabric puckers, remove the stitches carefully and resew with a looser thread gap and lighter tension.
Frequently asked questions
How much thread should I use to sew on a button?
Use about 18 to 24 inches of thread for one button. Doubling the thread gives a stronger working strand, while this length is long enough for several passes and a secure tie-off without creating excessive tangles.
How many stitches does a button need?
A light shirt button usually needs six to eight passes through each pair of holes. A heavy coat button may need additional passes and stronger thread. Stop adding stitches when the button is stable and the fabric begins to pull.
Should a button be sewn tightly against the fabric?
A flat button should have a small thread gap beneath it so the fabric can wrap around the button when the garment closes. A shank button does not need that gap because its raised loop already creates space.
What can I use if I do not have a matching button?
Use a replacement with the same hole pattern and a similar size and weight. A button that is too large may not pass through the buttonhole, while one that is too small may slip through or fail to hold the garment closed.
For more help with this topic, use the Crafts Sewing guides.