To learn how to snowboard, take a beginner lesson, wear a helmet and use a gentle open slope. Start with your stance and balance, then practice skating with one foot strapped in. Learn to stop on your heel edge and toe edge before making J-turns. Link turns only when you can control speed and stop consistently.
Choose a beginner setup and practice area
A first snowboard session works best with forgiving equipment and a gentle, open slope. Begin on a designated beginner area rather than a steep or crowded trail. A lesson is the safest alternative to learning alone because an instructor can adjust your stance and explain local slope rules.
Ask a rental shop for a beginner-friendly board and bindings that match your boot size. Your boots should feel snug without creating sharp pressure points, and both bindings should hold the boots firmly. Check that straps close fully and that nothing moves when you rock the boot against the binding.
Verify the setup: you can flex your knees comfortably, both feet stay secure, and you can release the bindings using the equipment’s normal mechanism. If any part feels loose or painful, stop before sliding.
Set your stance and learn how to fall
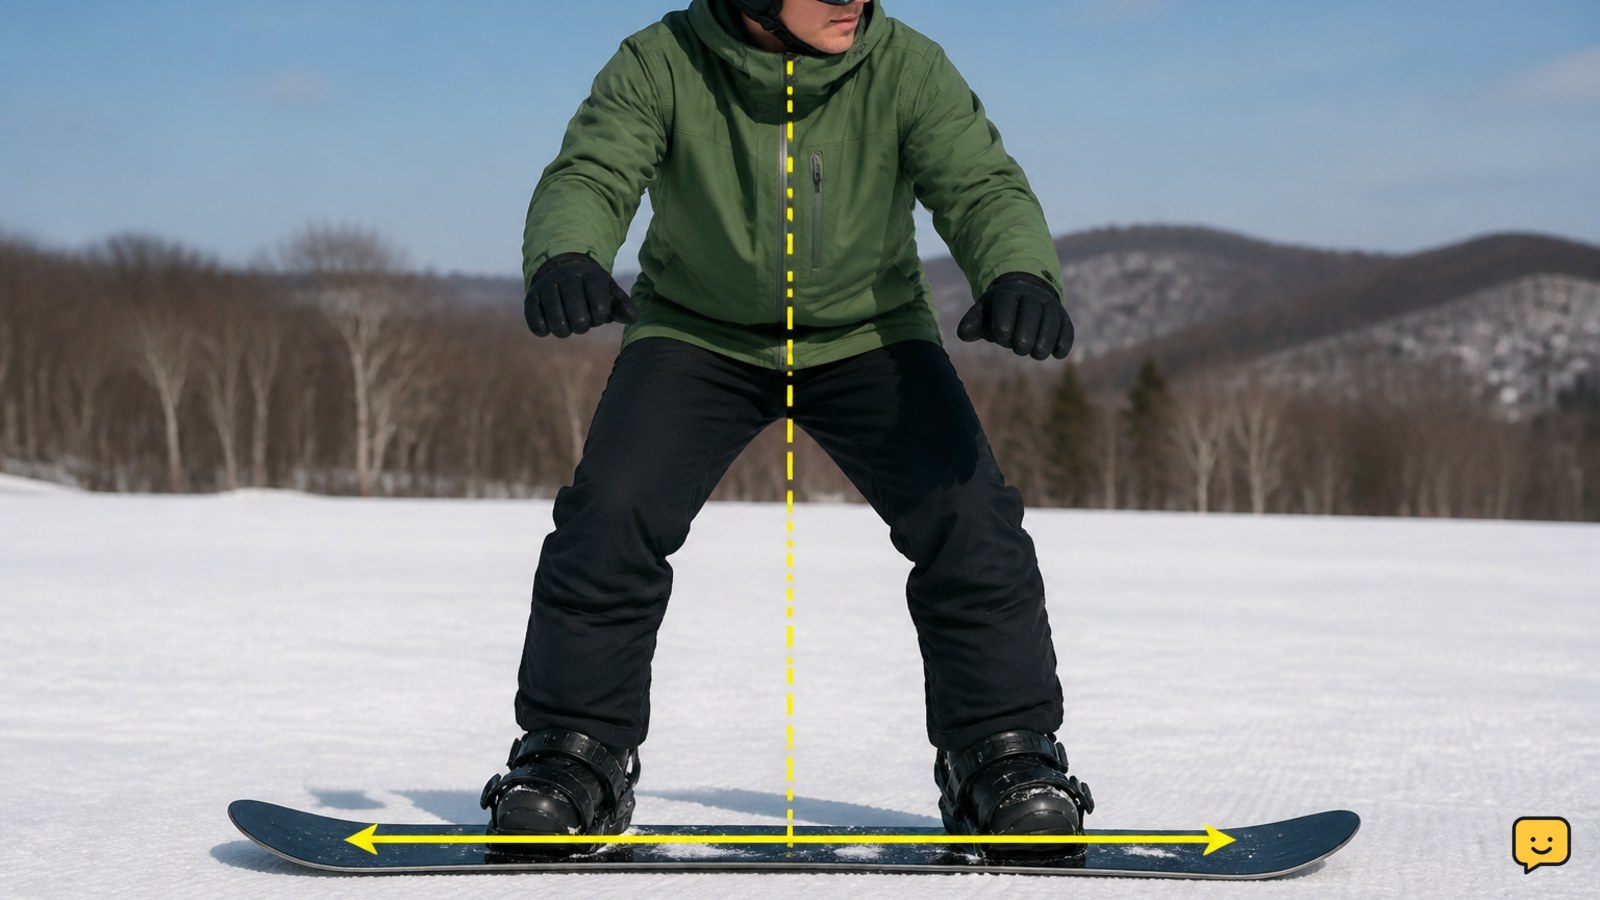
Your snowboard stance places both feet across the board, with your shoulders and hips facing mostly sideways to the direction of travel. The front foot is the foot nearest the nose of the board. If you do not know which foot should lead, try standing on a smooth, safe surface and notice which foot naturally steps forward when you begin to slide; an instructor or rental technician can also help.
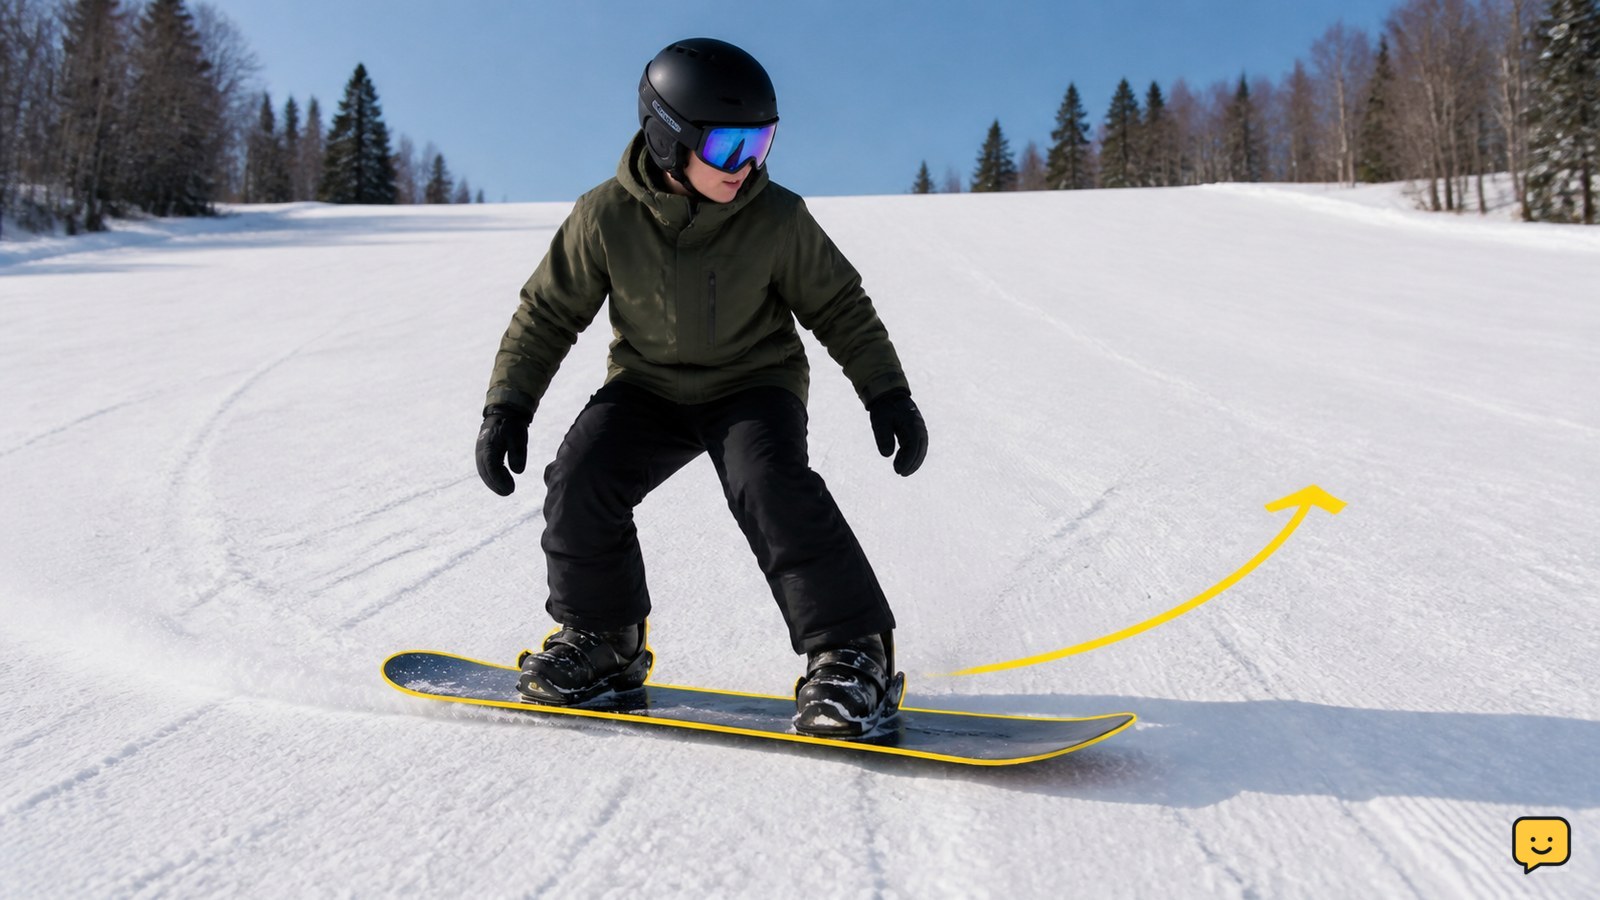
With the board across the slope and both feet strapped in, bend your knees and keep your weight centered over the board. Keep your hands forward and your eyes looking where you want to travel, not down at the board. Avoid sitting back, locking your knees or leaning sharply uphill.
Practice falling on the stationary board. Lower your center of gravity and try to fall to your knees or onto the padded side of your body rather than reaching straight back with stiff hands. Stand up by rolling onto your knees, placing your hands carefully, and rising without pointing the board downhill.
Success check: you can hold a relaxed, bent-knee stance for several breaths and stand up without the board sliding unexpectedly. If you repeatedly catch an edge while standing, return to flatter terrain and keep your weight centered.
Skate with one foot strapped in
Skating teaches you to move across flat snow and prepares you for getting on and off a lift. Strap your front foot into its binding and leave the back foot free. Place the free foot behind the board, then push against the snow with small, controlled steps while keeping your strapped foot centered.
Use the free foot to push, then place it briefly on the board near the rear binding when gliding. Keep the board pointing across the slope or along a safe flat path. To slow down, turn the board slightly across your direction of travel and use gentle pressure through the edge.
Do not skate through a lift queue until you can stop and step off the board without falling into other riders. At the top or bottom of a lift, follow the resort’s instructions and keep the board pointed where staff direct you.
Success check: you can push, glide a short distance and stop with your free foot without twisting your upper body. If the board shoots forward, reduce the push and practice on flatter snow.
Control speed with the heel-side and toe-side edges
Snowboard speed is controlled by changing how much an edge grips the snow, not by dragging one foot. With both feet strapped in on a gentle slope, face across the hill and practice the heel-side edge first. Bend your knees, keep your hips over the board and press your heels down gradually until the board slows and stops.
For the toe-side edge, face your chest more toward the downhill side, keep your knees bent and press your shins gently into the front of the boots. Keep your hips over the board instead of bending sharply at the waist. Use small movements; a large edge change can make the board stop abruptly or catch.
Practice traversing across the slope, stopping, and starting again. Your board should travel sideways across the hill rather than pointing straight downhill for long periods.
Success check: you can choose a heel-side or toe-side stop before gaining uncomfortable speed. If you cannot stop, sit down safely or steer across the slope toward an open area, then return to flatter terrain. Never continue toward a fence, drop-off, lift tower or crowded area.
Make J-turns before linking turns
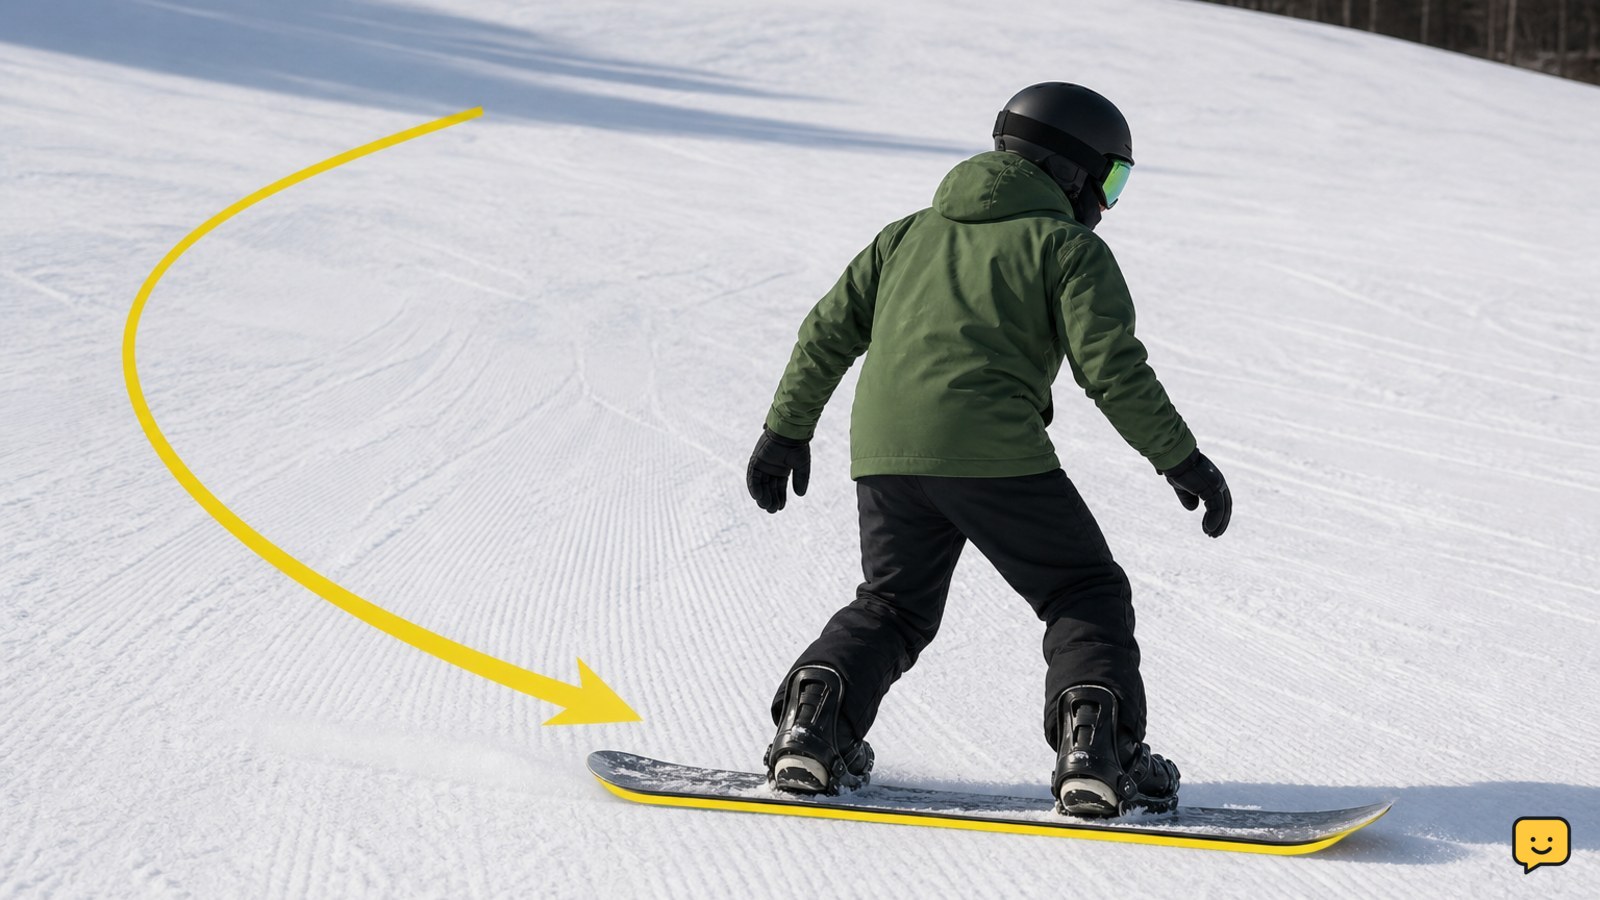
A J-turn combines a short glide downhill with an intentional turn back across the slope. Begin with the heel-side edge: point the board slightly downhill, keep your knees bent, then increase heel pressure as the board arcs back across the hill and comes to a stop. The board’s path should resemble a letter J.
Repeat the drill on the toe-side edge. Start across the slope, release some edge pressure to glide, then guide the board downhill briefly before increasing toe pressure to turn back uphill across the slope.
Look toward the open space where you want to finish. Keep your shoulders aligned with the board and let your legs create the edge change. Do not force the turn by swinging your arms or twisting your upper body.
Success check: each J-turn ends across the slope with a controlled stop, and you can repeat it on both edges. If the board keeps running downhill, increase edge pressure earlier and practice a smaller release on a gentler section.
Link turns only when speed stays predictable
Linked turns alternate between the heel-side and toe-side edges without stopping after every arc. Start from one controlled J-turn, release pressure gradually, guide the board through the fall line, and build the opposite edge until the next turn finishes across the slope.
Keep the turns wide and deliberate. Look through the turn toward the next open area, leave space for other riders, and stop at the side of the run where you are visible. The snowboard should change edges smoothly rather than pivot suddenly.
Move to a slightly longer or busier beginner run only after you can link several turns while controlling speed, stopping on either edge and avoiding other slope users. The REI beginner progression emphasizes stance, skating, crossing a slope, J-turns and linked turns; Burton similarly begins with one-foot skating before progressing to riding skills.
Do not progress yet: if you accelerate each turn, fall on every edge change, cannot stop on command or feel pressured by traffic. Return to J-turns and take another lesson instead of choosing a steeper slope.
Fix the first problems without forcing the turn
Most beginner snowboard problems come from an unstable stance, looking at the board, or changing edges too suddenly. Use the symptom to choose the safest correction:
- The board keeps pointing downhill: increase heel- or toe-edge pressure earlier and finish the turn across the slope.
- You catch an edge: keep your weight centered, soften your knees and make smaller edge changes on flatter snow.
- You spin or twist: keep your shoulders aligned with the board and guide the turn with your legs.
- You cannot stand up: move to a flatter area, place the board across the slope and rise slowly from your knees.
- You feel out of control: steer across the slope toward open space, sit down safely if needed, and stop the session if control does not return.
End the practice block while your movements are still controlled. Short repetitions with visible stops are more useful than continuing after fatigue makes your reactions slow.
Frequently asked questions
Is snowboarding harder to learn than skiing?
Neither is universally easier; the first snowboard session often involves more falls while you learn edge control and standing up. A beginner lesson, forgiving terrain and short practice blocks can make the learning curve safer. Choose the activity that matches your interest and physical comfort, and stop if pain or fatigue affects your control.
What should a beginner snowboarder learn first?
Learn a balanced stance, safe falling and one-foot skating first. Then practice heel-side and toe-side stops before attempting J-turns. You should be able to control speed and stop on either edge before riding a longer or steeper trail.
How do you stop on a snowboard?
To stop, turn the board across the slope and increase pressure on either the heel-side or toe-side edge while keeping your knees bent and weight centered. Use small, gradual movements. Practice both directions on gentle terrain before riding where a stop is difficult or visibility is limited.
How long does it take to learn to snowboard?
Progress varies with fitness, balance, snow conditions, instruction and practice time. Many beginners can learn basic skating, stopping and simple turns through a lesson and repeated short sessions, but there is no safe fixed schedule. Move to harder terrain only when you can control speed and stop consistently.
For more help with this topic, use the Sports Recreation guides.